Components and components location
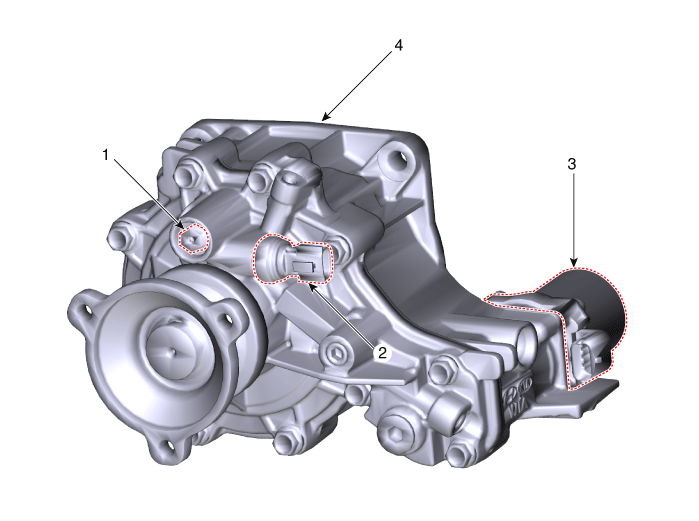
1. Relif valve
2. Pressure sensor
|
3. Oil hydraulic motor
4. Coupling assembly
|
Direct Electro Hydraulic Actuator Coupling. Description and operation
4WD ECU processes signals from various sensors and determines the current road
and driving conditions. The ECU then utilizes this information to implement
precision control over the 4WD coupling's multi-plate clutch and variably adjust
the amount of torque delivered tothe rear wheels.
Four Wheel Drive (4WD) transfer mode selection
|
1. |
AUTO MODE:
| –
|
When driving in 4WD AUTO mode, the vehicle operates similar
to conventional 2WD vehicles under normal operating conditions.
However, if the system determines that there is a need for the
4WD mode, the engine’s driving power is distributedto all four
wheels automatically without driver intervention.
|
| –
|
When driving on normal roads and pavement, the vehicle moves
similar to conventional 2WD vehicles.
|
|
|
2. |
LOCK MODE:
| –
|
This mode is used for climbing or descending sharp grades, off-road
driving, driving on sandy and muddy roads, etc., to maximize
traction.
|
| –
|
However, binding may occur in LOCK MODE when circling and it
does not operate when the vehicle speed is over 60 km/h.
|
|
Electronic Coupling - 4WD Control (By Driving Condition)
|
1. |
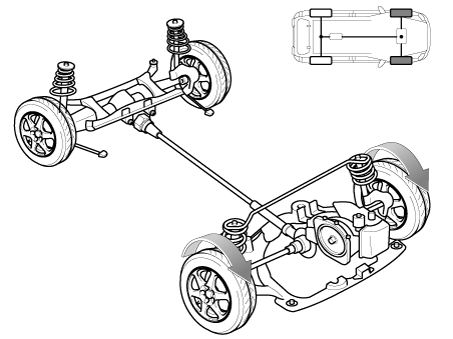
Cruising (Auto Mode)
| –
|
Power is delivered mostly to the front wheels.
|
|
|
2. |
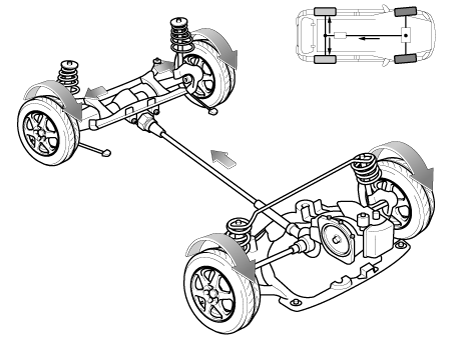
Cornering (Auto Mode)
| –
|
Adjusts the amount of power to the rear wheels based on the
turning radius and cornering speed.
|
|
|
3. |
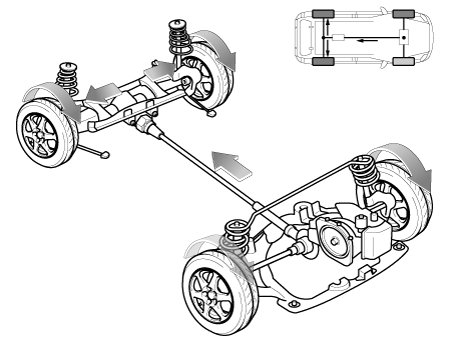
Wheel Slip (Auto Mode)
| –
|
If one or both of the front wheels lose traction, the system
transfers an appropriate amount of power to the rear wheels
based on the slip amount at the front wheels.
|
|
|
1. |
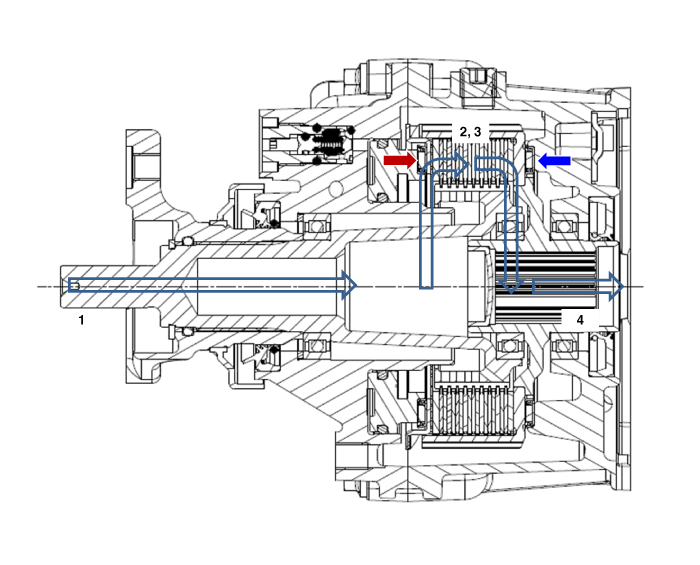
The power is delivered in the following order:
Transmission -> Transfer -> Propeller shaft
|
|
2. |
AWD ECU calculates the necessary amount of rear-wheel torque and sends
the corresponding driving current to the actuator (electronic motor
and hydraulic pump).
|
|
3. |
The piston operates by the oil pressure and the friction is generated.
Then, the clutch is engaged.
|
|
4. |
The power is delivered to the differential by the engaged clutch and
the driving power is generated in to the rear wheel.
|
Direct Electro Hydraulic Actuator Coupling. Repair procedures
| •
|
All units are filled up with coupling fluid (ultra-low viscosity
ATF) prior to shipping. Inspection, fill-up, and replacement
of coupling fluid is therefore not necessary (zero maintenance,
lifetime fluid).
|
|
|
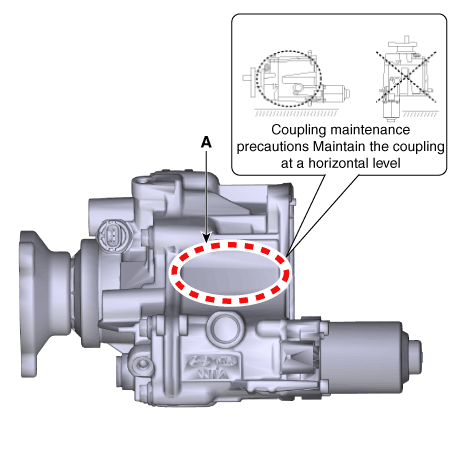
Coupling Maintenance Precautions
Maintain the coupling at a horizontal level.
| •
|
Refer to the handling caution level (A) when servicing the coupling
(removal, installation, replacement, etc.).
|
| •
|
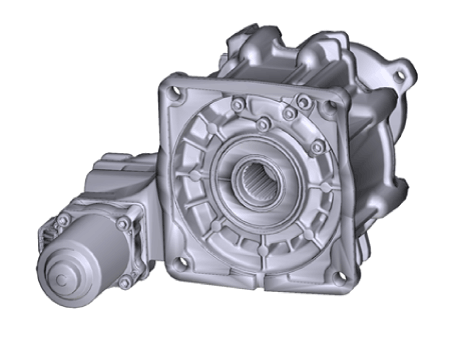
Always maintain a horizontal posture.
|
|
| •
|
Be careful not to damage the parts located under the vehicle
(floor under cover, fuel filter, fuel tank and canister) when
raising the vehicle using the lift.
(Refer to General Information - "Lift and Support Points")
|
|
|
1. |
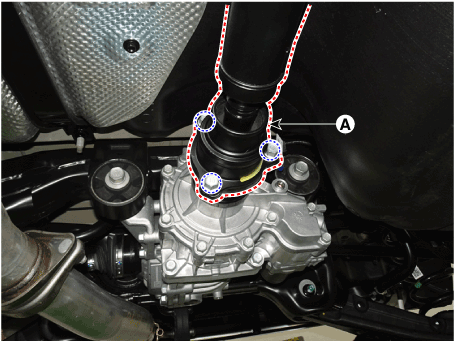
Loosen the rear propeller shaft assembly mounting bolts and then removing
the rear propeller shaft assembly (A).
|
Tightening torque :
49.0 - 68.6N.m (5.0 - 7.0kgf.m, 36.2 - 50.6lb-ft)
|
|
|
2. |
Using a flat tool, separate the propellar shaft from 4WD coupling assembly.
|
|
3. |
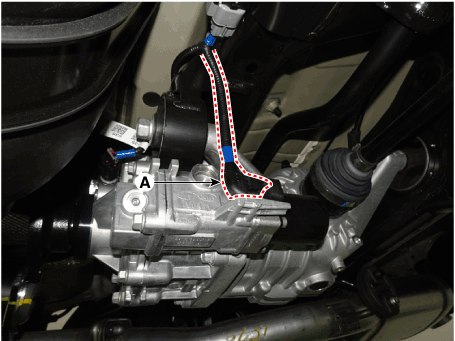
Disconnect the oil hydrulic motor connector (A).
|
|
4. |
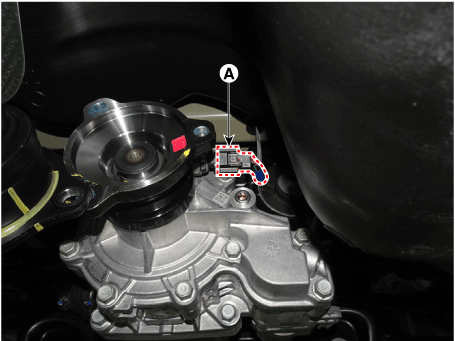
Disconnect the pressure sensor connector (A).
|
|
5. |
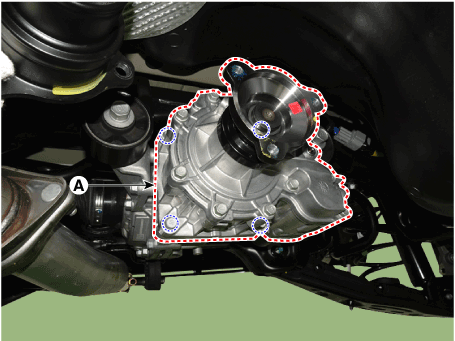
Loosen the bolts and then removing the coupling assembly (A).
|
Tightening torque :
58.9 - 64.7 N.m (5.8 - 6.6kgf.m, 41.9 - 47.7 lb-ft)
|
|
|
1. |
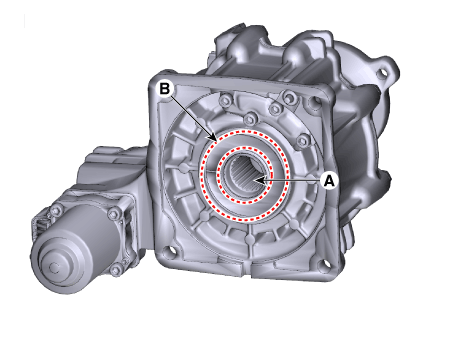
To install, reverse the removal procedures.
|
• |
Smear the splines (A) with molybdenum type high pressure
grease.
|
|
• |
When install the coupling, be careful not to damage
the oil seal (B).
|
|
|
|
2. |
After replacing the coupling, reset the 4WD ECU's clutch learing using
the diagnostic tool.
(Refer to 4WD Control System - "Repair procedures")
|
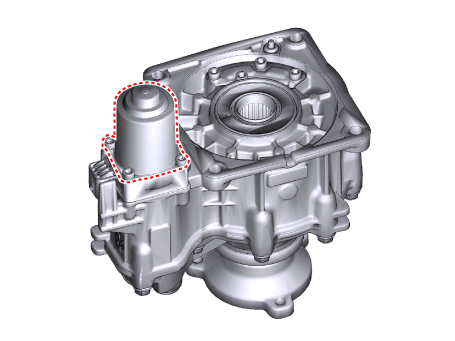
Oil hydraulic Motor(Actuator). Description and operation
The 4WD ECM controls the Pump Motor Pump (Actuator) to generating an oil pressure.
The pressure engages a multiple disk clutch to transfer torque to the rear wheels.
The torque to the rear wheels varies according to the pressure on the clutch.
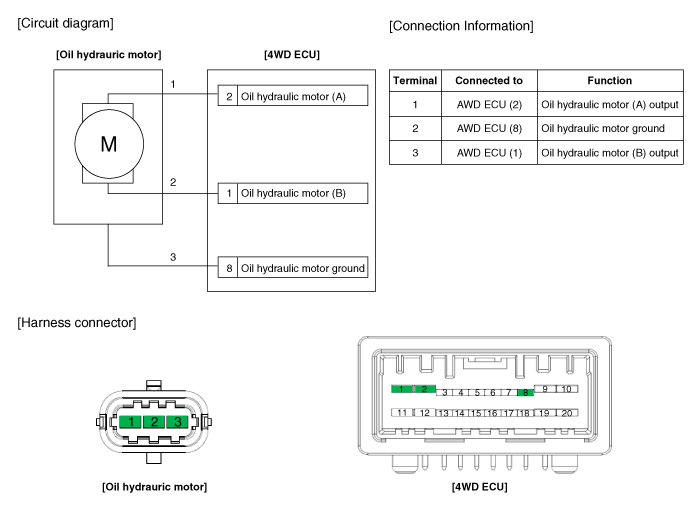
Oil hydraulic Motor(Actuator). Schematic diagrams
Oil hydraulic Motor(Actuator). Repair procedures
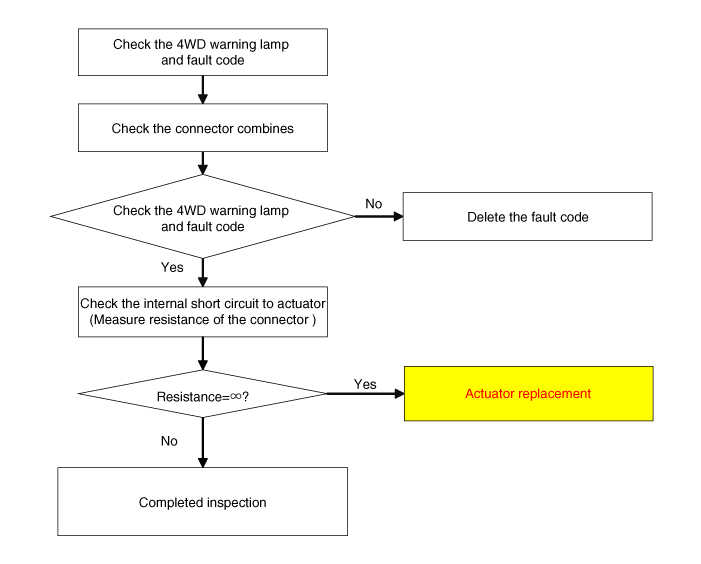
| •
|
If you have trouble code related to the oil hydraulic motor
(actuator), check oil hydraulic motor (actuator) according to
the inspection process.
|
|
| Oil Hydraulic Motor (Actuator) Inspection
Procedure |
| •
|
Be careful not to damage the parts located under the vehicle
(floor under cover, fuel filter, fuel tank and canister) when
raising the vehicle using the lift.
(Refer to General Information - "Lift and Support Points")
|
|
|
1. |
Remove the coupling assembly.
(Refer to 4 Wheel Drive (4WD) System - "Coupling Assembly")
|
|
2. |
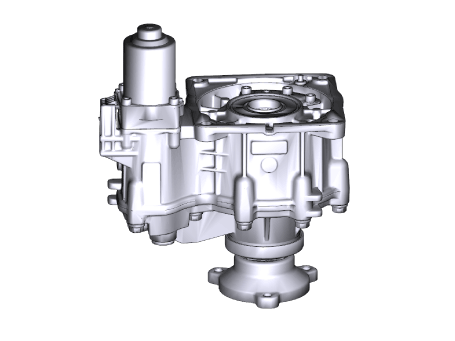
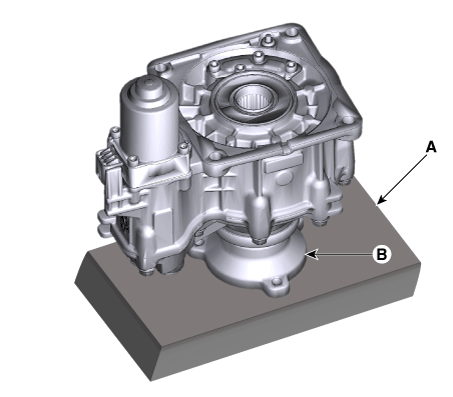
Keep going perpendicular state after remove the coupling assembly.
|
• |
Keep going perpendicular state during remove (install)
the hydraulic motor (actuators).
|
|
• |
Use a tool (A) that allows the auxiliary operator to
hold or seat the coupling in a vertical position.
|
|
• |
So that the input shaft side (B) is not damaged.
|
|
|
|
3. |
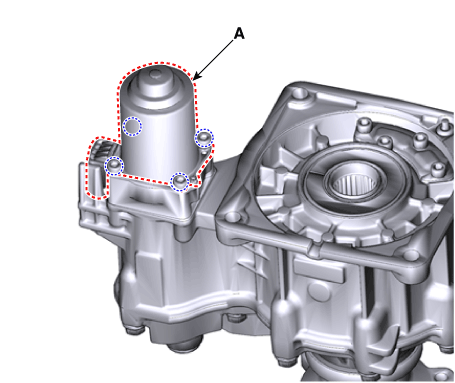
Remove the hydraulic motor (A) after loosening bolts with hex wrench.
|
• |
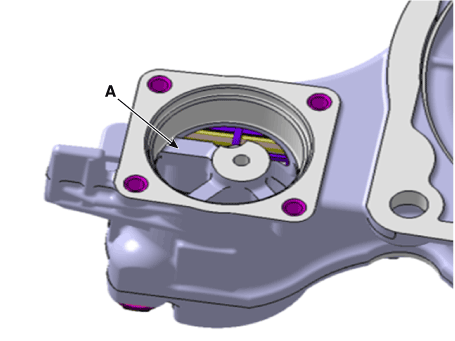
Remove the hydraulic motor (actuators) after dropping
residual oil as much as possible inside the coupling.
(abut 5-10 sec)
|
|
|
|
1. |
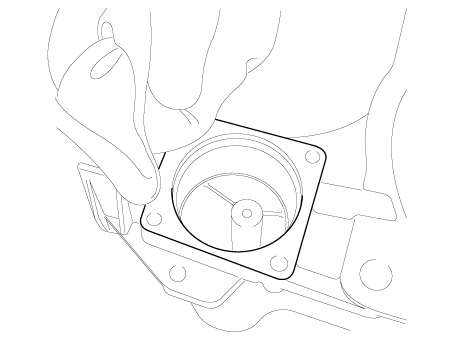
Before installation, wipe the surface with a clean cloth.
|
|
2. |
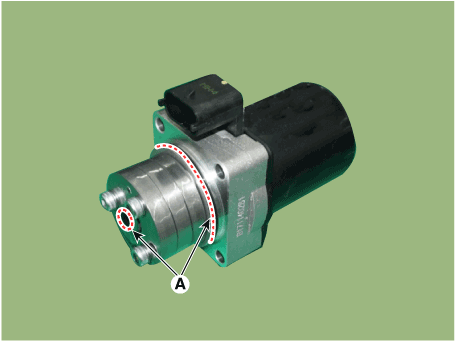
Check the O-rings (A) of the new hydraulic motor (actuators).
|
• |
You have to prevent any dust from entering inside hydraulic
motors (actuators) and housing.
|
|
|
|
3. |
Tighten the bolts after install the hydraulic motor.
|
• |
When installing, motor connector (A) has to toward in
the direction of outside of the coupling.
|
Tightening torque:
9.8 - 11.7 N·m (1.0 - 1.2 kgf·m, 7.2 - 8.6 lb·ft)
|

|
|
|
• |
When installing, oil can be reflux by the pressure in
air breather hole (A).
|
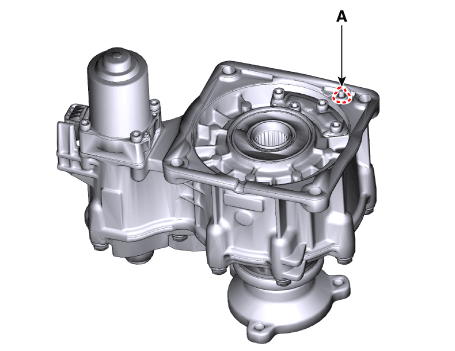
|
• |
Change direction in the direction of the arrow and lay
on the floor as shown in the illustration.
※ The reflux oil will flow to the bottom.
|
|
• |
You have to prevent additional backflow in according
to order as shown in the illustration.
|
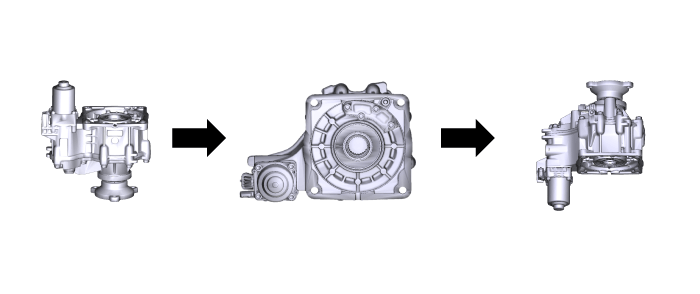
|
|
|
4. |
Wipe the flowed oil to around the surface with a clean cloth.
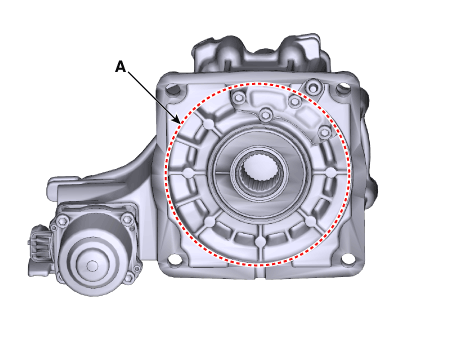
|
|
5. |
Install the coupling assembly.
(Refer to 4 Wheel Drive (4WD) System - "Coupling Assembly")
|
Pressure Sensor. Description and operation
The 4WD ECU makes a Motor Pump(Actuator) turn round for generating an oil pressure.
And then it presses a multiple disk clutch and transfers the generated torque
into rear wheels. Its torque value varies according to a pressure status.
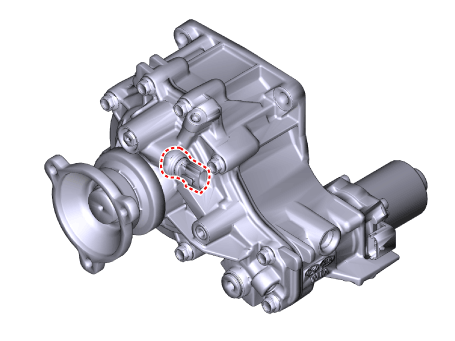
| • |
Component location
|
Pressure Sensor. Schematic diagrams
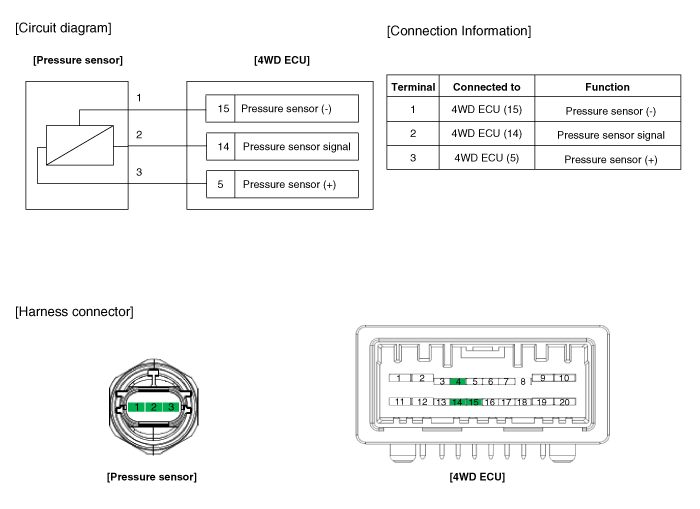
Pressure Sensor. Repair procedures
| Measure the resistance of pressure
sensor |
|
1. |
Turn ignition switch OFF.
|
|
2. |
Disconnect the pressure sensor connector.
|
|
3. |
Measure resistance between sensor terminal and terminal.
|
|
4. |
Check the measured resistance. (Refer to table)
|
[Table 1]
Terminal
|
Resistance
|
PIN 2 – PIN 3
|
1.59 - 2.39 kΩ
|
PIN 1 – PIN 3
|
152 - 231.6 kΩ
|
PIN 1 – PIN 2
|
153.52 - 233.88 kΩ
|
| •
|
Be careful not to damage the parts located under the vehicle
(floor under cover, fuel filter, fuel tank and canister) when
raising the vehicle using the lift.
(Refer to General Information - "Lift and Support Points")
|
|
|
1. |
Remove the coupling assembly.
(Refer to 4 Wheel Drive (4WD) System - "Coupling Assembly")
|
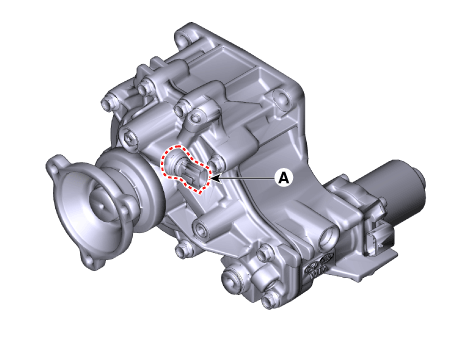
• |
Keep it level with the sticker (A) on the top of the
coupling.

|
|
|
|
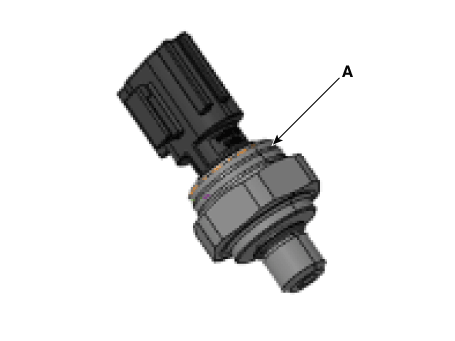
2. |
Remove the pressure sensor (A).
|
• |
Keep going horizontal state to prevent leaks during
remove the pressure sensor.
|
|
|
Tightening torque:
10.8 - 14.7 N.m (1.1 - 1.5 kgf.m, 8.0 - 10.8 lb-ft)
|
|
|
1. |
To install, reverse the removal procedure.
|
| •
|
Check the cleanliness of the pressure sensor before installation.
|
| •
|
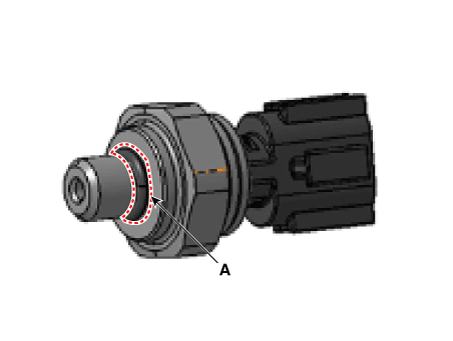
Check the pressure sensor O-ring (A).
|
| •
|
Keep it level with the sticker (A) on the top of the coupling.

|
|
Transfer Fluid. Repair procedures Inspection • Transfer oil should be inspected and refilled every 60,000 km (40,000 mile) / 4 year. • Be careful not to damage the parts located ...
Repair procedures Adjustment Description The friction material inside the coupling will degrade over time. Therefore, corresponding compensation values must be referenced and entered after replacing the ...
See also:
Parking Brake Assembly. Repair procedures
Removal Parking Brake Shoe 1. Raise the vehicle, and make sure it is securely supported. 2. Remove the rear tire and wheel. 3. Remove the rear brake caliper and Rear disc brake. 4. Remove the parking brake ...
Climate information screen selection
Press the climate information screen selection button to display climate information on the screen. ...
Trunk Trim
Components and components location Components [5 seat vehicle] 1. Luggage side trim [LH] 2. Luggage side trim [RH] 3. Rear transverse trim 4. Cargo screen 5. Luggage floor tray 6. Luggage board 7. Luggage ...
 Hyundai Santa Fe (TM): Coupling Assembly


 Transfer Assembly
 4WD Control System


