 Hyundai Santa Fe (TM): Trunk Trim
Components and components location
| Components |
[5 seat vehicle]
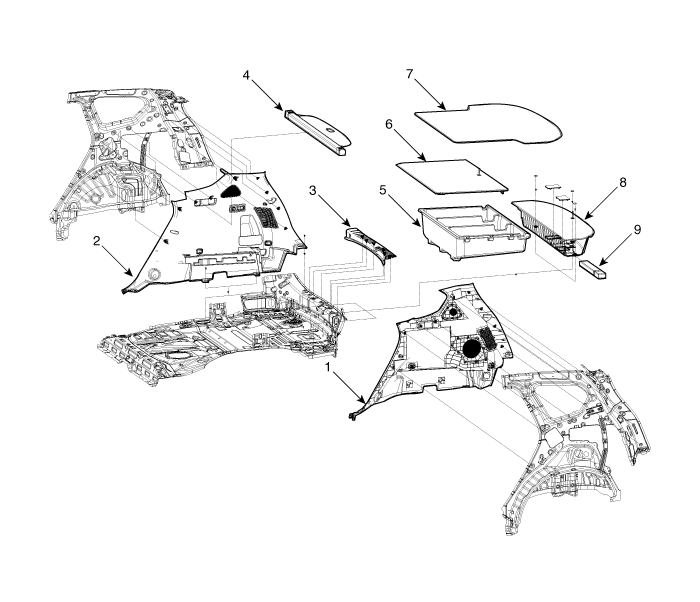
| 1. Luggage side
trim [LH] 2. Luggage side trim [RH] 3. Rear transverse trim 4. Cargo screen 5. Luggage floor tray |
6. Luggage board 7. Luggage met 8. Luggage floor box rear trim 9. Car warning triangle assembly |
[7 seat vehicle]
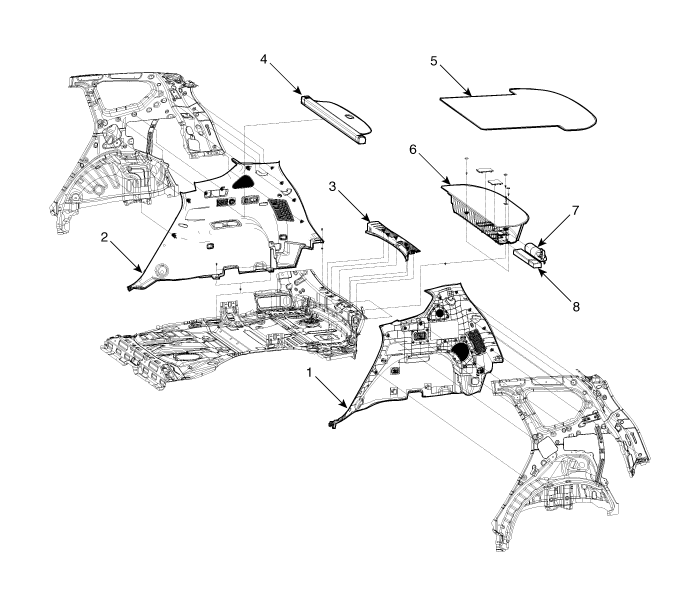
| 1. Luggage side
trim [LH] 2. Luggage side trim [RH] 3. Rear transverse trim 4. Cargo screen |
5. Luggage met 6. Luggage floor box rear trim 7. Fire extinguisher 8. Car warning triangle assembly |
Rear Transverse Trim. Components and components location
| Component Location |
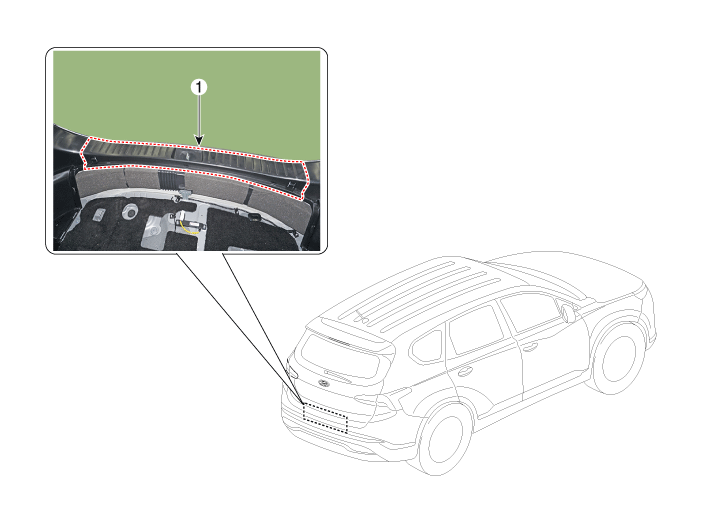
| 1. Rear Transverse
Trim |
Rear Transverse Trim. Repair procedures
| Replacement |
|
|
| 1. |
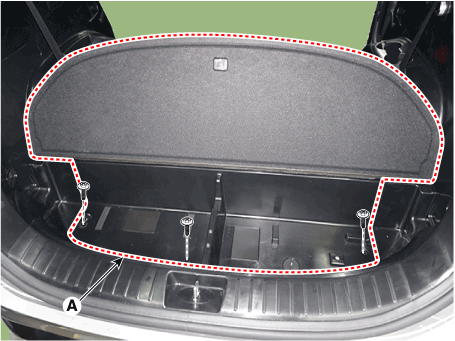
Loosen the mounting screws and remove the luggage floor box (A).
|
| 2. |
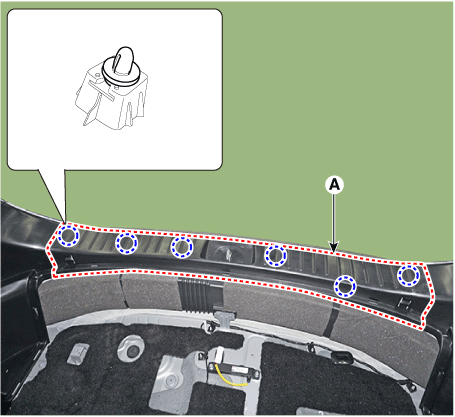
Loosen the mounting clips and remove the rear transverse trim (A).
|
| 3. |
To install, reverse removal procedure.
|
Luggage Side Trim. Repair procedures
| Replacement |
|
|
| 1. |
Remove the third row seat assembly.
(Refer to Rear Seat - "Rear Seat Assembly")
|
| 2. |
Remove the rear door body side weatherstrip.
(Refer to Rear DooR -"Rear Door Body Side Weatherstrip")
|
| 3. |
Remove the tailgate weatherstrip.
(Refer To Tailgate -"Tailgate Weatherstrip")
|
| 4. |
Remove the rear door scuff trim.
(Refer to Interior Trim -"Door Scuff Trim")
|
| 5. |
Remove the Rear transverse trim.
(Refer to Interior Trim -"Rear Transverse Trim")
|
| 6. |
Push the second row seat towards the front of the vehicle as far as
possible.
|
| 7. |
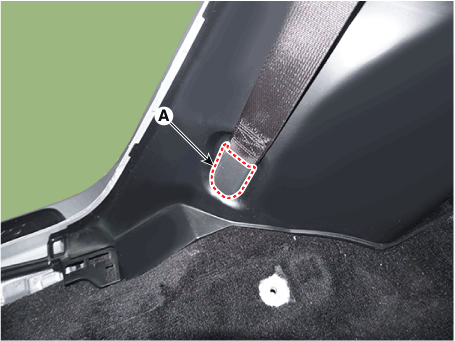
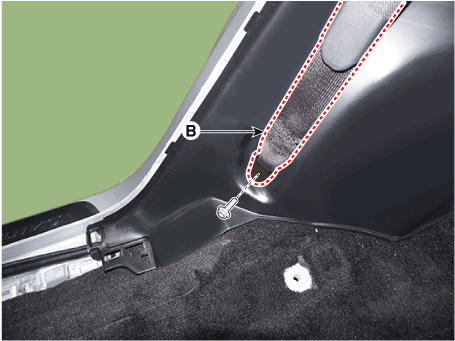
Remove the cover (A) and loosen the mounting bolt and remove the second
row seat belt lower anchor (B).
|
| 8. |
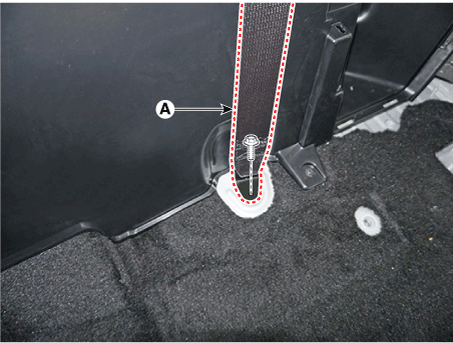
Loosen the mounting bolt and remove the third row seat belt lower anchor
(A).
|
| 9. |
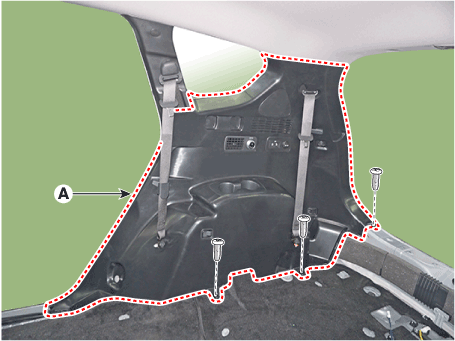
Loosen the mounting screws and remove the luggage side trim (A).
|
| 10. |
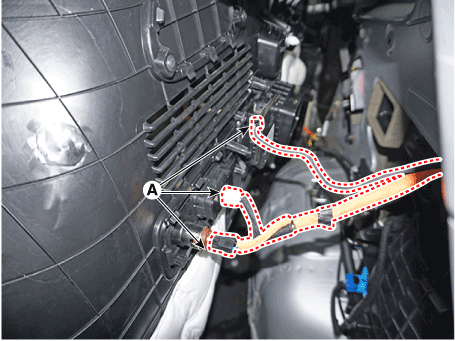
Press the lock pin and separate the various connector (A).
|
| 11. |
To install, reverse removal procedure.
|
 Interior Trim
Components and components location Components 1. Front pillar trim 2. Cowl side trim 3. Center pillar upper trim 4. Front door scuff trim 5. Rear door scuff trim 6. Rear pillar trim 7. Center pillar lower ...
 Windshield Glass
Components and components location Components 1. Windshield glass 2. Windshield glass upper molding 3. Windshield glass side molding Repair procedures Replacement [Removal] • Put on gloves ...
See also:
Use high quality ethylene glycol coolant
Your vehicle is delivered with high quality ethylene glycol coolant in the cooling system. It is the only type of coolant that should be used because it helps prevent corrosion in the cooling system, lubricates ...
Defroster
CAUTION To prevent damage to the conductors bonded to the inside surface of the rear window, never use sharp instruments or window cleaners containing abrasives to clean the window. ✽ NOTICE If ...
Engine Mounting. Components and Components
Location
Components 1. Transaxle mounting bracket 2. Roll rod bracket 3. Engine mounting bracket 4. Engine mounting support bracket ...


