 Hyundai Santa Fe (TM): Front Bumper
Components and components location
| Components |
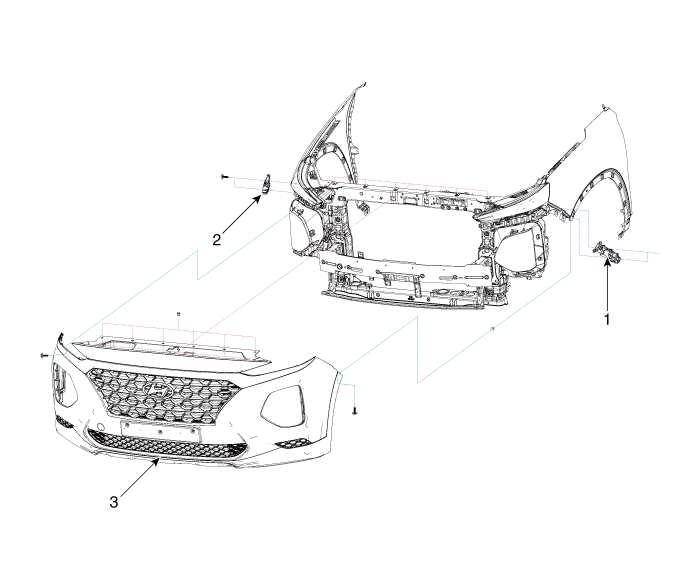
| 1. Front bumper
side bracket [LH] 2. Front bumper side bracket [RH] |
3. Front bumper
assembly |
Front Bumper Assembly. Components and components location
| Component Location |
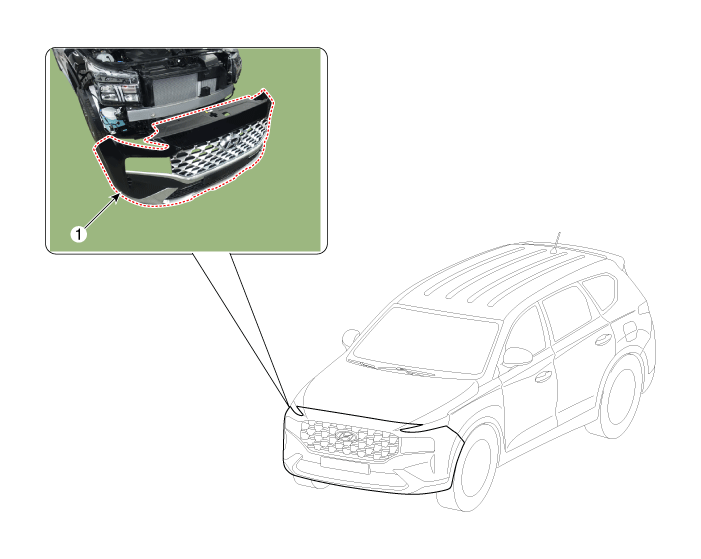
| 1. Front Bumper
Assembly |
Front Bumper Assembly. Repair procedures
| Replacement |
|
|
| 1. |
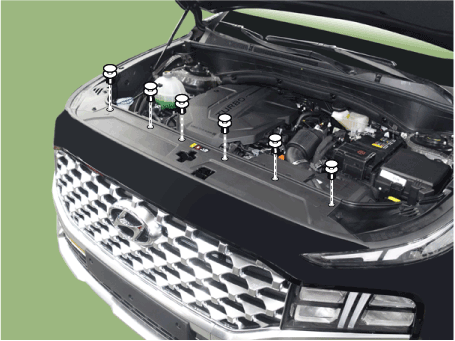
Loosen the front bumper upper mounting clips.
|
| 2. |
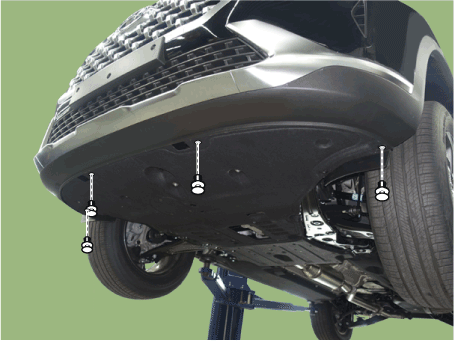
Loosen the front bumper lower mounting clips.
|
| 3. |
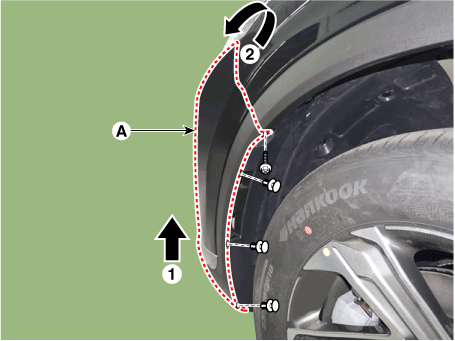
Loosen the mounting clis and screws on the side of front bumper (A),
detach the side part of front bumper.
|
| 4. |
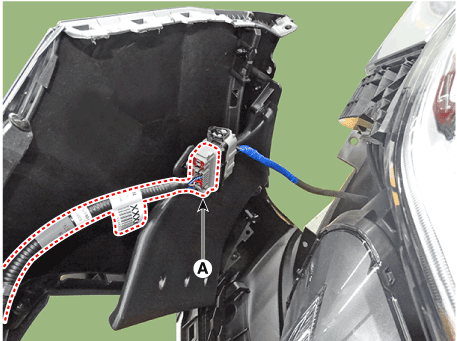
Press the lock pin and separate the front bumper main connector (A).
|
| 5. |
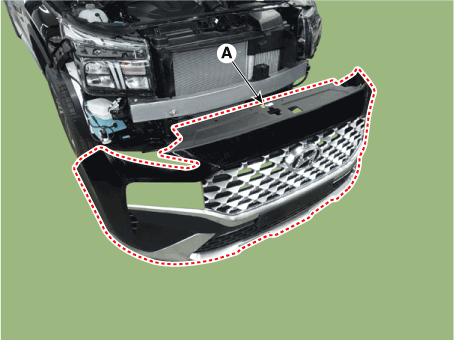
Remove the front bumper assembly (A).
|
| 6. |
To install, reverse removal procedure.
|
Radiator Grill. Components and components location
| Component Location |
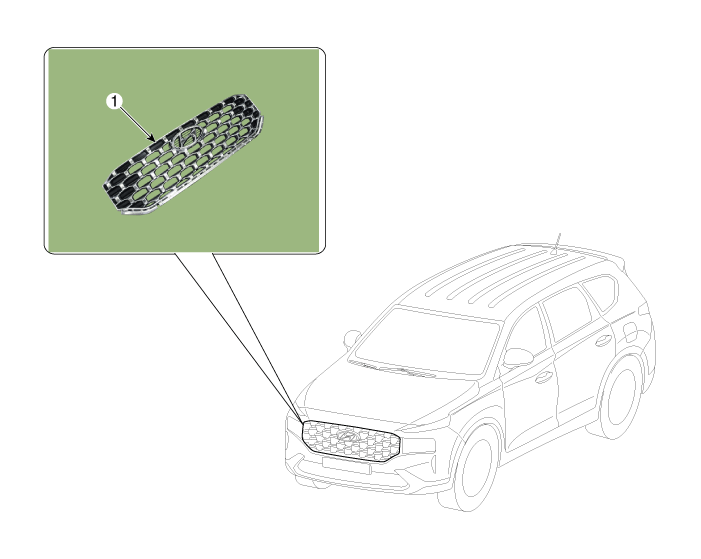
| 1. Radiator Grill |
Radiator Grill. Repair procedures
| Replacement |
|
|
| 1. |
Remove the front bumper assembly.
(Refer to Front Bumper - "Front Bumper Assembly")
|
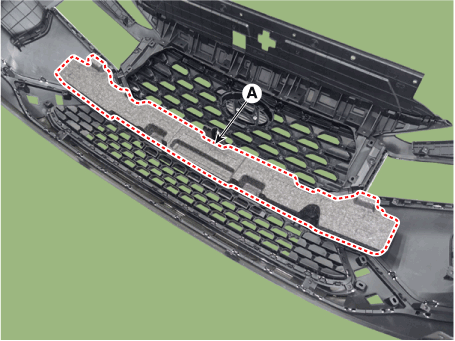
| 2. |
Remove the front bumper energy absorber (A).
|
| 3. |
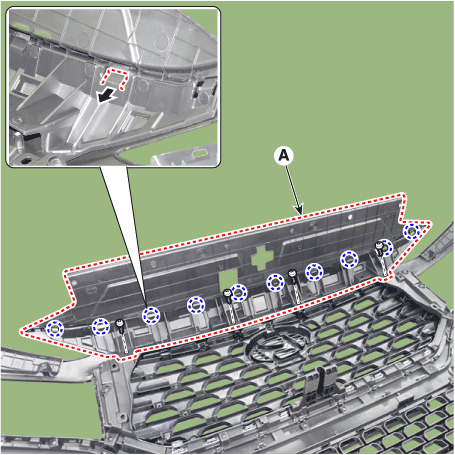
After loosening the mounting screws, remove the front bumper upper cover
(A).
|
| 4. |
Loosen the mounting screws, remove the side front bumper molding (A).
|
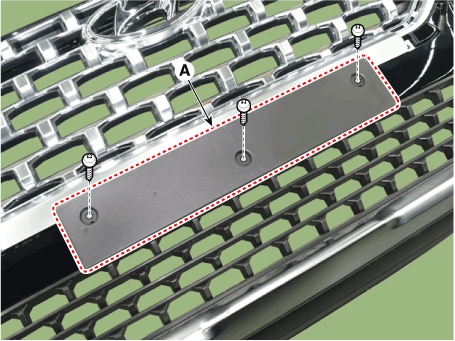
| 5. |
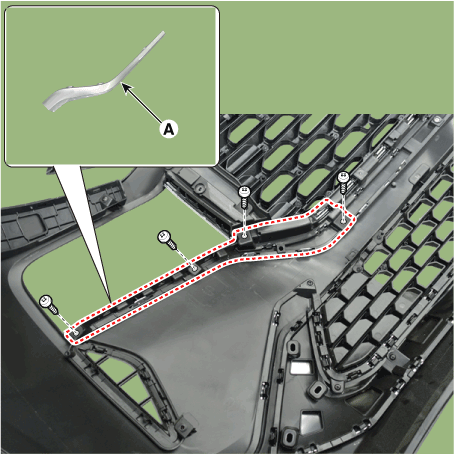
Loosen the mounting screws, remove the license plate bracket (A).
|
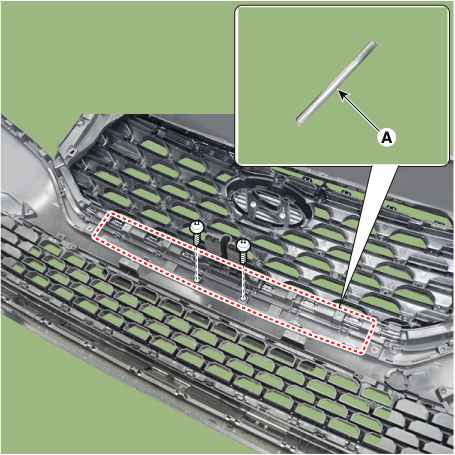
| 6. |
Loosen the mounting screws, remove the center front bumper molding (A).
|
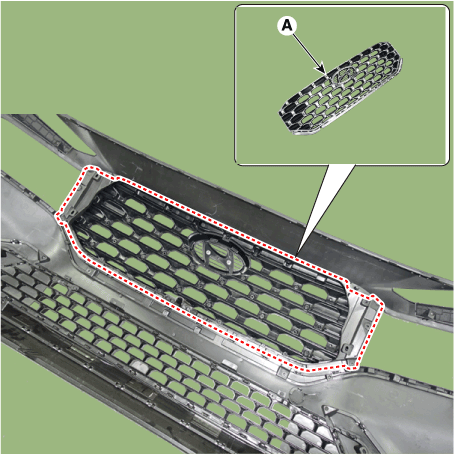
| 7. |
After loosening the mounting screws, remove the radiator grill (A).
|
| 8. |
To install, reverse removal procedure.
|
 Front End Module
Front Bumper Beam Assembly. Components and components location Components Location 1. Front bumper beam assembly Front Bumper Beam Assembly. Repair procedures Replacement • Put on gloves ...
 Rear Bumper
Components and components location Components 1. Rear Bumper Side Under Cover 2. Rear Bumper Side Bracket 3. Rear Bumper Assembly Rear Bumper Assembly. Components and components location Component Location ...
See also:
Room Lamp. Repair procedures
Inspection 1. Remove the room lamp assembly then check for continuity between terminals. [General] [Panorama Sunroof] Removal 1. Disconnect the negative (-) battery terminal. 2. Detach the lamp lens (A) ...
Oil Seal. Repair procedures
Replacement [Right side] 1. Remove the driveshaft assembly. (RH side) 2. Remove the dust cover (A). 3. Remove the oil seal (A, B). 4. Install the oil seal with special service tools. • Apply lithium ...
Variable Intake Solenoid (VIS) Valve. Specifications
Specification Item Specification Coil resistance (Ω) 30.0 ~ 35.0 [20°C(68°F)] ...


