 Hyundai Santa Fe (TM): Rear Wiper/Washer
Components and components location
| Component Location |
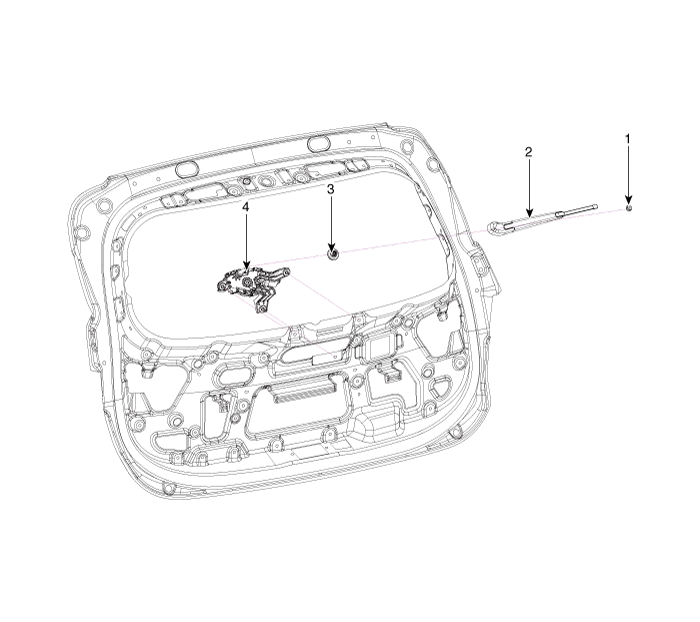
| 1. Rear wiper
arm nut 2. Rear wiper arm & blade |
3. Rear wiper
grommet 4. Rear wiper motor assembly |
Rear Wiper Motor. Repair procedures
| Inspection |
Rear Wiper Motor
| 1. |
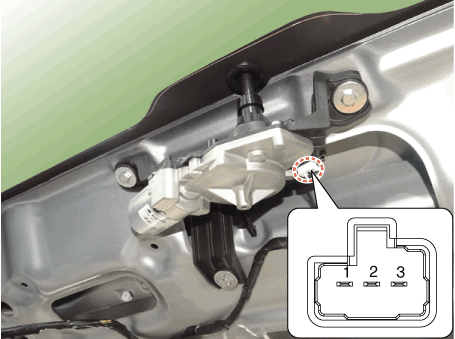
Remove the connector from the rear wiper motor.
|
| 2. |
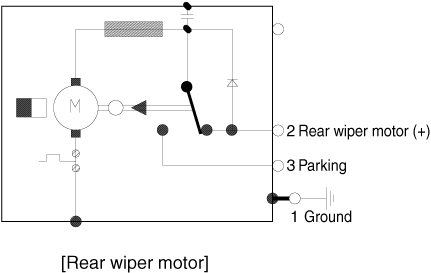
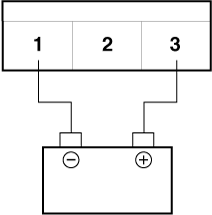
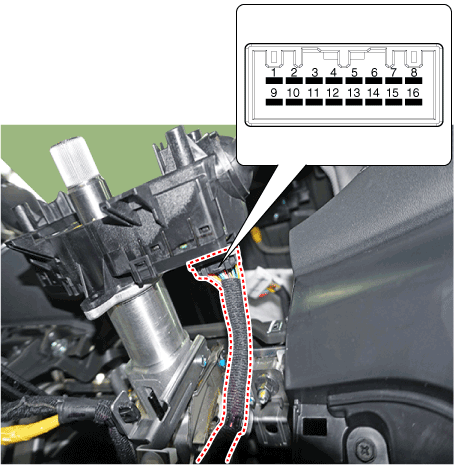
Connect battery positive (+) and negative (-) cables to terminals 2
and 1 respectively.
|
| 3. |
Check that the motor operates normally. Replace the motor if it operates
abnormally.
|
Automatic Stop Operation Check
| 1. |
Operate the motor at low speed using the stalk control.
|
| 2. |
Stop the motor operation anywhere except at the off position by disconnecting
terminal 3.
|
| 3. |
Connect the positive (+) lead from the battery to terminal 3 and the
negative (-) lead to terminal 1.
|
| 4. |
Check that the motor stops running at the off position.
|
Diagnosis with diagnostic tool
| 1. |
In the body electrical system, failure can be quickly diagnosed by using
the vehicle diagnostic system (diagnostic tool).
The diagnostic system (diagnostic tool) provides the following information.
|
| 2. |
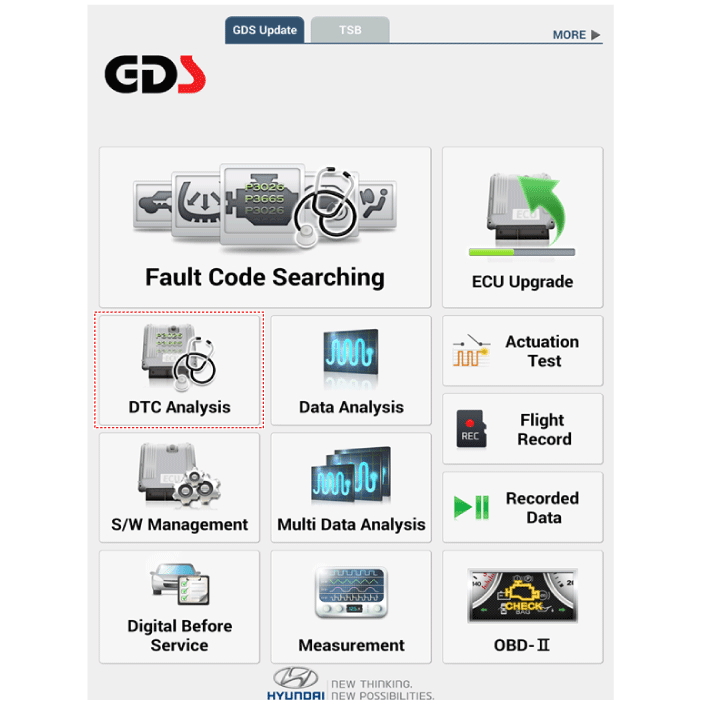
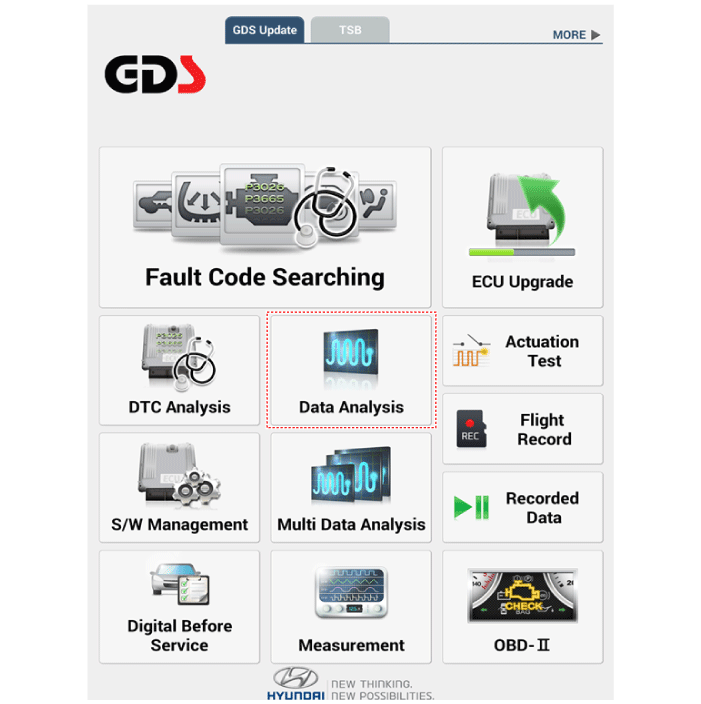
If diagnose the vehicle by diagnostic tool, select "DTC Analysis" and
"Vehicle".
|
| 3. |
Select the 'Data Analysis'.
|
| 4. |
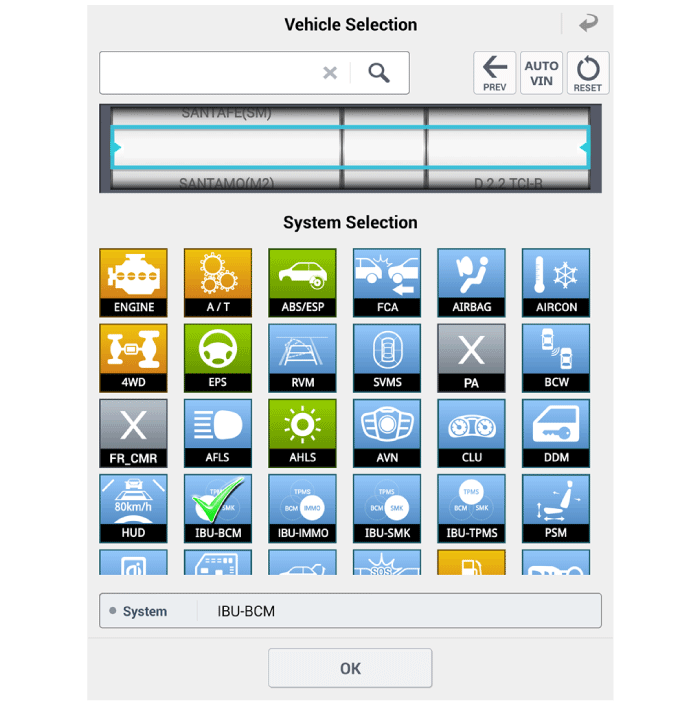
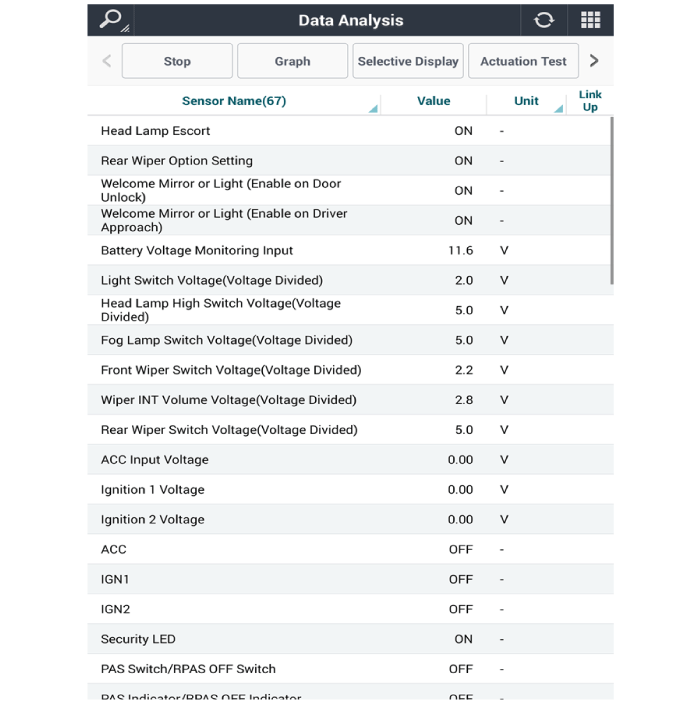
Select the 'IBU_BCM' to search the current state of the input/output
data.
|
| Removal |
| 1. |
Disconnect the negative (-) battery terminal.
|
| 2. |
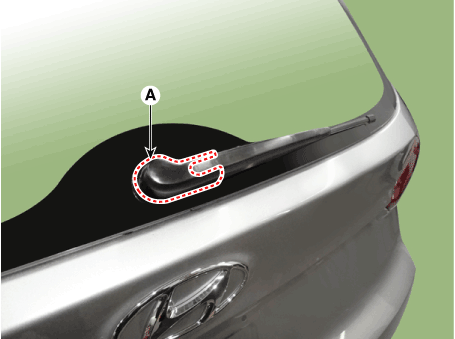
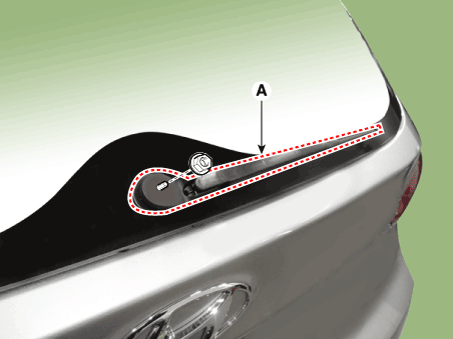
Detach the rear wiper cap (A).
|
| 3. |
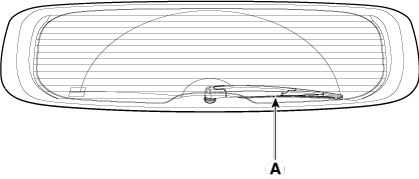
Remove the rear wiper arm & blade (A) after removing rear wiper nut
(B).
|
| 4. |
Remove the tailgate trim.
(Refer to Body - "Tailgate Trim")
|
| 5. |
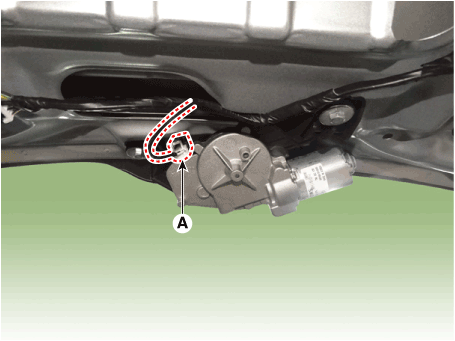
Disconnect the motor connector (A).
|
| 6. |
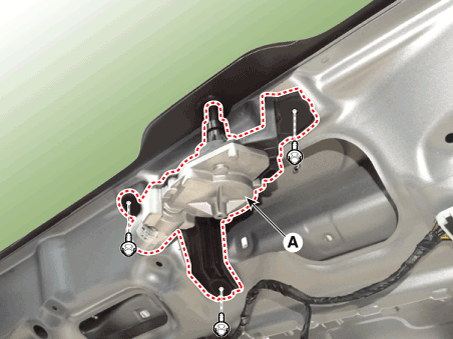
Remove the rear wiper motor (A) after loosening bolts .
|
| Installation |
| 1. |
Install the rear wiper motor assembly.
|
| 2. |
Install the tailgate trim.
|
| 3. |
Install the rear wiper arm cap after tighting the nut.
|
| 4. |
Set the rear wiper blade and to the lowest defogger heat line and tailgate
glass.
|
Rear Washer Switch. Repair procedures
| Inspection |
| 1. |
Check for continuity between the terminals in each switch position as
shown below.
|
Inspection (With diagnostic tool)
| 1. |
In the body electrical system, failure can be quickly diagnosed by using
the vehicle diagnostic system (diagnostic tool).
The diagnostic system (diagnostic tool) provides the following information.
|
| 2. |
If diagnose the vehicle by diagnostic tool, select "DTC Analysis" and
"Vehicle".
|
| 3. |
If check current status, select the "Data Analysis" .
|
| 4. |
Select the 'IBU_BCM' to search the current state of the input/output
data.
|
Rear Washer Motor. Repair procedures
| Inspection |
| 1. |
With the washer motor connected to the reservoir tank, fill the reservoir
tank with water.
|
| 2. |
Remove the front bumper cover.
(Refer to Body - "Front Bumper Cover")
|
| 3. |
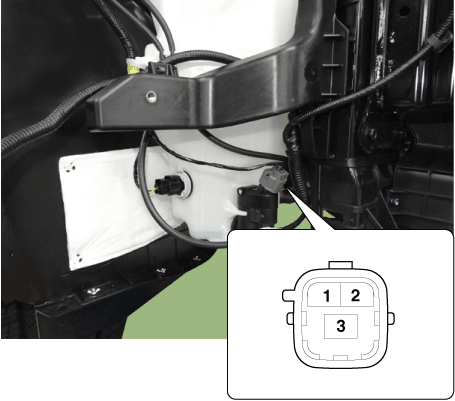
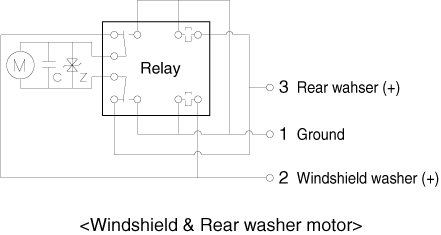
Connect positive (+) and negative (-) battery cables to terminals 3
and 2 respectively to see that the washer motor runs and water is pumped.
|
| 4. |
Check that the motor operates normally.
Replace the motor if it operates abnormally.
|
 Windshield Wiper/Washer
Components and components location Component Location 1. Windshield wiper arm & blade 2. Wiper & washer switch 3. Windshield washer hose 4. Windshield wiper motor & linkage 5. Washer motor ...
 Electro Chromic Inside Rear View Mirror
Description and operation Description The ECM (Electro Chromatic inside rear view Mirror) is intended dim the reflecting light in the rear view mirror. The forward facing sensor detects brightness of the ...
See also:
Master Cylinder. Components and Components Location
Components 1. Reservoir cap 2. Reservoir 3. Grommet 4. Master cylinder ...
For best battery service
Keep the battery securely mounted. Keep the battery top clean and dry. Keep the terminals and connections clean, tight, and coated with petroleum jelly or terminal grease. Rinse any spilled electrolyte ...
Curtain air bag
❈ The actual air bags in the vehicle may differ from the illustration. Curtain air bags are located along both sides of the roof rails above the front and rear doors. They are designed to help ...

