 Hyundai Santa Fe (TM): Seat Belt Pretensioner
Seat Belt Pretensioner (BPT). Description and operation
| Description |
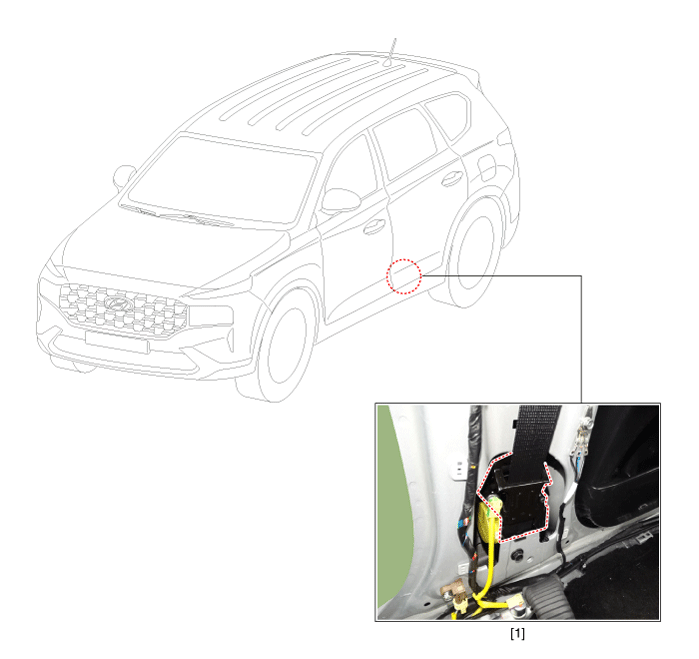
The Seat Belt Pretensioners (BPT) are installed inside center pillar (LH & RH).
When a vehicle crashes with a certain degree of frontal impact, the pretensioner
seat belt helps to reduce the severity of injury to the front seat occupants
by retracting the seat belt webbing. This prevents the front occupants from
thrusting forward and hitting the steering wheel or the instrument panel when
the vehicle crashes.
|

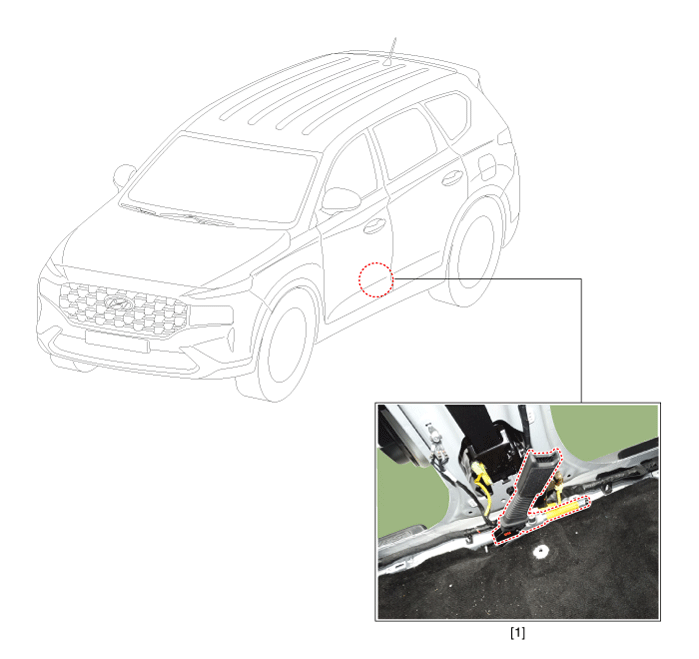
Seat Belt Pretensioner (BPT). Components and components location
| Components |
| 1. Front Seat
Belt Pretensioner (BPT) |
Seat Belt Pretensioner (BPT). Repair procedures
| Removal |
| 1. |
Disconnect the battery negative cable, and wait for at least three minutes
before beginning work.
|
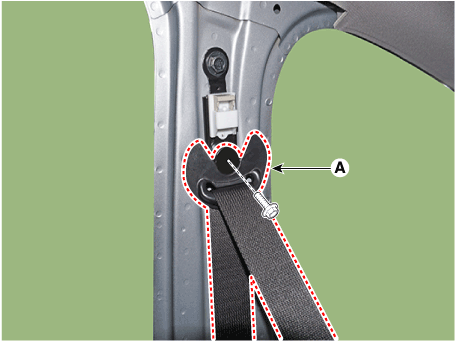
| 2. |
Remove the front anchor seat belt (A).
|
| 3. |
Remove the center pillar lower trim.
(Refer to Body - "Center Pillar Trim")
|
| 4. |
Remove the center pillar upper trim.
(Refer to Body - "Center Pillar Trim")
|
| 5. |
After loosening the mounting bolt, then remove the front seat belt lower
anchor (A).
|
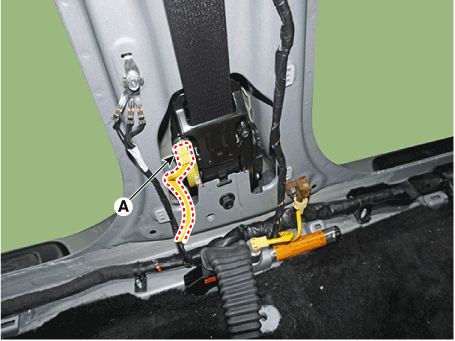
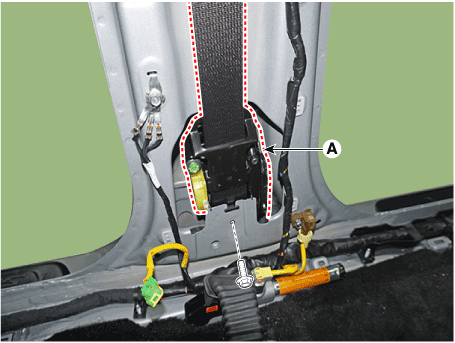
| 6. |
Disconnect the seat belt pretensioner connector (A) and then remove
the seat belt pretensioner.
|
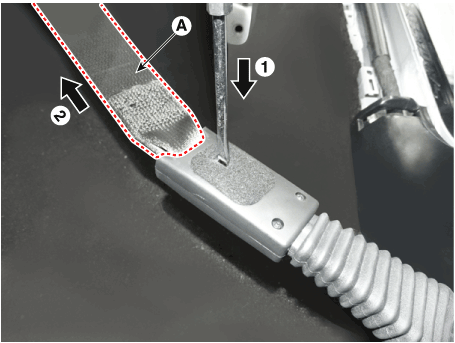
| 7. |
Remove the seat belt pretensioner (A) after loosening the mouning bolts.
|
| Installation |
| 1. |
Disconnect the battery negative cable and wait for at least three minutes.
|
| 2. |
Install the seat belt pretensioner.
|

| 3. |
Install the front seat belt upper anchor bolt.
|
| 4. |
Install the center pillar trim.
(Refer to Body - "Center Fillar Trim")
|
| 5. |
Install the door scuff trim.
(Refer to Body - "Door Scuff Trim")
|
| 6. |
Reconnect the battery negative cable.
|
| 7. |
After installing the seat belt pretensioner, confirm proper system operation:
|
Emergency Fastening Device (EFD). Description and operation
| Description |
The Emergency Fastening Device (EFD) operates at the same time with the Seat
Belt Pretensioner when it satisifies the deployment condition after a collision.
It is an auxiliary equipment to prevent a driver and passenger from breaking
away by pulling the seat belt toward the anchor side after a collision. It is
located near the anchor on the driver and passenger seat and is supported by
two cables.
|
Emergency Fastening Device (EFD). Components and components location
| Components |
| 1. Emergency
Fastening Device (EFD) System |
Emergency Fastening Device (EFD). Repair procedures
| Removal |
| 1. |
Disconnect the battery negative terminal, and wait for at least three
minutes before beginning to work.
|
| 2. |
Remove the anchor seat belt (A).
|
| 3. |
Remove the front seat.
(Refer to Body - "Front Seat")
|
| 4. |
Remove the door scuff trim trim.
(Refer to Body - "Door Scuff Trim")
|
| 5. |
Remove the center pillar lower trim.
(Refer to Body - "Center Pillar Trim")
|
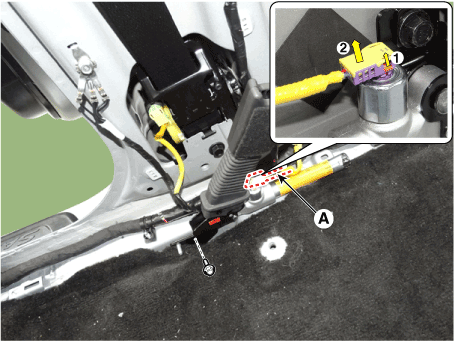
| 6. |
Disconnect the connector (A) and then remove the anchor pretensioner
by loosening the mounting bolt.
|
| Installation |
| 1. |
Install anchor pretensioner and reconnect the connector (A).
|
| 2. |
Remove the front seat.
(Refer to Body - "Front Seat")
|
| 3. |
Install the center pillar lower trim.
(Refer to Body - "Center Pillar Trim")
|
| 4. |
Install the door scuff trim trim.
(Refer to Body - "Door Scuff Trim")
|
| 5. |
Reconnect the battery negative cable.
After installing the anchor pretensioner, confirm proper system operation:
|
 Airbag Module
Driver Airbag (DAB) Module and Clock Spring. Description and operation Description The Driver Airbag (DAB) is installed in the steering wheel and electrically connected to SRSCM via the clock spring. It ...
 Brake System
...
See also:
Air bag warning label
Air bag warning labels, some required by the U.S. National Highway Traffic Safety Administration (NHTSA), are attached to alert the driver and passengers of potential risks of the air bag system. ...
Driving Convenience
Smart Cruise Control (SCC) Smart Cruise Control is designed to help detect the vehicle ahead and help maintain the desired speed and minimum distance between the vehicle ahead. Overtaking Acceleration ...
Interior overview
1. Inside door handle 2. Outside rearview mirror control 3. Power window lock button 4. Central door lock switch 5. Power window switch 6. Fuel-filler lid opener 7. Instrument panel illumination control ...