 Hyundai Santa Fe (TM): Tail Gate
Repair procedures
| Adjustment |
| 1. |
Place the car on a flat surface and check whether the body and trunk
lid are well-aligned.
|
| 2. |
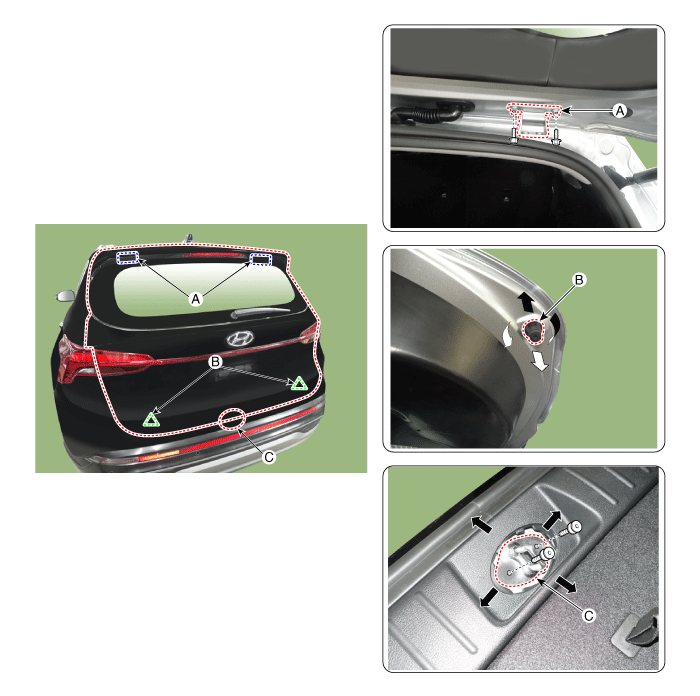
After loosening the tailgate hinge (A) mounting bolt, adjust the tailgate
by moving it up and down or from side to side.
|
| 3. |
Adjust the gap between the tailgate and body by turning the tailgate
overslam bumpers (B).
|
| 4. |
After loosening the tailgate striker (C) mounting bolts, adjust the
striker by moving it back and forth or from side to side and then tighten
the mounting bolts.
|
| 5. |
Make sure the tailgate opens or closes properly.
|
Tail Gate Assembly. Components and components location
| Component Location |
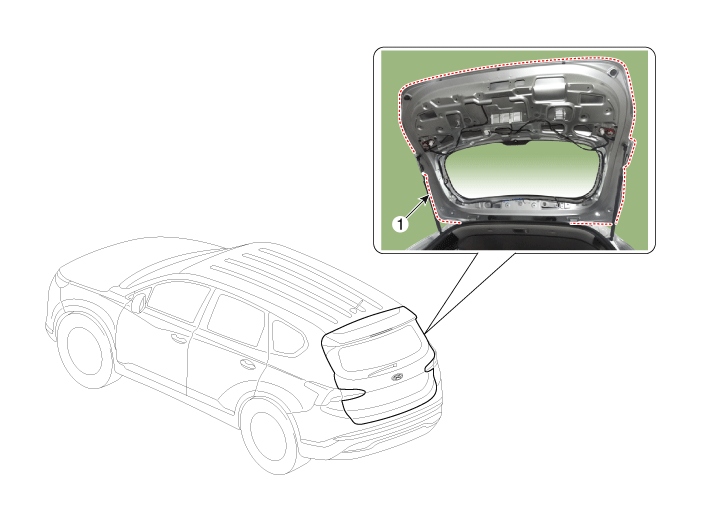
| 1. Tailgate assembly |
Tail Gate Assembly. Repair procedures
| Replacement |
|
|
| 1. |
Remove the tailgate trim.
(Refer to Tailgate - "Liftgate Trim")
|
| 2. |
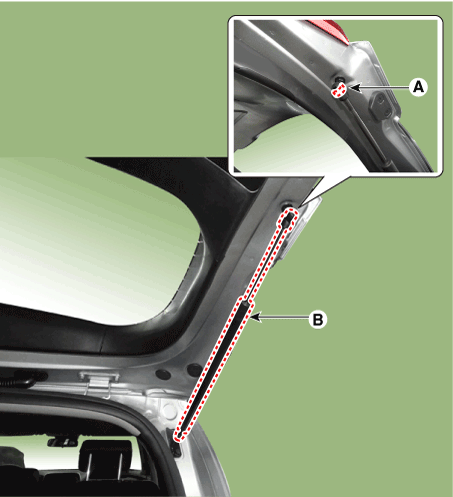
Using a screwdriver, lift the socket clips (A) up slightly on both ends
of the tailgate lifter (B).
|
| 3. |
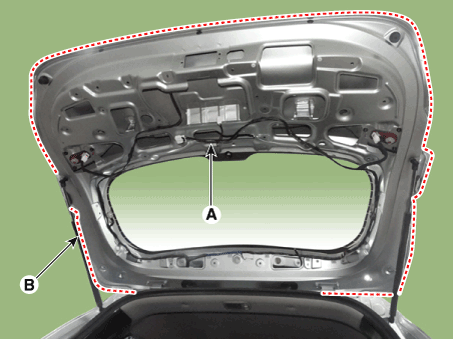
Disconnect the connectors and tailgate wiring harness (A).
|
| 4. |
After loosening the mounting bolts, then remove the tailgate assembly
(B).
|
| 5. |
To install, reverse removal procedure.
|
Tail Gate Trim. Components and components location
| Component Location |
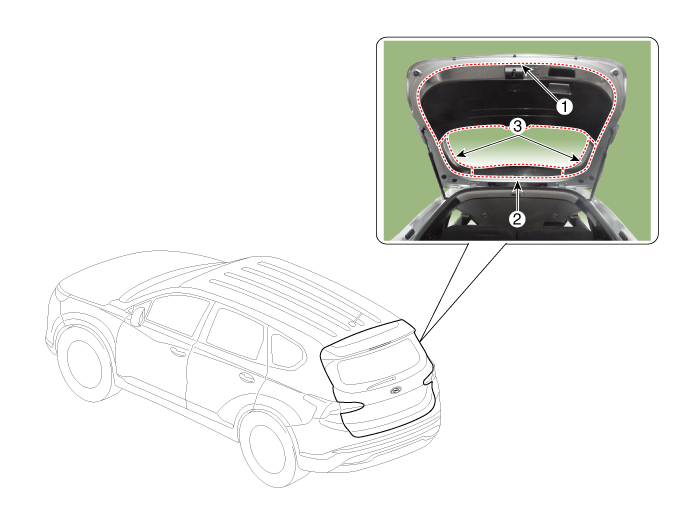
| 1. Tailgate Lower
Trim 2. Tailgate Upper Trim |
3. Tailgate Side
Trim |
Tail Gate Trim. Repair procedures
| Replacement |
[Tailgate lower trim]
|
|
| 1. |
Remove the tailgate upper & lower trim.
(Refer to Tailgate - "Liftgate Trim")
|
| 2. |
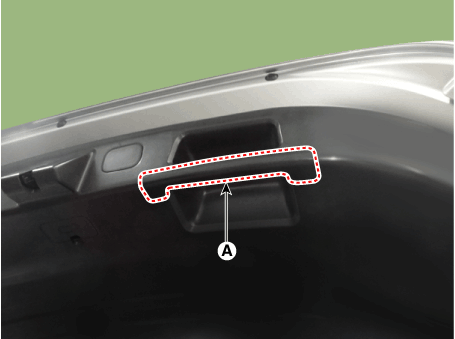
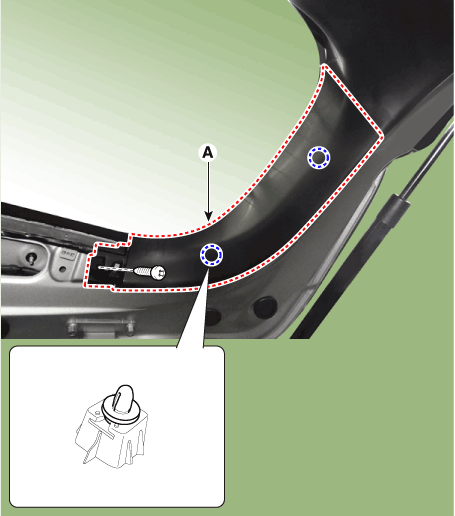
Using a screwdriver or remover, remove the pull handle (A).
|
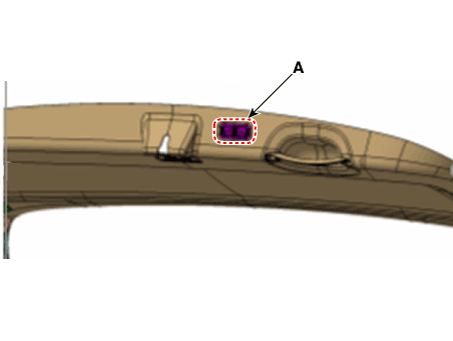
| 3. |
Using a screwdriver or remover, remove the PTG switch (A).
|
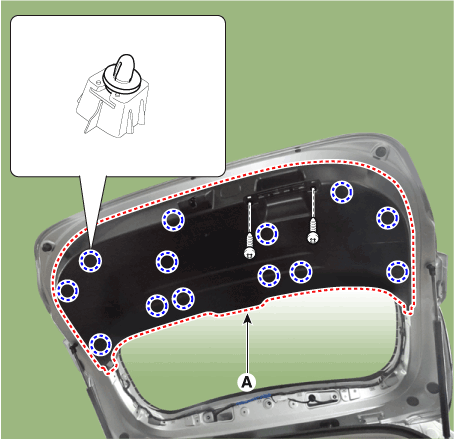
| 4. |
After loosening the mounting screws and fastner remove the tailgate
lower trim (A).
|
| 5. |
To install, reverse removal procedure.
|
[Tailgate upper trim]
|
|
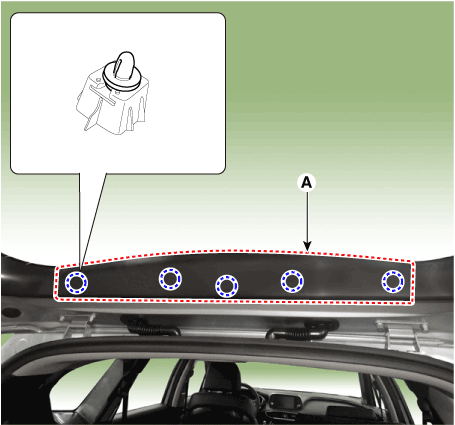
| 1. |
Using a screwdriver or remover, remove the tailgate upper trim (A).
|
| 2. |
To install, reverse removal procedure.
|
[Tailgate side trim]
|
|
| 1. |
Remove the tailgate upper trim.
(Refer to Tailgate - "Liftgate Trim")
|
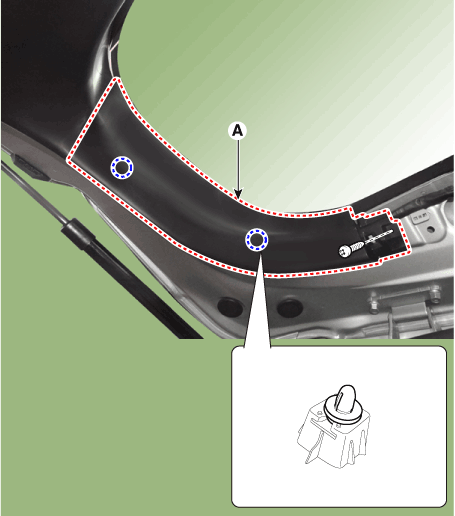
| 2. |
Using a screwdriver or remover, remove the side trim (A).
[LH]
[RH]
|
| 3. |
To install, reverse removal procedure.
|
Tail Gate Lift. Repair procedures
| Replacement |
|
| 1. |
Using a screwdriver, lift up slightly the socket clips (A) of both ends
on the lifter (B), and then remove the lifter from the bracket.
|
| 2. |
Push the socket of the lifter into the bracket for installation.
|
Tail Gate Weatherstrip. Repair procedures
| Replacement |
| 1. |
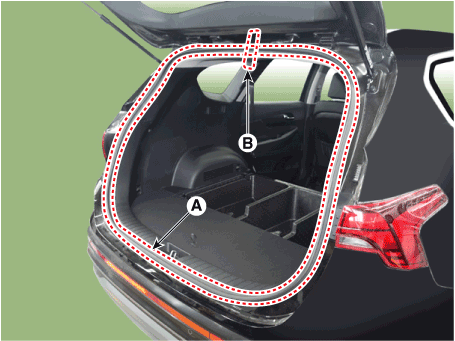
Remove the tailgate weatherstrip (A).
|
| 2. |
To install, reverse removal procedure.
|
 Hood
Hood
Repair procedures Adjustment 1. After loosening the hinge (A) mounting bolt, adjust the hood (B) by moving it up and down or from side to side and tighten the bolt. 2. Adjust the hood height by moving ...
 Fuel Filler Door
Components and components location Component Location 1. Fuel Filler Door Repair procedures Replacement • Put on gloves to prevent hand injuries. • When removing with a flat-tip ...
See also:
Heated steering wheel
With the ignition switch in the ON position, pressing the heated steering wheel button warms the steering wheel. The indicator on the button will illuminate and notify you on the LCD display. To turn ...
Power Seat Control Switch. Schematic
Diagrams
Circuit Diagram ...
Specifications
Specifications Item Specification Master cylinder Type Tandem I.D. mm (in) 22.22 mm (0.87 in) Piston stroke mm (in) 45 mm (1.77 in) Brake booster Type 11" Tie-rod Boosting ratio 1899-12-31T09:01:00.000 ...

