 Hyundai Santa Fe (TM): Blower
Blower Unit. Components and components location
| Components Location |
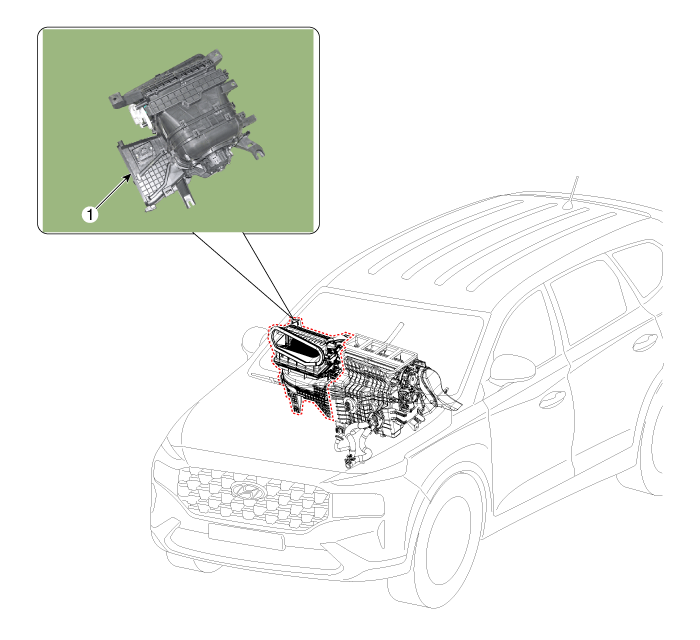
| 1. Blower unit
assembly |
| Components |
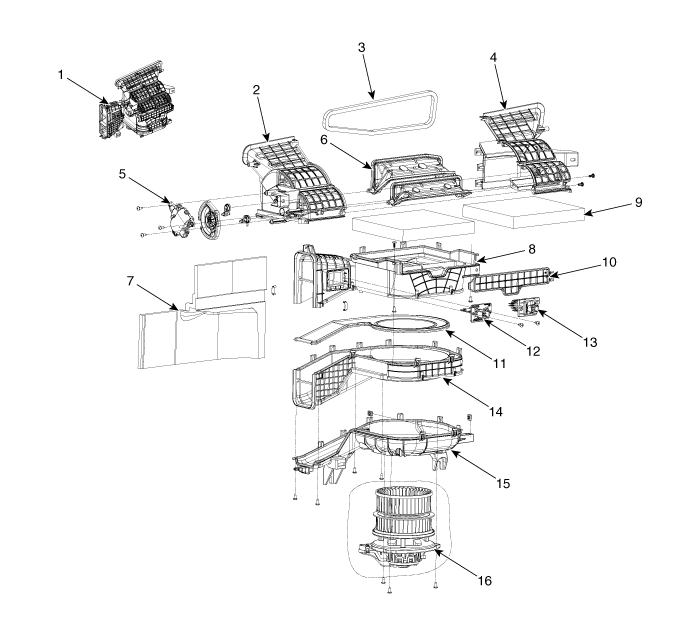
| 1. Blower unit
assembly 2. Inlet case [LH] 3. Inlet seal 4. Inlet case [RH] 5. Intake actuator 6. Inlet door assembly 7. Blower NVH pad 8. Blower upper case |
9. Climate control
actuator 10. Air filter cover 11. Blower divider plate 12. Blower resistor (Manual) 13. Power mosfet (DATC) 14. Blower lower case 15. Blower lower cover 16. Blower motor assembly |
Blower Unit. Repair procedures
| Replacement |
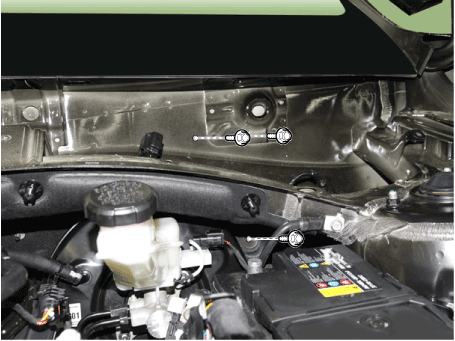
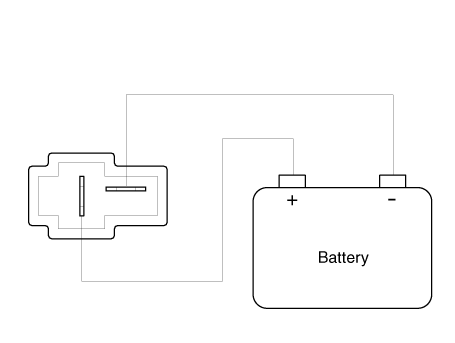
| 1. |
Disconnect the negative (-) battery terminal.
|
| 2. |
Recover the refrigerant with a recovery/recycling/charging station.
|
| 3. |
When the engine is cool, drain the engine coolant from the radiator.
(Refer to Engine Mechanical System - "Coolant")
|
| 4. |
Remove the cowl top cover.
(Refer to Body - "Cowl Top Cover")
|
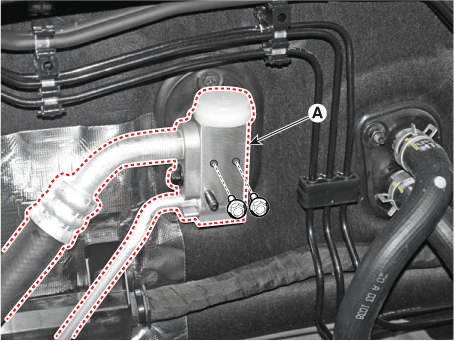
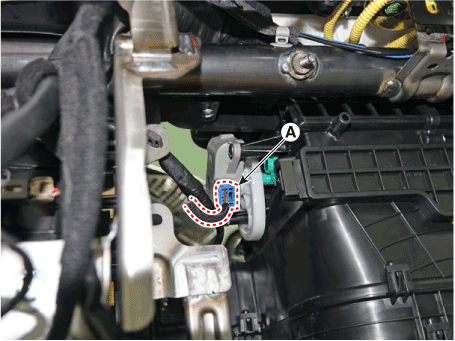
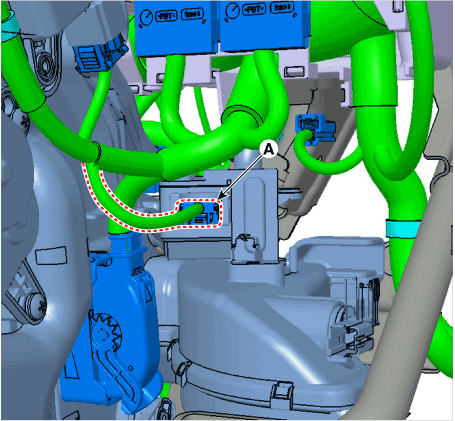
| 5. |
Loosen the mounting bolts and separate the expension valve (A) from
the evaporator core.
|
| 6. |
Separate the heater hose (A).
|
| 7. |
Loosen the cowl cross bar assembly mounting bolts.
|
| 8. |
Remove the front seat assembly.
(Refer to Body - "Front Seat Assembly")
|
| 9. |
Remove the floor console assembly.
(Refer to Body - "Floor Console Assembly")
|
| 10. |
Remove the front pillar trim.
(Refer to Body - "Front Pillar Trim")
|
| 11. |
Remove the cowl side trim.
(Refer to Body - "Cowl Side Trim")
|
| 12. |
Remove the crash pad lower panel.
(Refer to Body - "Crash Pad Lower Panel")
|
| 13. |
Remove the steering column shroud panel.
(Refer to Body - "Steering Column Shroud Panel")
|
| 14. |
Remove the steering wheel.
(Refer to Steering System - "Steering Wheel")
|
| 15. |
Remove the multifunction switch.
(Refer to Body Electrical System - "Multifunction Switch")
|
| 16. |
Lower the steering column after loosening the mounting bolts.
(Refer to Steering System - "Steering Column and Shaft")
|
| 17. |
Remove the front door scuff trim.
(Refer to Body - "Door Scuff Trim")
|
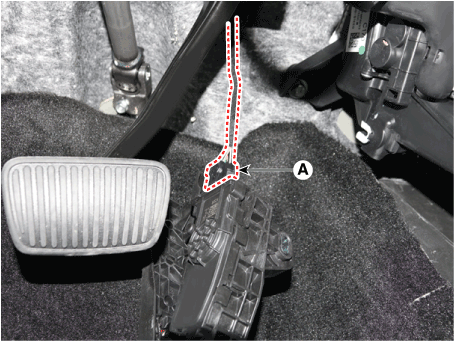
| 18. |
Loosen the mounting bolt and nut, remove the accelerator pedal module
(A).
|
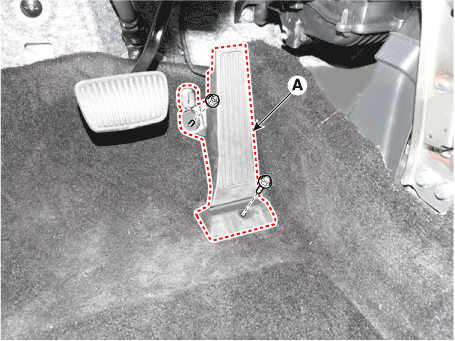
| 19. |
Press the lock pin, separate the accelerator pedal connector (A).
|
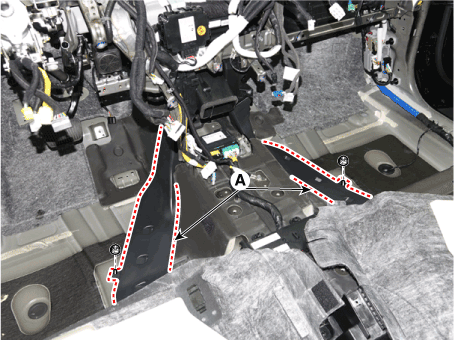
| 20. |
Remove the rear air duct (A) and then separate the floor carpet (B)
backwards.
|
| 21. |
Loosen the mounting nuts and remove the rear heating duct (A).
|
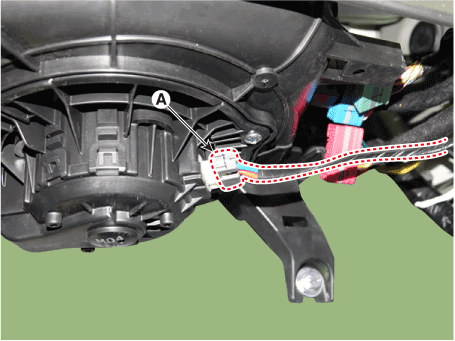
| 22. |
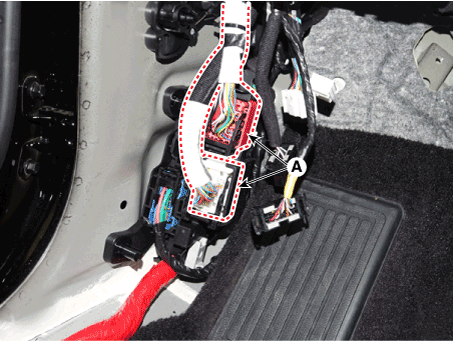
Disconnect the junction box connectors (A).
|

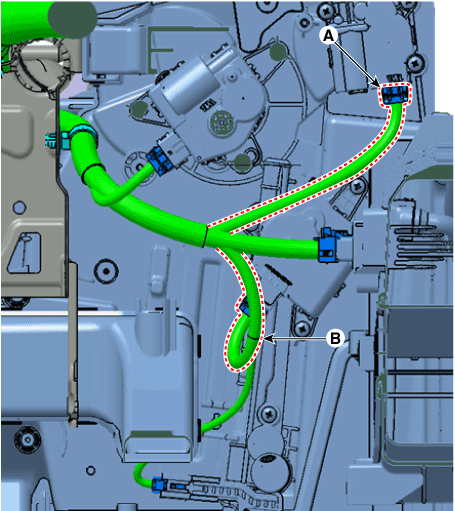
| 23. |
Disconnect the multi box connectors (A).
[Driver]
[Passenger]
|
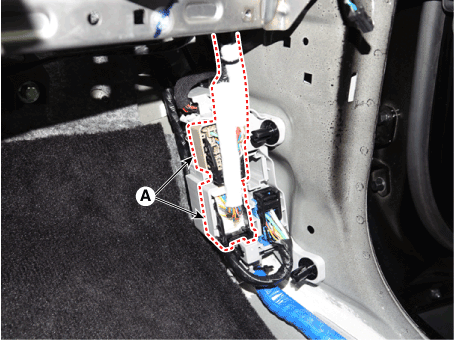
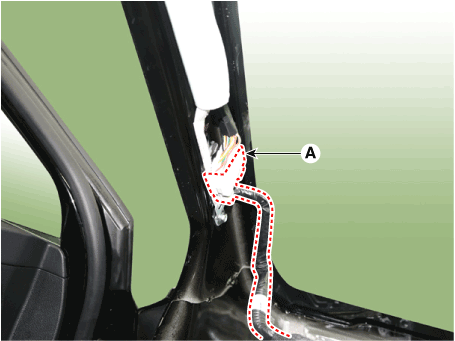
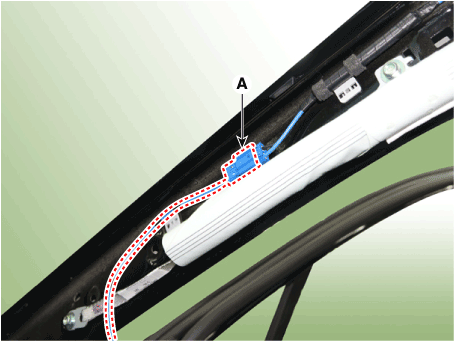
| 24. |
Loosen the mounting clips (B) in the front pillar and Disconnect the
connectors (A).
[Driver]
[Passenger]
|
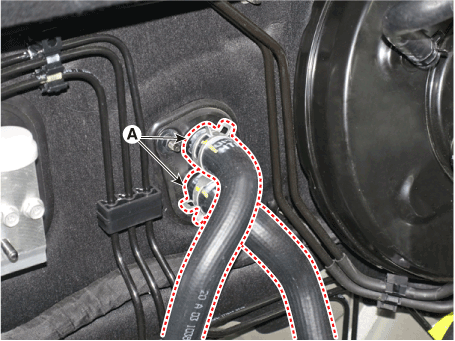
| 25. |
Remove the drain hose (A).
|

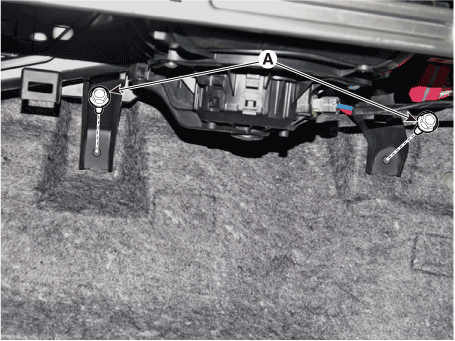
| 26. |
Remove the lower mounting bolt of the blower unit.
[Driver]
[Passenger]
|
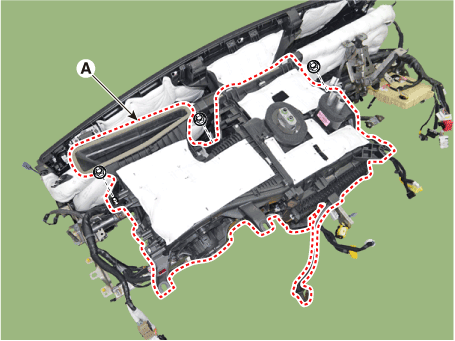
| 27. |
After loosening the bolts and nuts remove the crash pad and heater &
blower unit assembly (A) together.
|

| 28. |
Disconnect the heater & blower unit connectors.
|
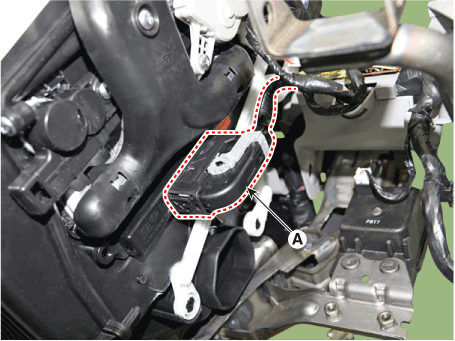
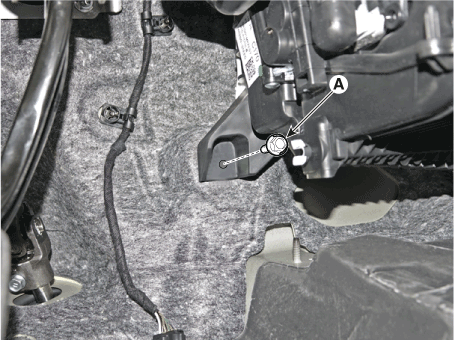
| 29. |
Loosen the heater & blower unit mounting bolt (A).
|

| 30. |
Loosen the mounting nuts and remove the heater & blower unit (A) from
the crash pad.
|
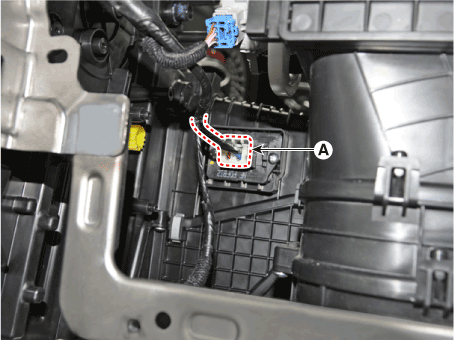
| 31. |
Loosen the mounting screw and separate the blower unit (A).
|
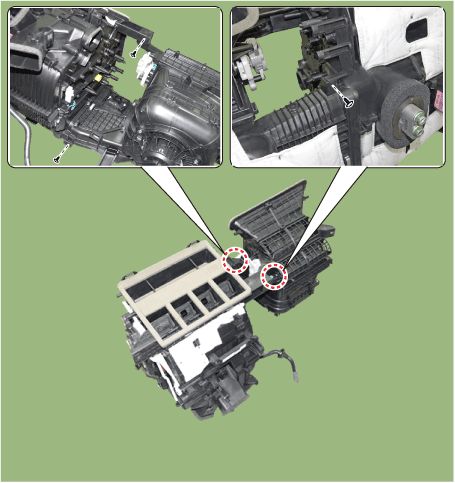
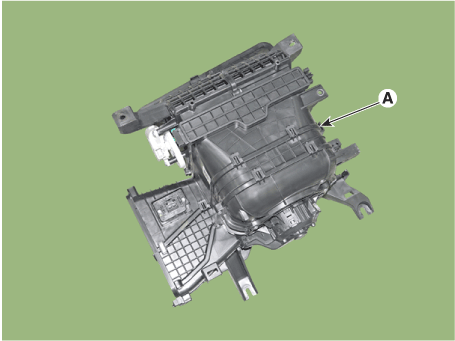
| 32. |
Install in the reverse order of removal.
|
Blower Motor. Repair procedures
| Inspection |
| 1. |
Connect the battery voltage and check the blower motor rotation.
|
| 2. |
If the blower motor does not operate well, substitute with a known-good
blower motor and check for proper operation.
|
| 3. |
Replace the blower motor if it is proved that there is a problem with
it.
|
| Replacement |
| 1. |
Disconnect the negative (-) battery terminal.
|
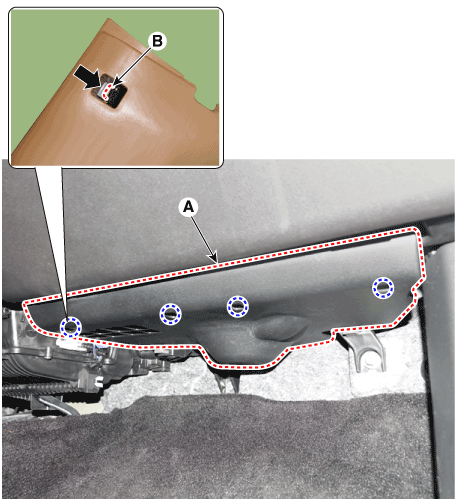
| 2. |
Press the lock pin (B) and then remove the crash pad under cover (A).
|
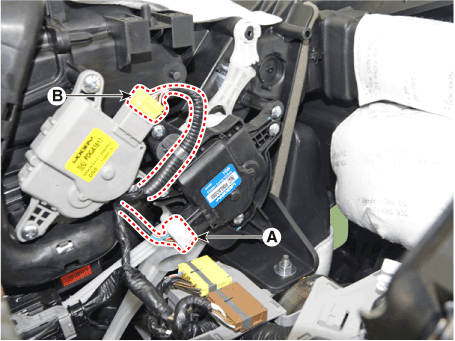
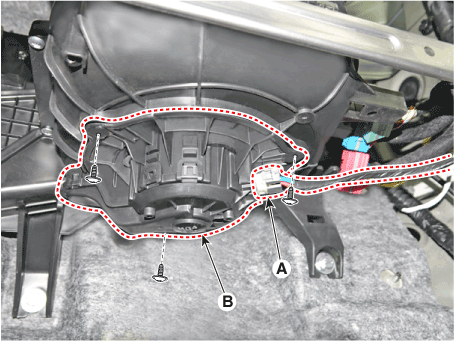
| 3. |
Disconnect the blower motor connector (A) and then remove the blower
motor (B) after loosening the screws.
|
| 4. |
Install in the reverse order of removal.
|
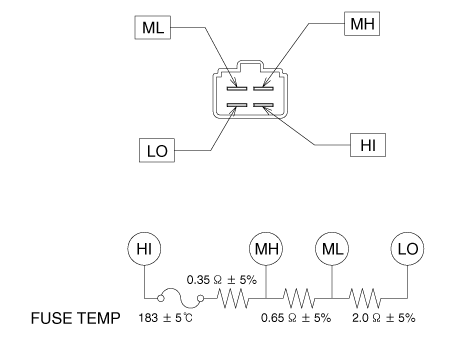
Blower Resistor (Manual). Repair procedures
| Inspection |
| 1. |
Measure the resistance between the terminals.
|
| 2. |
The measured resistance is not within specification, the blower resistor
must be replaced. (After removing the resistor)
|
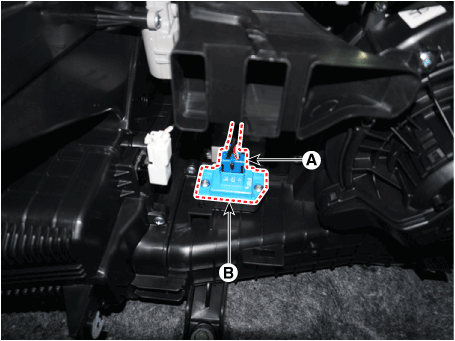
| Replacement |
| 1. |
Disconnect the negative (-) battery terminal.
|
| 2. |
Remove the glove box.
(Refer to Body - "Glove Box")
|
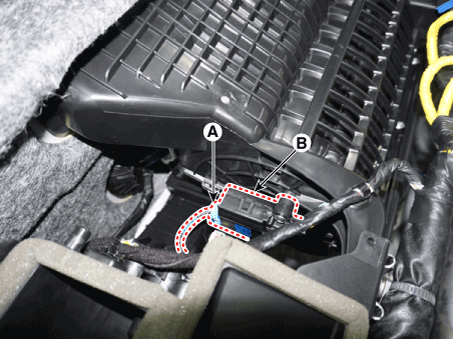
| 3. |
Disconnect the connector (A) and then remove the blower resistor (B)
after loosening the mounting screws.
|
| 4. |
Install in the reverse order of removal.
|
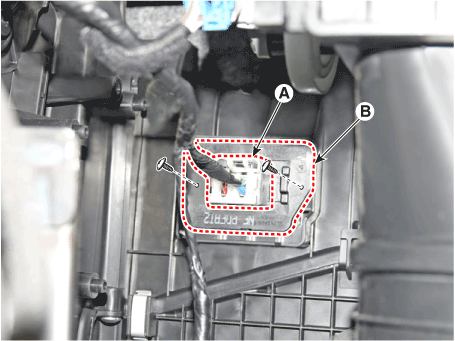
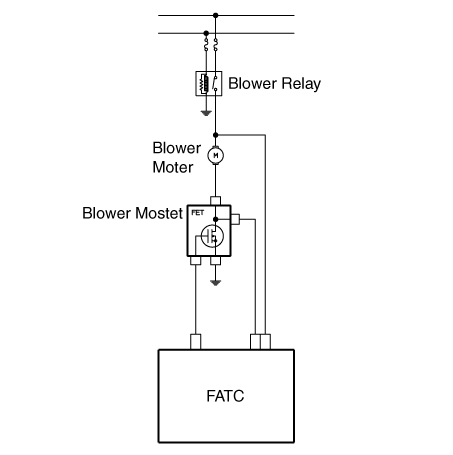
Power Mosfet (DATC). Repair procedures
| Inspection |
| 1. |
Turn the ignition switch ON.
|
| 2. |
Manually operate the control switch and measure the voltage of the blower
motor.
|
| 3. |
Select the control switch to raise the voltage until high speed.
Specification
|
||||||||||||||||||||||||||||||||||||||||||||||||||||||||||||||
| 4. |
If the measured voltage is not within specification, substitute with
a known-good power mosfet and check for proper operation.
|
| 5. |
Replace the power mosfet if it is proved that there is a problem with
it.
|
| Replacement |
| 1. |
Disconnect the negative (-) battery terminal.
|
| 2. |
Remove the glove box.
(Refer to Body - "Glove Box")
|
| 3. |
Disconnect the connector (A) and then remove the power mosfet (B) after
loosening the mounting screws.
|
| 4. |
Install in the reverse order of removal.
|
Climate Control Air Filter. Description and operation
| Description |
Climate Control Air Filter. Repair procedures
| Replacement |
| 1. |
Remove the glove box.
(Refer to Body - "Glove Box")
|
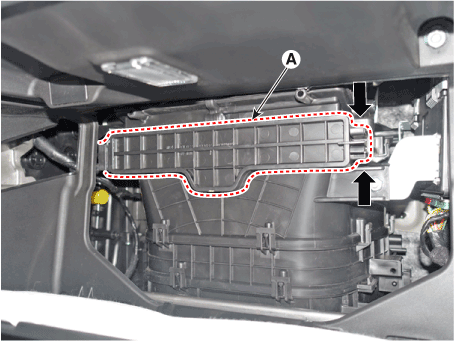
| 2. |
Remove the filter cover (A) by pressing the knob.
|
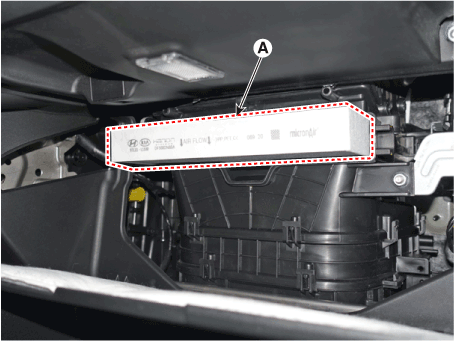
| 3. |
Replace the air filter (A) with a new one according to the direction
of air filter.
|

Intake Actuator. Description and operation
| Description |
Intake Actuator. Components and components location
| Components |
| 1. Intake actuator |
Intake Actuator. Repair procedures
| Inspection |
| 1. |
Turn the ignition switch OFF.
|
| 2. |
Disconnect the intake actuator connector.
|
| 3. |
Verify that the intake actuator operates to the fresh air position when
connecting 12V to terminal 3 and grounding terminal 7.
Verify that the intake actuator operates to the recirculated air position
when connected in reverse.
|

| 4. |
Connect the intake actuator connector.
|
| 5. |
Turn the ignition switch ON.
|
| 6. |
Check the voltage between terminal 5 and 6.
Specification
It will feedback the current position of the actuator to controls.
|
| 7. |
If the intake actuator does not operate well, substitute with a known-good
intake actuator and check for proper operation.
|
| 8. |
Replace the intake actuator if it is proved that there is a problem
with it.
|
| Replacement |
| 1. |
Disconnect the negative (-) battery terminal.
|
| 2. |
Remove the main crash pad assembly.
(Refer to Body - "Main Crash Pad Assembly")
|
| 3. |
Separate the intake actuator connector (A) and loosen the mounting screws
and remove the intake actuator (B).
|
| 4. |
Install in the reverse order of removal.
|
 Heater
Heater Unit. Components and components location Component Location 1. Heater Unit Assembly Components 1. Heater unit assembly 2. Heater NVH pad 3. Heater seal duct 4. Heater tube cover 5. Heater core assembly ...
 Rear Heater
Rear Heater Unit. Components and components location Component Location 1. Rear Heater & A/C Unit Components 1. Rear heater & blower unit assembly 2. Blower motor assembly 3. Rear power mosfet ...
See also:
Description and operation
Description Emissions Control System consists of three major systems. • The Crankcase Emission Control System prevents blow-by gas from releasing into the atmosphere. This system recycles gas back into ...
Components and Components Location
Components 1. HECU module 2. Front wheel speed sensor 3. Rear wheel speed sensor 4. Yaw rate & Lateral G sensor 5. ABS Warning lamp 6. Parking brake/EBD warning lamp 7. ESC Function/Warning lamp 8. ...
Passive Occupant Detection System (PODS-F). Repair procedures
Removal PODS-F ODU (Occupant Detection Unit) 1. Disconnect the battery negative cable, and wait for at least three minutes before beginning work. 2. Remove the front passenger seat assembly. 3. Disconnect ...
