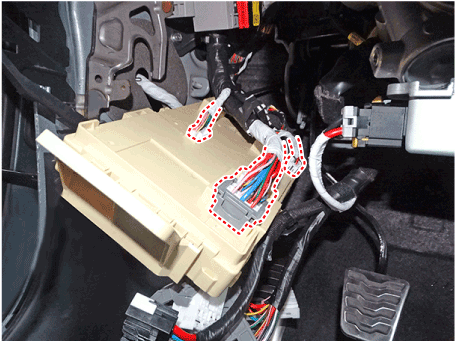
 Hyundai Santa Fe (TM): Fuses And Relays
Components and components location
| Component Location |
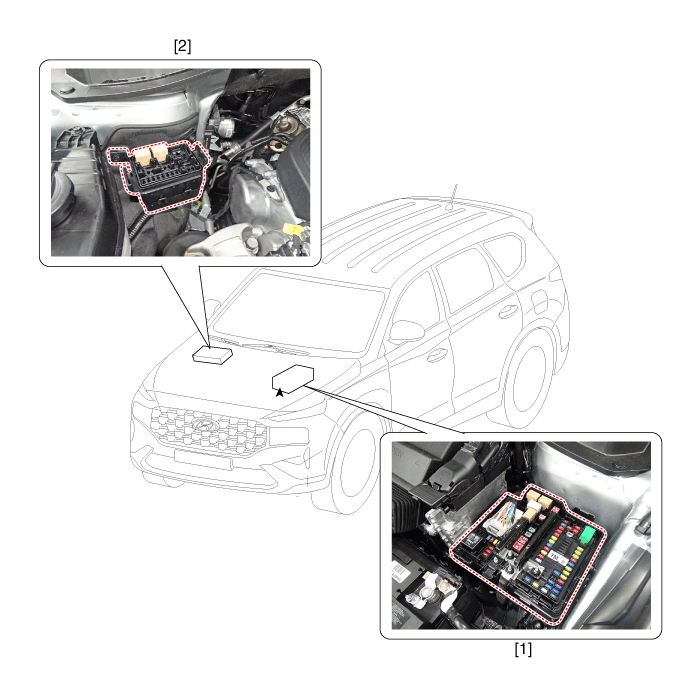
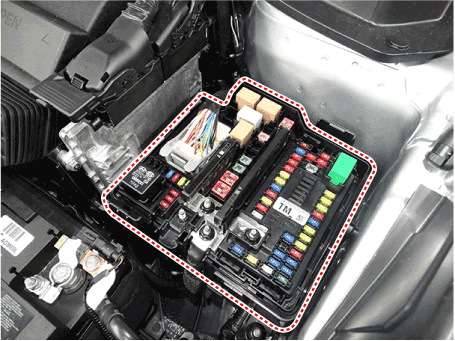
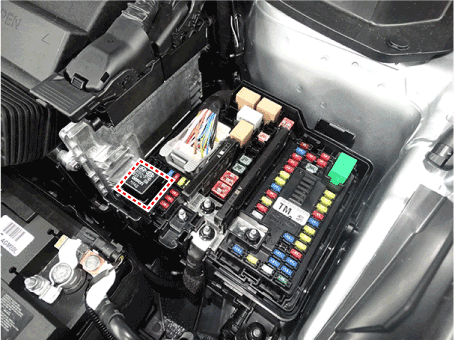
| 1. Engine room
relay box |
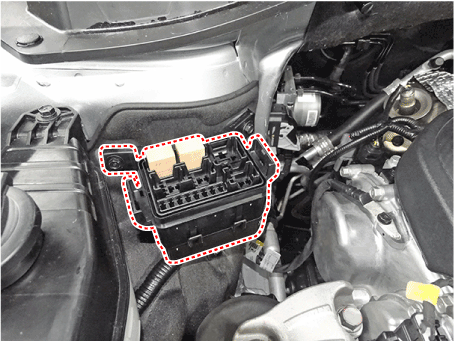
2. Sub relay
box |
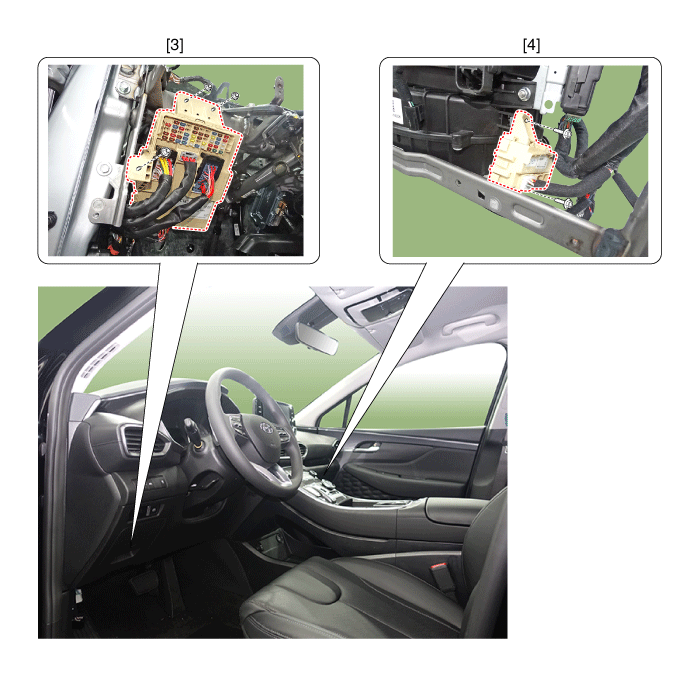
| 3. ICU Junction
block |
4. ICM relay
box |
Relay Box (Engine Compartment). Components and components location
| Component Location |
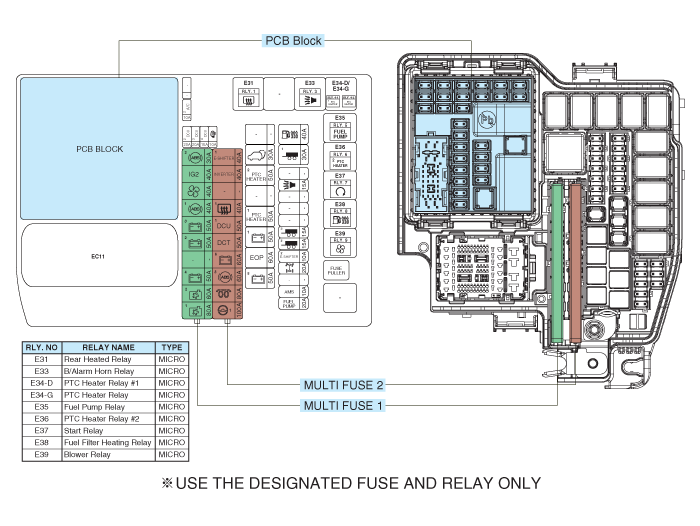
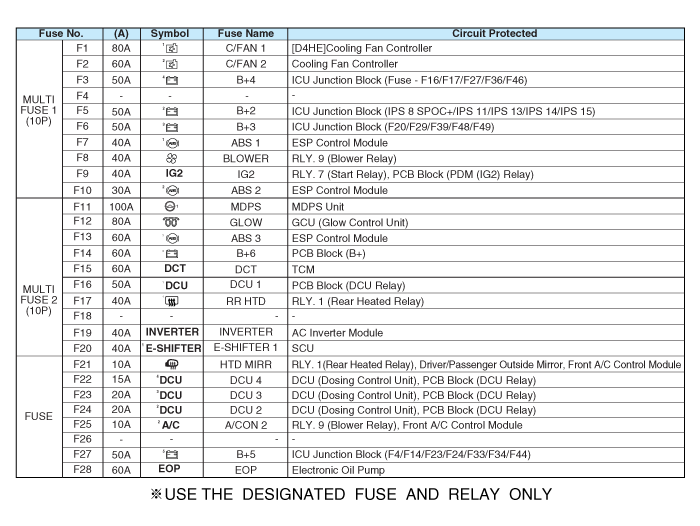
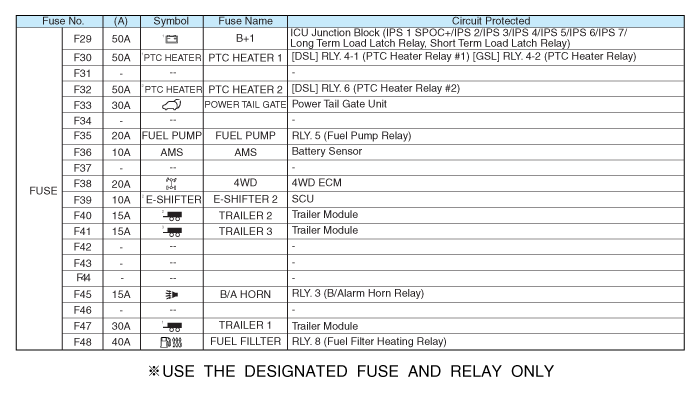
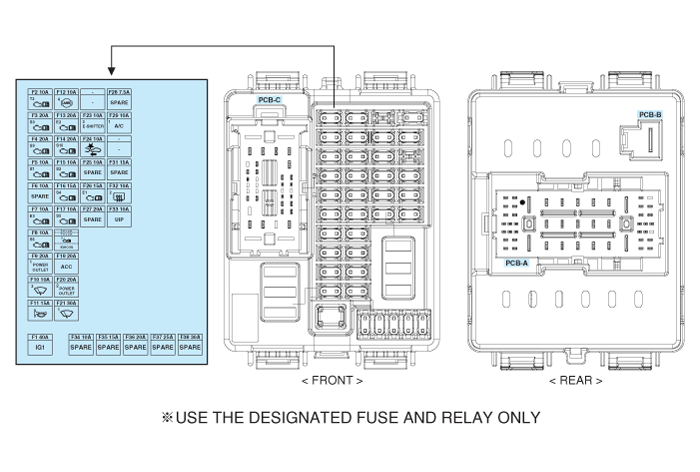
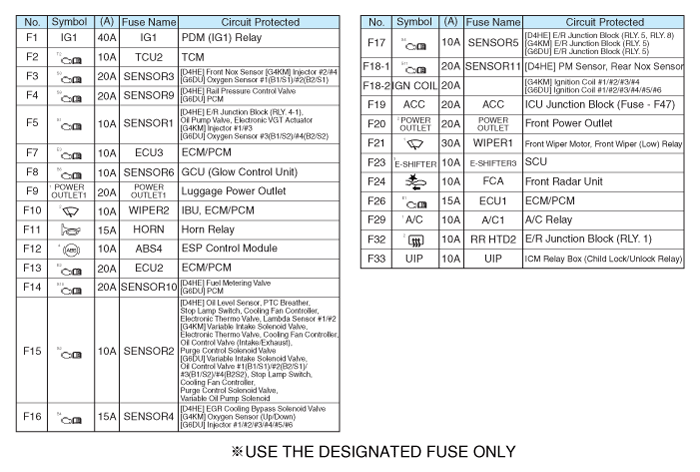
Relay Box (Engine Compartment). Repair procedures
| Inspection |
| 1. |
Disconnect the negative (-) battery terminal.
|
| 2. |
Pull out the relay from the engine compartment relay box.
|
|
| 1. |
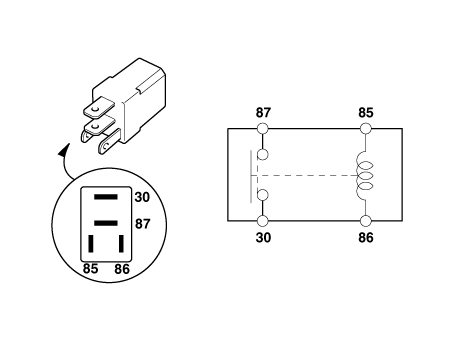
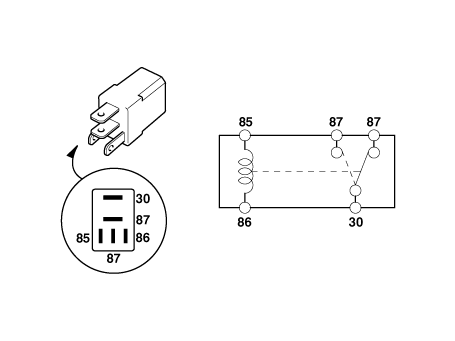
There should be continuity between the No.30 and No.87 terminals when
power and ground are connected to the No.85 and No.86 terminals.
|
| 2. |
There should be no continuity between the No.30 and No.87 terminals
when power is disconnected.
[Engine room relay box]
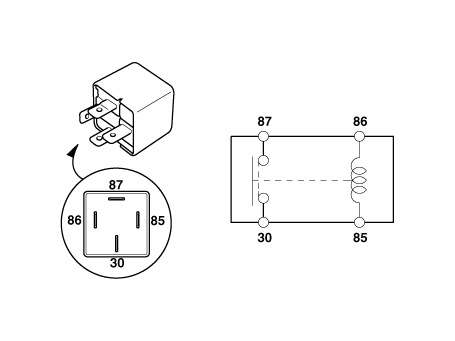
[Sub junction block]
|
| 1. |
There should be continuity between the No.30 and No.87 terminals when
power and ground are connected to the No.85 and No.86 terminals.
|
| 2. |
There should be continuity between the No.30 and No.87 terminals when
power is disconnected.
|
| 1. |
There should be continuity between the No.30 and No.87 terminals when
power and ground are connected to the No.85 and No.86 terminals.
|
| 2. |
There should be no continuity between the No.30 and No.87 terminals
when power is disconnected.
|
| 1. |
Disconnect the negative (-) battery terminal.
|
| 2. |
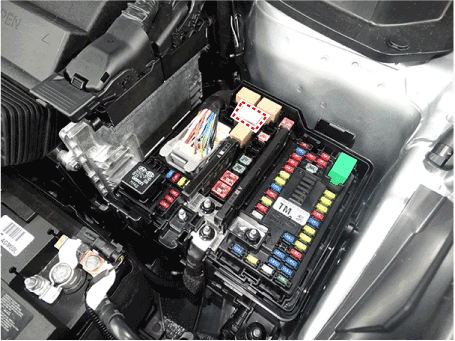
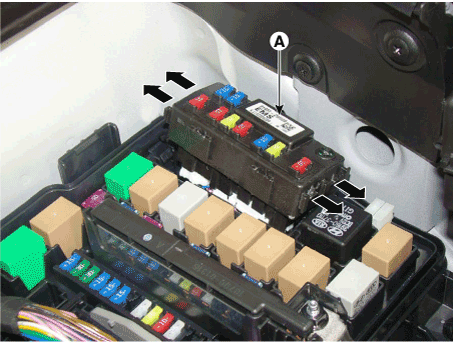
Push 4 hooks in the engine room relay box out to the arrow direction
and put up the PCB block (A).
|
| 3. |
Disconnect the connector and remove the the PCB block (A).
|
| 1. |
Be sure there is no play in the fuse holders, and that the fuses are
held securely.
|
| 2. |
Are the fuse capacities for each circuit correct?
|
| 3. |
Are there any blown fuses?
If a fuse is to be replaced, be sure to use a new fuse of the same capacity.
Always determine why the fuse blew first and completely eliminate the
problem before installing a new fuse.
|
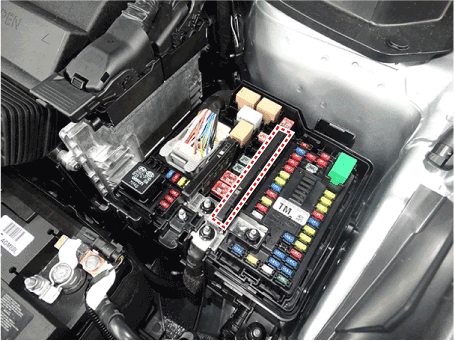
|
Relay Box (Passenger Compartment). Description and operation
| Dscription and Operation |
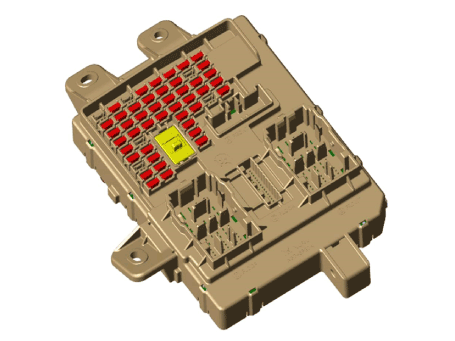
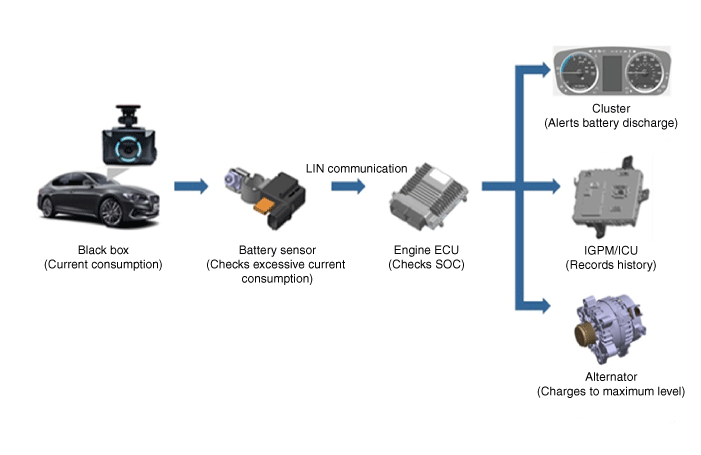
| – |
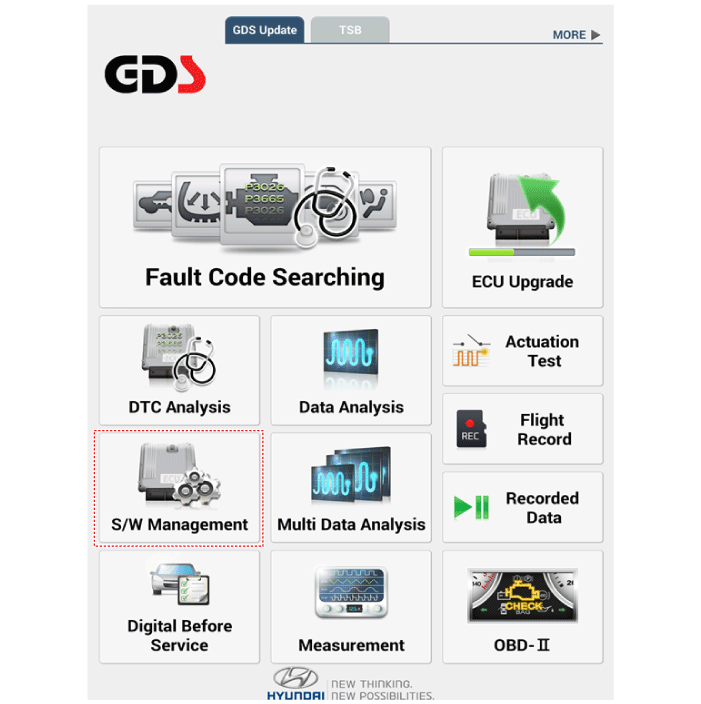
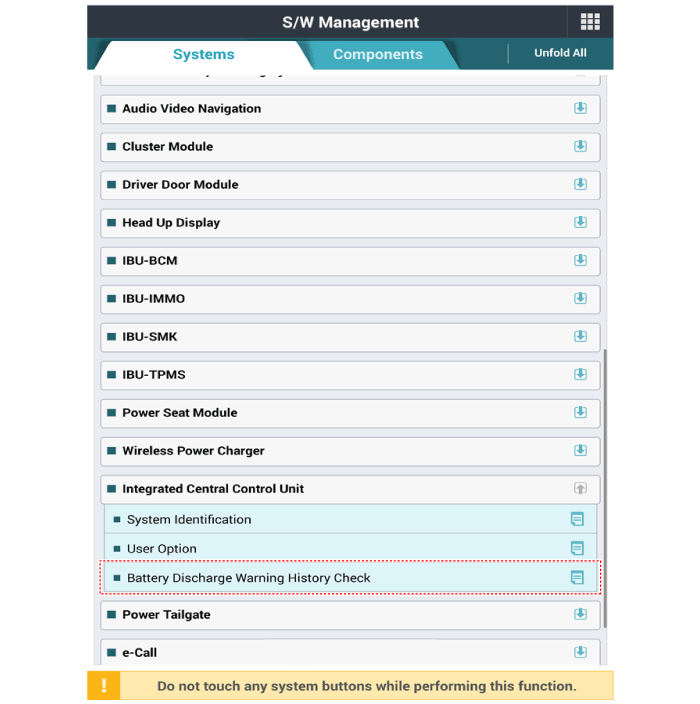
This function allows checking the history of excessive battery consumption
of the parked vehicle.
|
| – |
It is possible to check the running distance and SOC when the battery
consumption was excessive and the current SOC information.
|
| 1. |
Procedure for coding variants
|
Relay Box (Passenger Compartment). Components and components location
| Components |
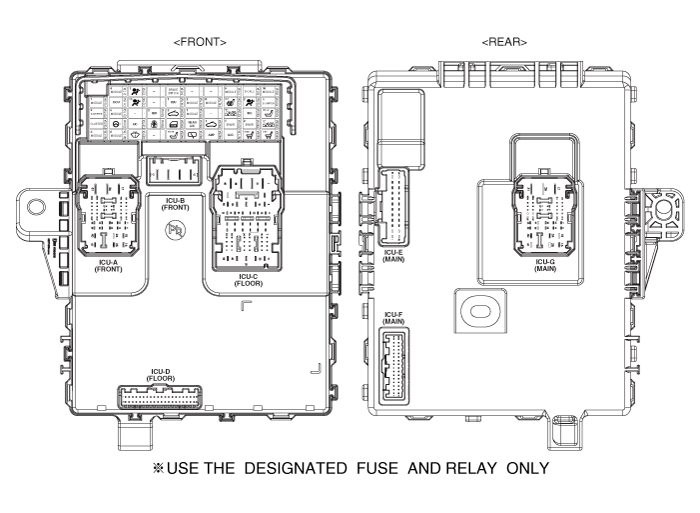
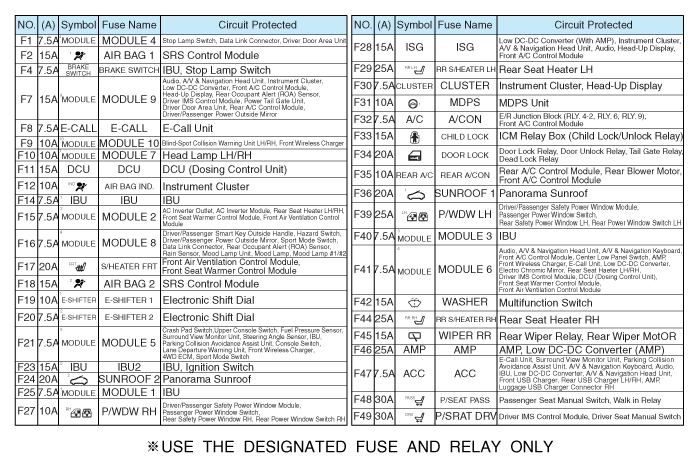
Relay Box (Passenger Compartment). Repair procedures
| Fuse Inspection |
| 1. |
Check that the fuse holders are loosely held and that the fuses are
securely fixed by the holders.
|
| 2. |
Check that each fuse circuit has the exact fuse capacity.
|
| 3. |
Check the fuses for any damage.
|
| 1. |
In the body electrical system, failure can be quickly diagnosed by using
the vehicle diagnostic system (diagnostic tool).
The diagnostic system(diagnostic tool) provides the following information.
|
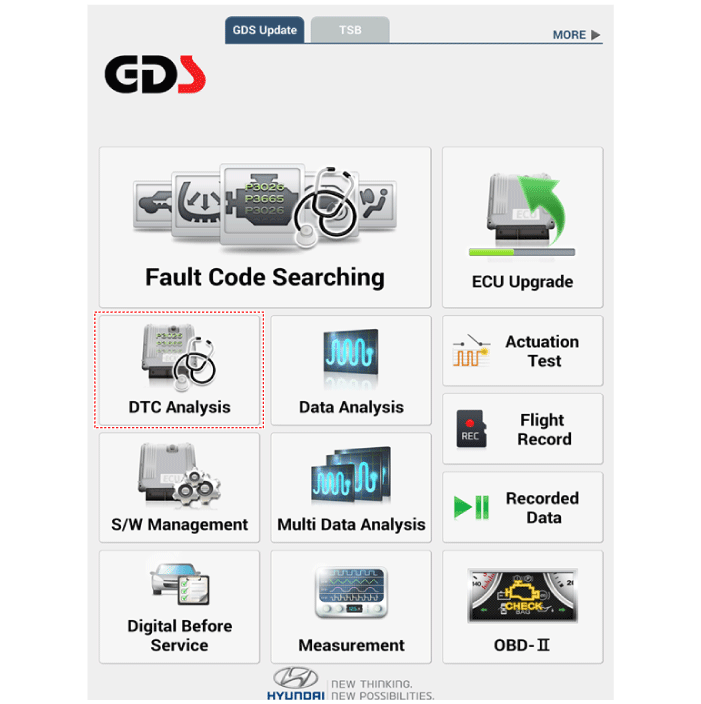
| 2. |
If diagnose the vehicle by diagnostic tool, select "DTC Analysis" and
"Vehicle".
|
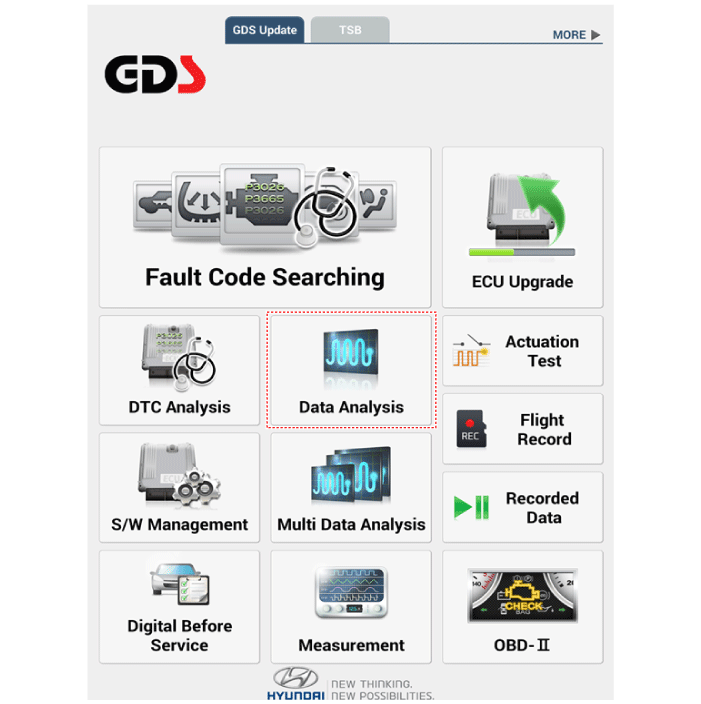
| 3. |
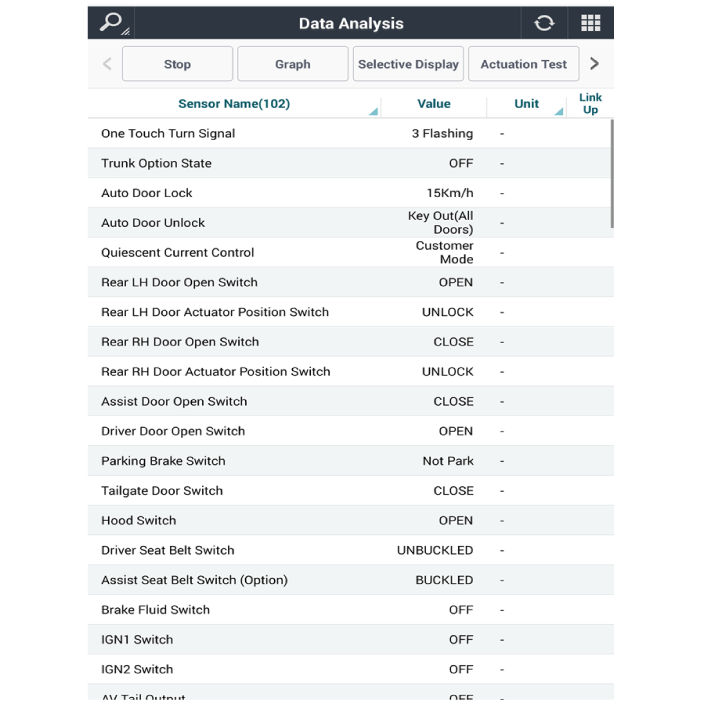
If check current status, select the "Data Analysis" and "Car model".
|
| 4. |
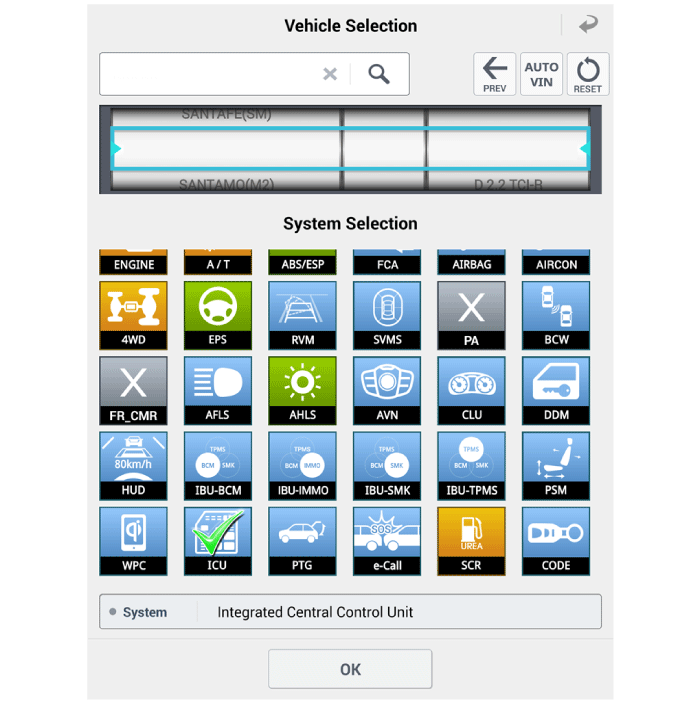
Select the 'ICU' to search the current state of the input/output data.
|
| Removal |
| 1. |
Disconnect the negative (-) battery terminal.
|
| 2. |
Remove the crash pad lower panel.
(Refer to Body - "Crash Pad Lower Panel")
|
| 3. |
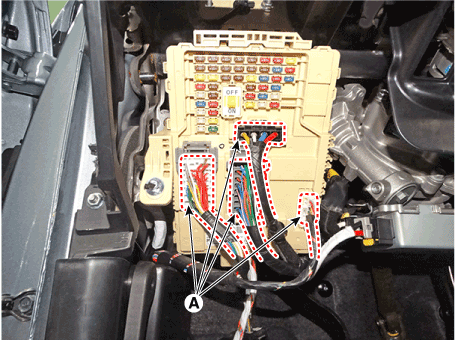
Disconnect the connectors (A) from the fuse side of the ICU.
|
| 4. |
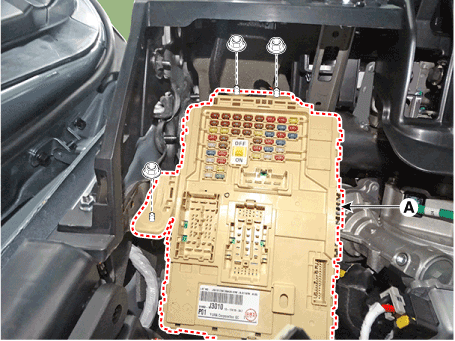
Remove the ICU (A) after loosening the mounting nuts.
|
| 5. |
Disconnect the connectors from the back side of the ICU.
|
| Installation |
| 1. |
Install the ICU.
|
| 2. |
Install the crash pad lower panel.
|
| 3. |
Connect the negative (-) battery terminal.
|
| 4. |
Check that all system operates normally.
|
ICM (Integrated Circuit Module) Relay Box. Description and operation
| Description |
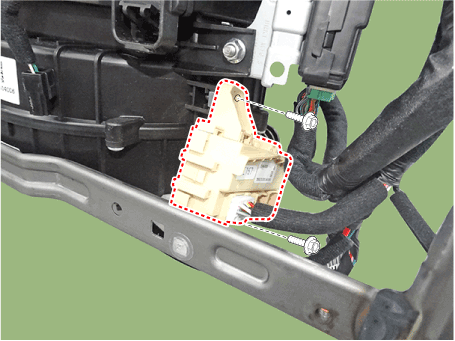
ICM (Integrated Circuit Module) Relay Box. Repair procedures
| Inspection |
| 1. |
There should be continuity between the No.15 and No.7,8 terminals when
power and ground are connected to the No.15 and No.14 in the ICM-A.
|
| 2. |
There should be continuity between the No.10 and No.12,13 terminals
when power and ground are connected to the No.15 and No.14 in the ICM-A.
|
| 1. |
There should be continuity between the No.11 and No.12,13 terminals
when power and ground are connected to the No.11 and No.1 in the ICM-A.
|
| 2. |
There should be continuity between the No.10 and No.7,8 terminals when
power and ground are connected to the No.11 and No.11 in the ICM-A.
|
 Fuel Filler Door
Components and components location Component Location 1. Fuel filler door release actuator Fuel Filler Door Release Actuator. Repair procedures Removal 1. Remove the left luggage side trim. (Refer to Body ...
 Indicators And Gauges
Troubleshooting Troubleshooting Symptom Possible cause Remedy Speedometer does not operate Cluster fuse (10A) blown Check for short and replace fuse Speedometer faulty Check speedometer CAN line faulty ...
See also:
Surround View Monitor (SVM)
Description and operation Description Surround View Monitor (SVM) is the system that allows video monitoring of 360 degrees around the vehicle. The system includes 4 ultra optical camera mounted around ...
Underdrive Brake Control Solenoid Valve(UD/B_VFS). Repair procedures
Inspection 1. Turn ignition switch OFF. 2. Remove the air duct. 3. Disconnect the solenoid valve connector(A). 4. Measure resistance between sensor signal terminal and sensor ground terminal. 5. Check ...
AVN Head Unit. Components and Components
Location
Components AVN (A/V & Navigation) Head Unit Connector Connector Pin Information No. Connector A Connector B Connector C 1 - MM CAN High - 2 Parking V VIDEO - (Dimming output) - 3 Parking V GND Parking ...


