 Hyundai Santa Fe (TM): Roof Trim
Components and components location
| Components |
| [General Type] |
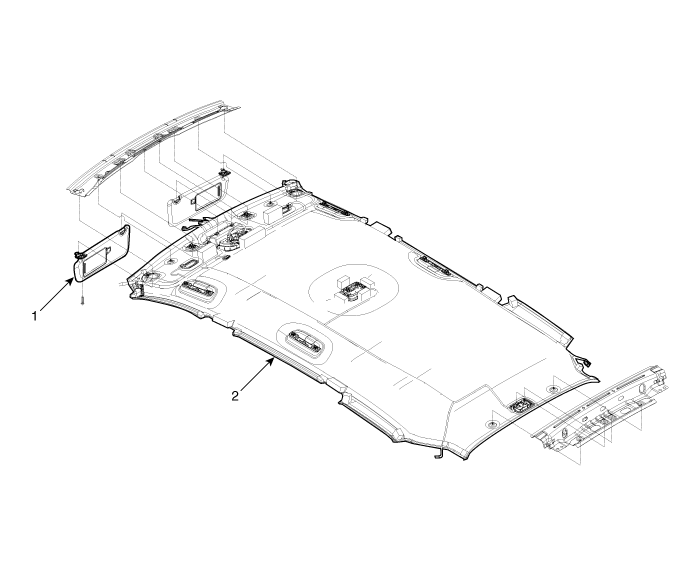
| 1. Sunvisor |
2. Roof trim |
| Components |
| [Panorama Sunroof Type] |
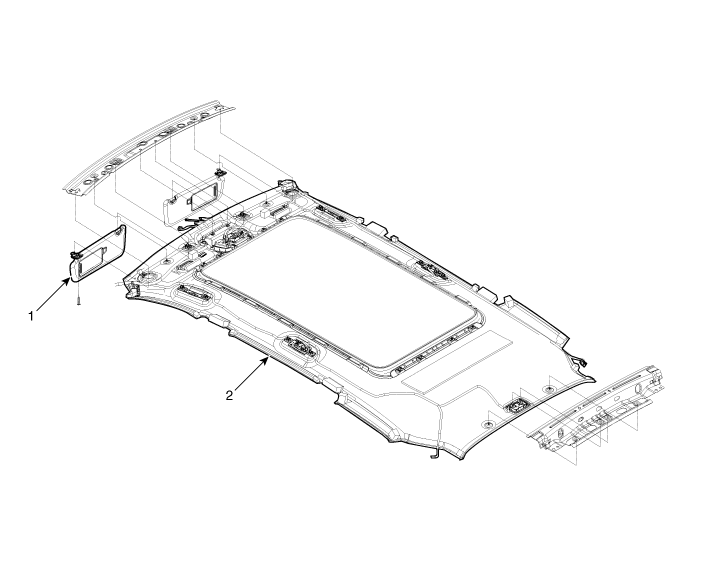
| 1. Sunvisor |
2. Roof trim |
Sunvisor. Components and components location
| Component Location |

| 1. Sunvisor |
2. Retainer |
Sunvisor. Repair procedures
| Replacement |
|

|

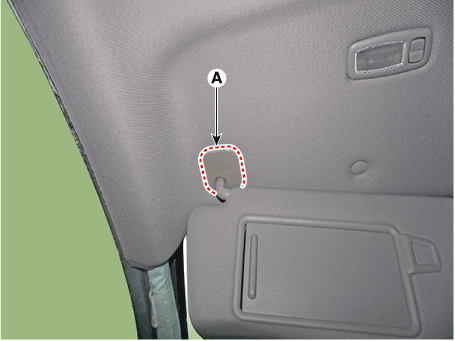
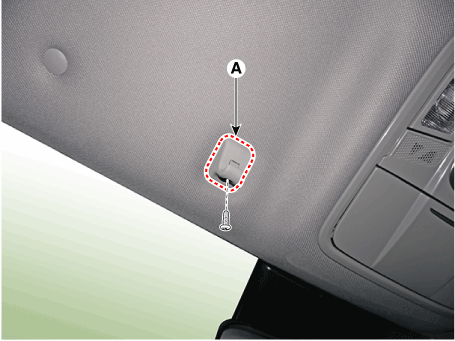
| 1. |
Remove the sunvisor pivot cover (A).
|
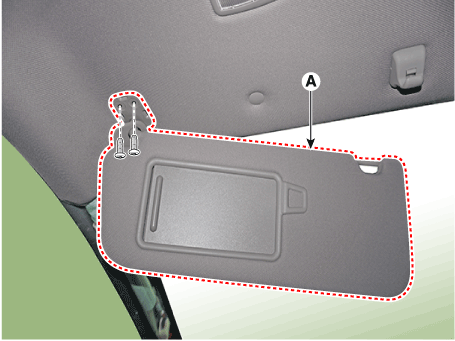
| 2. |
Loosen the mounting screw and seperate the sunvisor (A).
|
| 3. |
Loosen the mounting screws and remove the retainer (A).
|
| 4. |
To install, reverse removal procedure.
|

Assist Handle. Components and components location
| Component Location |
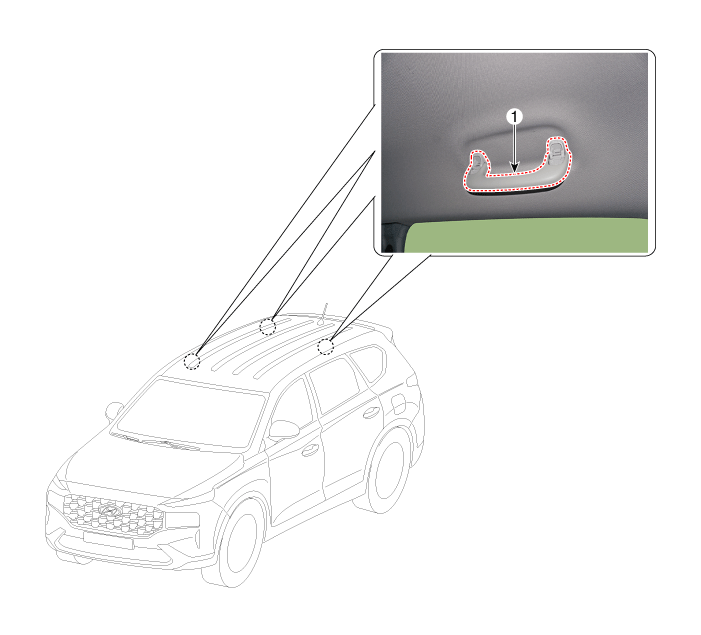
| 1. Assist Handle |
Assist Handle. Repair procedures
| Replacement |
|
|
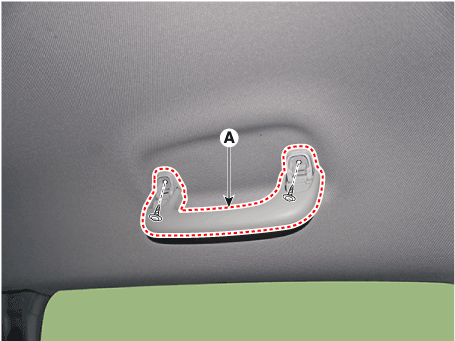
| 1. |
After lifting up the assist handle caps and loosening the mounting screws,
remove the assist handle (A).
|
| 2. |
To install, reverse removal procedure.
|
Roof Trim Assembly. Components and components location
| Component Location |

| 1. Roof Trim
Assembly |
Roof Trim Assembly. Repair procedures
| Replacement |
|
|
| 1. |
Remove the front seat.
(Refer to Front Seat - "Front Seat Assembly")
|
| 2. |
Remove the rear seat.
(Refer to Rear Seat - "Rear Seat Assembly")
|
| 3. |
Remove the front pillar trim.
(Rear to Interior Trim - "Front Pillar Trim")
|
| 4. |
Remove the center pillar upper trim.
(Rear to Interior Trim - "Center Pillar Trim")
|
| 5. |
Remove the rear pillar trim.
(Rear to Interior Trim - "Rear Pillar Trim")
|
| 6. |
Remove the sunvisor and retainer.
(Rear to Roof Trim - "Sunvisor")
|
| 7. |
Remove the assist handle.
(Rear to Roof Trim - "Assist Handle")
|
| 8. |
Remove the overhead console lamp.
(Rear to Body Electrical System - "Overhead Console Lamp")
|
| 9. |
Remove the room lamp.
(Rear to Body Electrical System - "Room Lamp")
|
| 10. |
Remove the ECM mirror connector.
(Refer to Body Electrical System - "Electro Chromic Inside Rear View
Mirror")
|
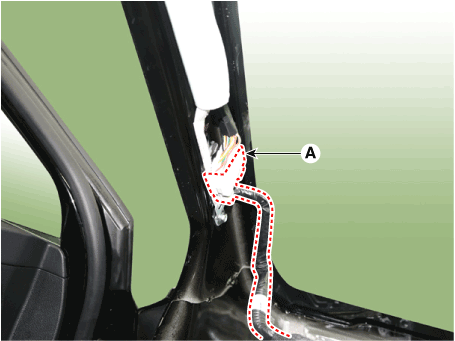
| 11. |
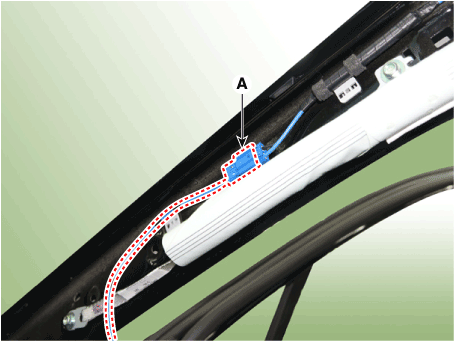
Separate the roof trim main connector (A) from the front pillar section.
[LH]
[RH]
|
| 12. |
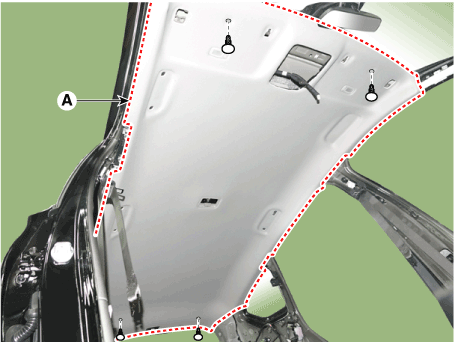
Remove the roof trim mounting clip and remove the roof trim assembly
(A).
|
| 13. |
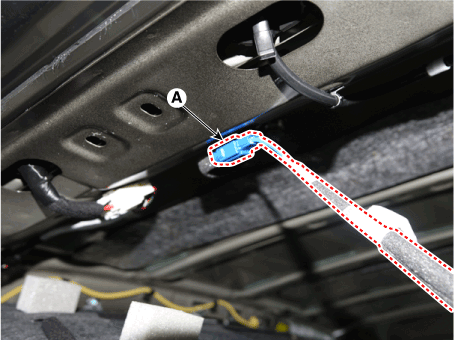
Press the lock pin, separate the roof trim connector (A).
|
| 14. |
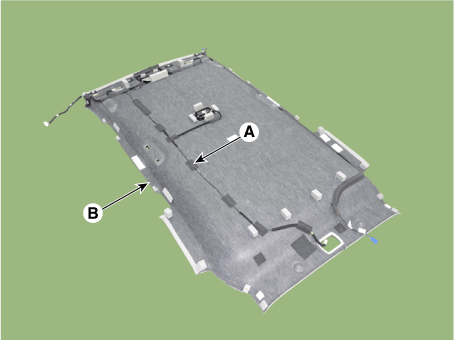
Remove the roof trim assembly (A) from the vehicle through the tailgate.
|
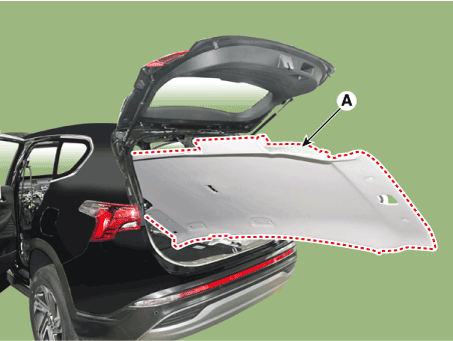
| 15. |
Remove roof trim wiring harness (A) from the roof trim (B).
|
| 16. |
To install, reverse removal procedure.
|
 Crash Pad
Components and components location Components (1) 1. Crash pad lower panel 2. Crash pad assembly 3. Crash pad side cover [LH] 4. Crash pad side cover [RH] Componets (2) 1. Crash pad under cover [RH] 2. ...
 Interior Trim
Components and components location Components 1. Front pillar trim 2. Cowl side trim 3. Center pillar upper trim 4. Front door scuff trim 5. Rear door scuff trim 6. Rear pillar trim 7. Center pillar lower ...
See also:
Rear Seat Belt
Rear Seat Belt Retractor. Components and components location Component Location 1. Second Row Seat Belt Retractor 2. Third Row Seat Belt Retractor Rear Seat Belt Retractor. Repair procedures Replacement ...
Components and Components Location
Components 1. Roof side moulding [LH] 2. Roof side moulding [RH] 3. Movable Glass 4. Slide 5. Cover base 6. Wind deflector 7. Center cover 8. Panorama sunroof frame assembly 9. Mechanism rail assembly ...
Transaxle Oil Temperature Sensor. Description and Operation
Description Transaxle Oil Temperature Sensor(OTS) monitors the automatic transaxle fluid's temperature and conveys the readings to TCM. It is an Negativen Thermal Coefficient(NTC) sensor whose resistance ...
