 Hyundai Santa Fe (TM): Tail Gate Window Glass
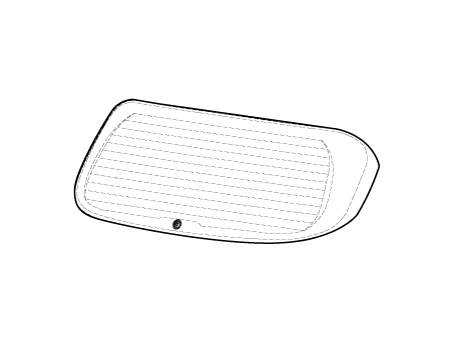
Components and components location
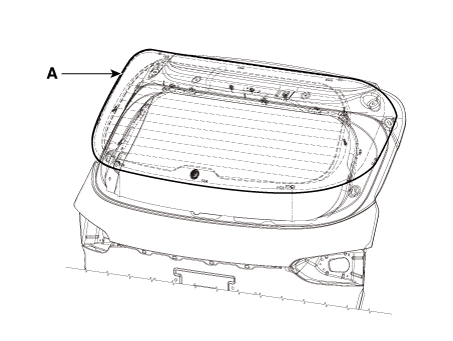
| Components |
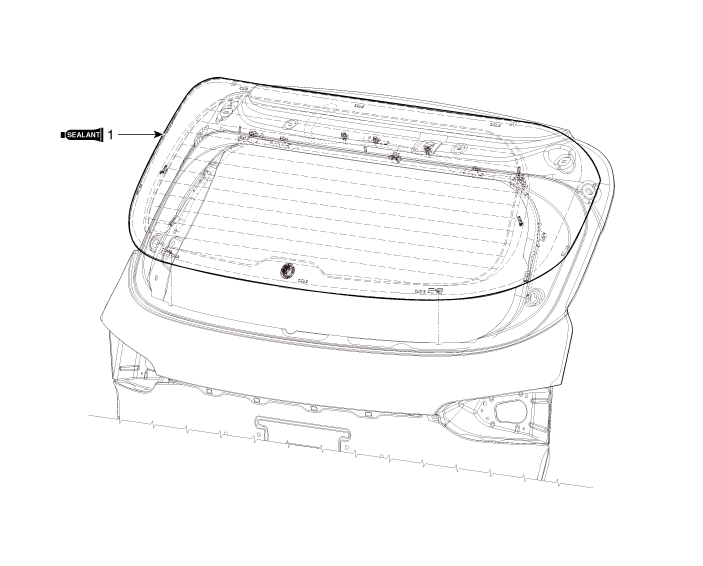
| 1. Tailgate window
glass |
Repair procedures
| Removal |
|

|

| 1. |
Remove the tailgate trim.
(Refer to Tailgate - "Tailgate Trim")
|
| 2. |
Remove the rear spoiler.
(Refer to Body Side Molding - "Rear Spoiler")
|
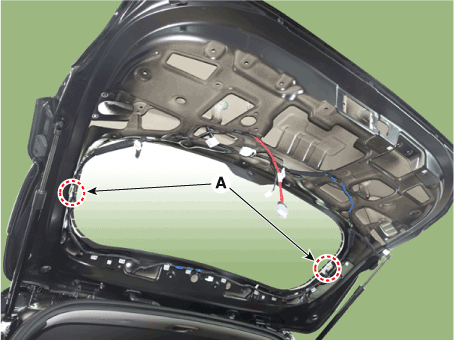
| 3. |
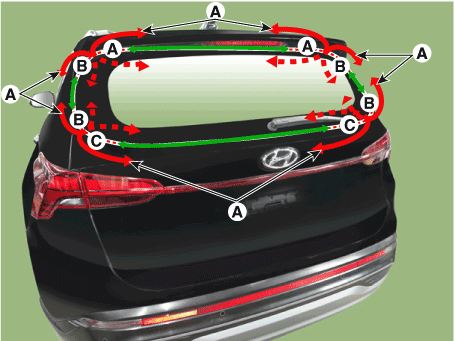
Disconnect the hot wire connector (A).
|
| 4. |
Cut off the sealant on the edge (B) while pulling the piano wire (A)
to the left and right.
|

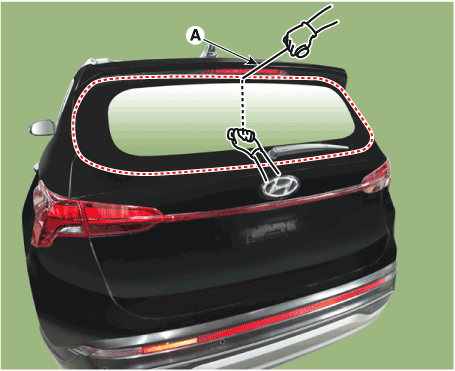
| 5. |
Put in a piano wire (A) through the corner of the tailgate window glass
and insert wire grips into both ends of the wire.
|
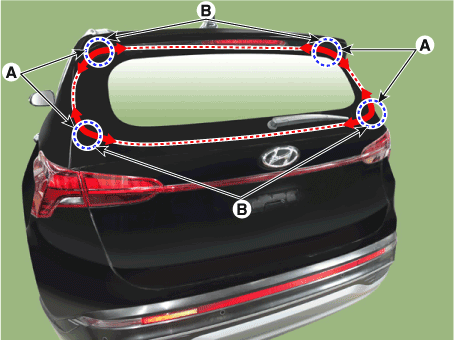
| 6. |
Cut off the sealant on (A-A), (B-B), (C-C), while pulling a piano wire
(A) to the left and right.
|
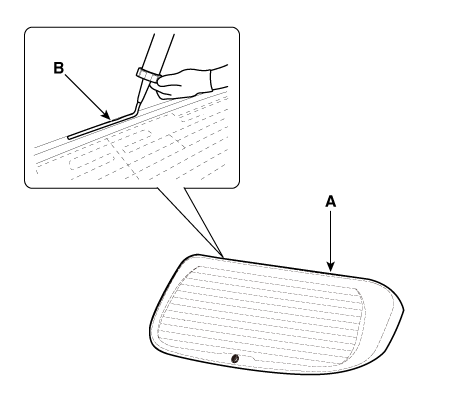
| 7. |
Remove the tailgate window glass (A).
|
| Installtion |
| 1. |
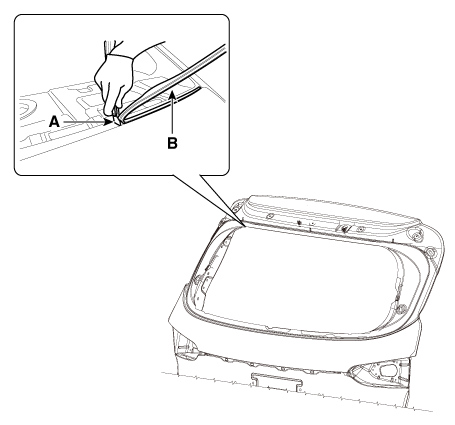
Using a cutting knife (A), remove the remaining sealant (B) on the body
panel.
|
| 2. |
Apply the body primer to the bonding surface of body panel.
|
| 3. |
Apply the glass primer to the outer edge of tailgate window glass.
|
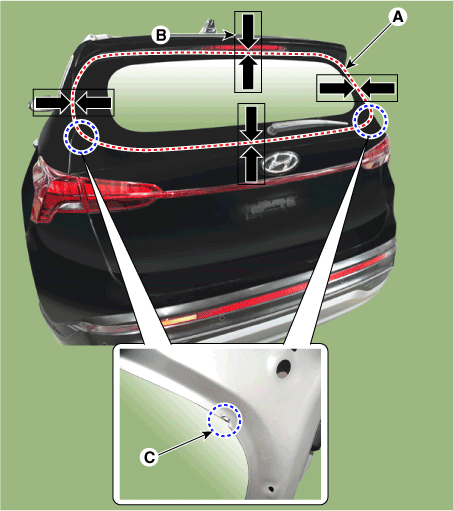
| 4. |
Using a sealant gun, apply the sealant (B) to the edge of rear tailgate
window glass (A).
|
| 5. |
Using the glass holder, adjust the tailgate window glass (A) to fit
the alignment marks (B) on the body and lightly push the tailgate window
glass to make the edges fully seated on the bonding surface of body.
|
| 6. |
To make sure that the applied sealant is completely hardened, leave
the car on a flat surface for at least 3 to 4 hours after installing
the tailgate window glass.
|
| 7. |
Conduct a leak testing.
|
| 8. |
Install the rear spoiler.
(Refer to Body Side Molding - "Rear Spoiler")
|
| 9. |
Install the tailgate trim.
(Refer to Tailgate - "Tailgate Trim")
|
 Windshield Glass
Components and components location Components 1. Windshield glass 2. Windshield glass upper molding 3. Windshield glass side molding Repair procedures Replacement [Removal] • Put on gloves ...
 Quarter Fixed Glass
Components and components location Components 1. Quarter Fixed Glass Repair procedures Replacement [Removal] • Put on gloves to prevent hand injuries. • Use seat covers to ...
See also:
Daytime running light
Daytime Running Lights (DRL) can make it easier for others to see the front of your vehicle during the day. DRL can be helpful in many different driving conditions, and it is especially helpful after dawn ...
Quarter Fixed Glass
Components and components location Components 1. Quarter Fixed Glass Repair procedures Replacement [Removal] • Put on gloves to prevent hand injuries. • Use seat covers to ...
Components and components location
Components Location 1. Crankcase pressure regulating valve (PRV) 2. Canister 3. Purge control solenoid valve (PCSV) 4. Fuel tank air filter 5. Catalytic converter (WCC) 6. Catalytic converter (UCC) 1. ...
