 Hyundai Santa Fe (TM): Windshield Glass
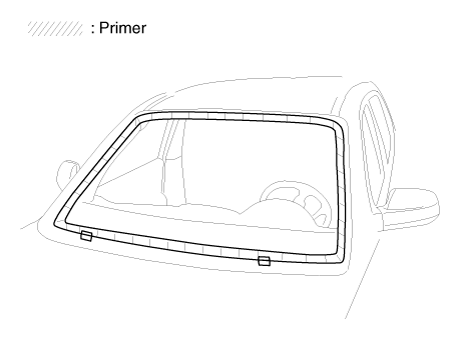
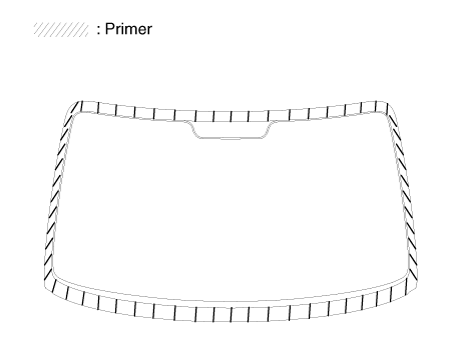
Components and components location
| Components |
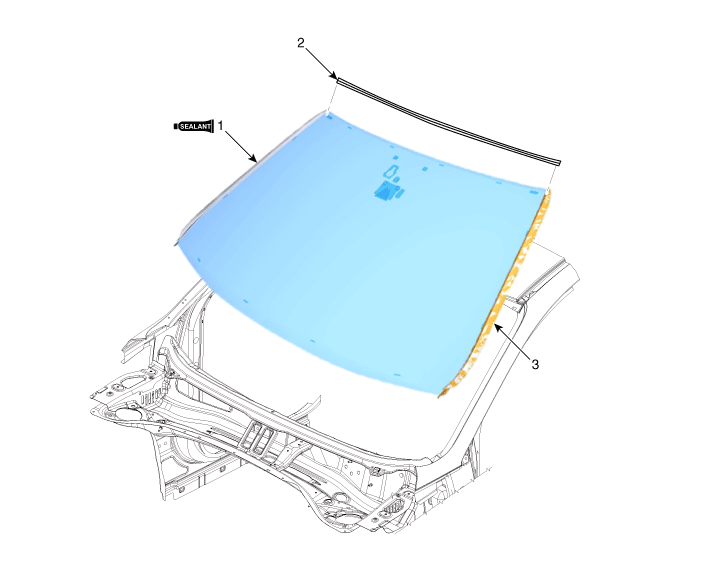
| 1. Windshield
glass 2. Windshield glass upper molding |
3. Windshield
glass side molding |
Repair procedures
| Replacement |
|

|

| 1. |
Remove the roof side molding.
(Refer to Interior Trim - "Roof Side Molding")
|
| 2. |
Remove the inside rear view mirror assembly.
(Refer to Mirror - "Inside Rear View Mirror")
|
| 3. |
Remove the front pillar trim.
(Refer to Interior Trim - "Front Fillar Trim")
|
| 4. |
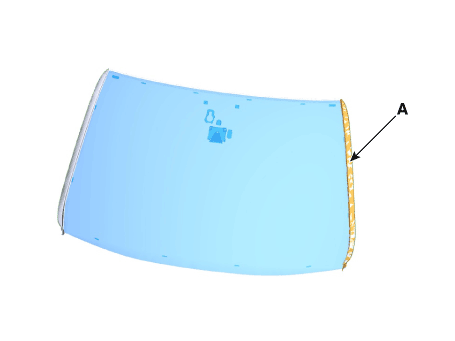
Remove the windshield glass side molding (A).
|
| 5. |
Remove the cowl top cover.
(Refer to "Cowl Top Cover")
|
| 6. |
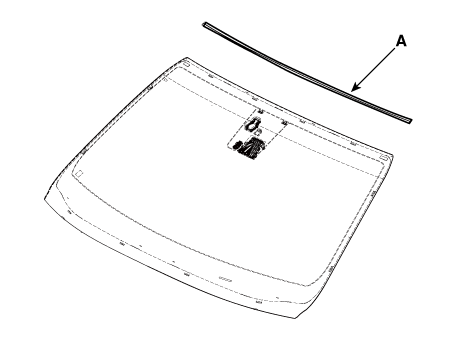
Remove the windshield glass upper molding(A).
|
| 7. |
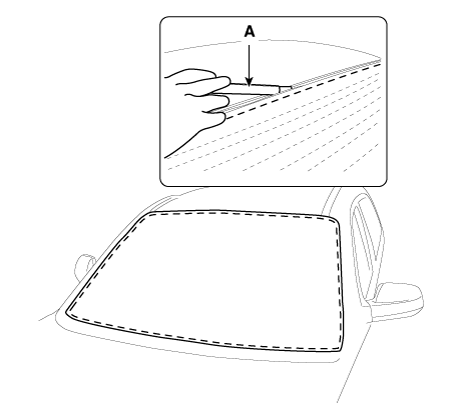
Using a cutter (A) knife, carefully remove the windshield glass molding.
|

| 8. |
Cut off the sealant on the edge (B) while pulling the piano wire (A)
to the left and right.
|
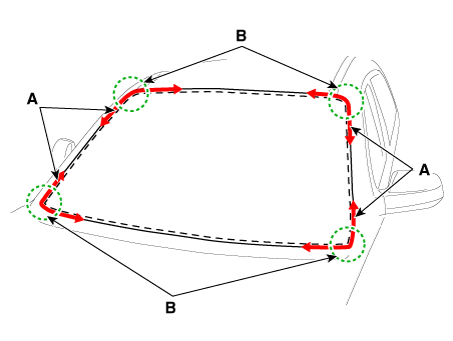
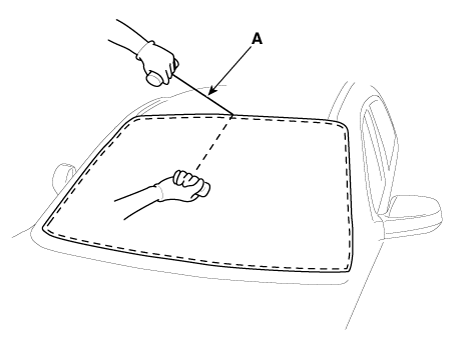
| 9. |
Put in a piano wire (A) through the corner of the windshield glass and
insert wire grips into both ends of the wire.
|
| 10. |
Cut off the sealant on (A-A), (B-B), (C-C), while pulling a piano wire
(A) to the left and right.
|
| 11. |
Remove the windshield glass (B) carefully using the glass holder (A).
|
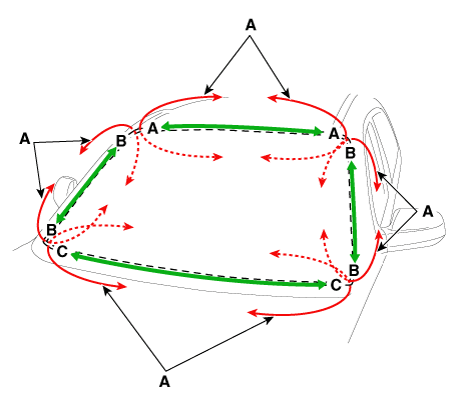
| 1. |
Using a knife, scrape the remaining sealant around the body panel leaving
about 2mm-thick sealant (0.0079 in.) on the bonding surface. If installing
a new windshield glass, make alignment marks on the windshield glass
and the body.
|
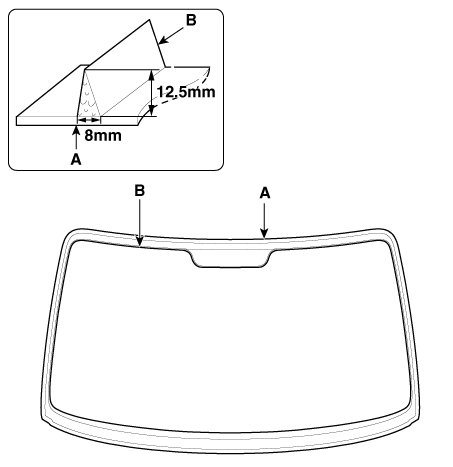
| 2. |
Clean the edges of body panel and windshield glass with alcohol. Apply
glass primer to the edges of windshield glass and attach the molding
onto the edges.
|
| 3. |
Apply the body primer to the bonding surface of body panel.
|
| 4. |
Apply the glass primer to the outer edge of windshield glass.
|
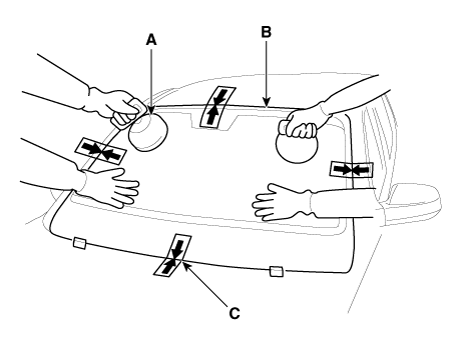
| 5. |
Apply a bead of sealant (B) around the windshield glass (A).
|
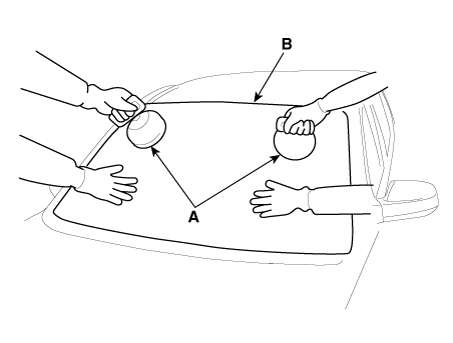
| 6. |
Using the glass holder (A), adjust the windshield glass (B) to fit the
alignment marks (C) on the body and lightly push the windshield glass
to make the edges fully seated on the bonding surface of body.
|
| 7. |
Install the windshield glass upper molding (A).
|
| 8. |
Install the windshield glass side molding (A).
|
| 9. |
Install the cowl top cover.
(Refer to "Cowl Top Cover")
|
| 10. |
Install the roof side molding.
(Refer to Interior Trim - "Roof Side Molding")
|
| 11. |
Conduct a leak testing.
|
| 12. |
Install the inside rear view mirror assembly.
(Refer to Mirror - "Inside Rear View Mirror")
|
| 13. |
Install the front pillar trim.
(Refer to Interior Trim - "Front Pillar Trim")
|
 Trunk Trim
Components and components location Components [5 seat vehicle] 1. Luggage side trim [LH] 2. Luggage side trim [RH] 3. Rear transverse trim 4. Cargo screen 5. Luggage floor tray 6. Luggage board 7. Luggage ...
 Tail Gate Window Glass
Components and components location Components 1. Tailgate window glass Repair procedures Removal • Put on gloves to prevent hand injuries. • Use seat covers to avoid damaging ...
See also:
SRS Control Module (SRSCM). Repair procedures
Removal 1. Remove the ignition key from the vehicle. 2. Disconnect the battery negative cable and wait for at least three minutes before beginning work. 3. Remove the floor console. 4. Loosen the bolts ...
Specifications
Specifications Items Specifications Rated voltage DC 12V Operating temperature range -22 ~ +176°F (-30°C ~ +80°C) Rated load Dimmer & passing switch High : 0.2A (Relay load) Low : 0.2A (Relay load) ...
Description and Operation
Description Ignition timing is controlled by the electronic control ignition timing system. The standard reference ignition timing data for the engine operating conditions are pre-pro grammed in the memory ...