Components and components location
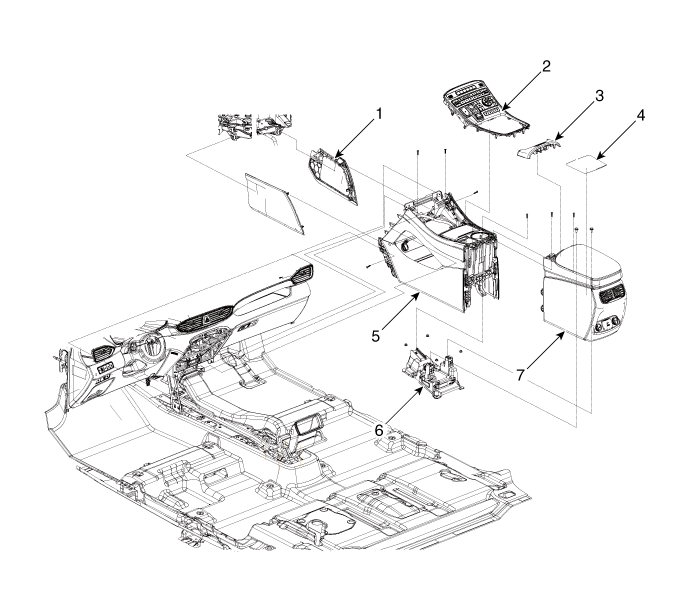
1. Floor console
side cover
2. Floor console upper cover
3. Console armrest lock assembly
4. Storage box mat
|
5. Front floor
console assembly
6. Rear console mounting bracket assembly
7. Rear floor console assembly
|
Floor Console Assembly. Components and components location
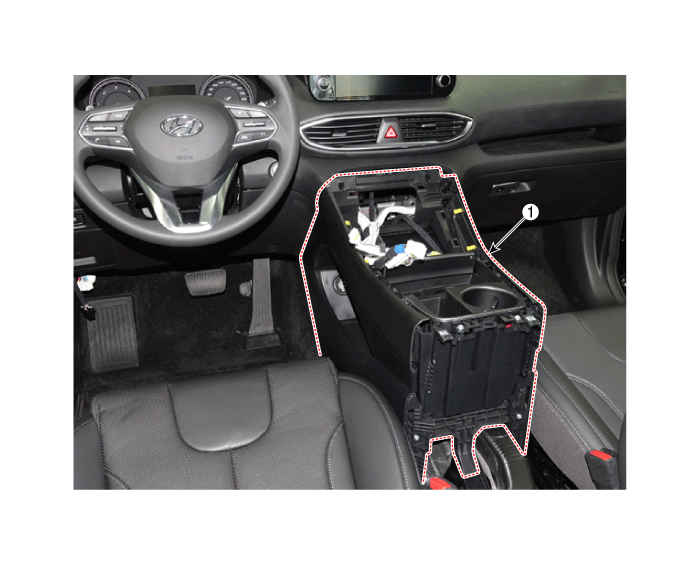
1. Front Console
Assembly
|
|
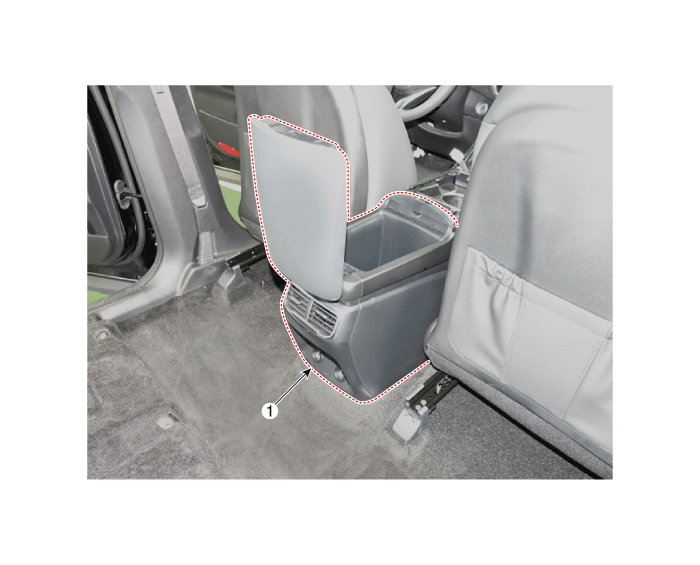
1. Rear Floor
Console Assembly
|
|
Floor Console Assembly. Repair procedures
[Rear Floor Console Assembly]
| •
|
When removing with a flat-tip screwdriver or remover, wrap protective
tape around the tools to prevent damage to components.
|
| •
|
Put on gloves to prevent hand injuries.
|
|
| •
|
Take care not to bend or scratch the trim and panels.
|
|
|
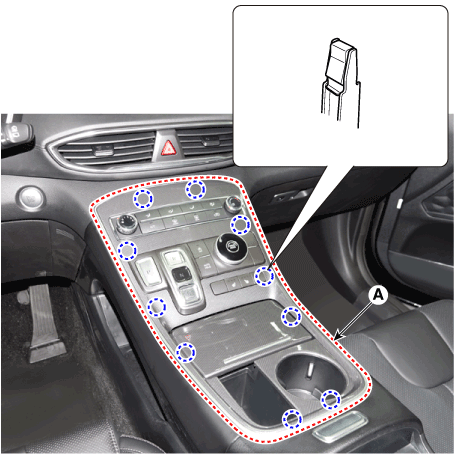
1. |
Remove the console upper cover (A).
|
|
2. |
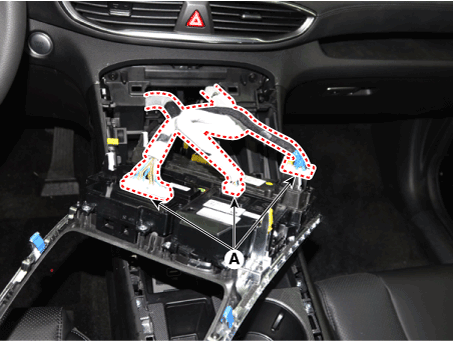
Press the lock pin, separate the connectors (A).
|
|
3. |
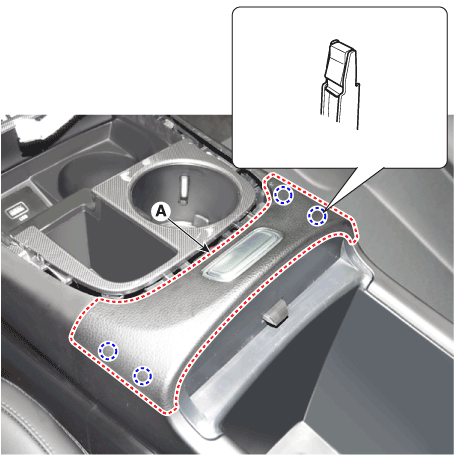
Remove the console armrest lock assembly (A).
|
|
4. |
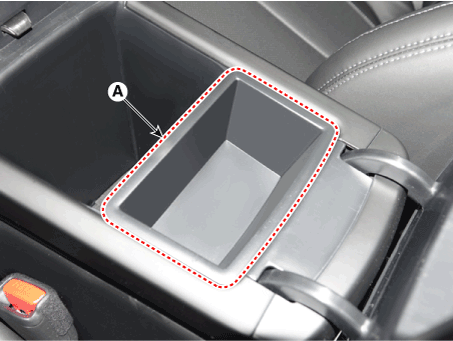
Remove the console armrest tray (A).
|
|
5. |
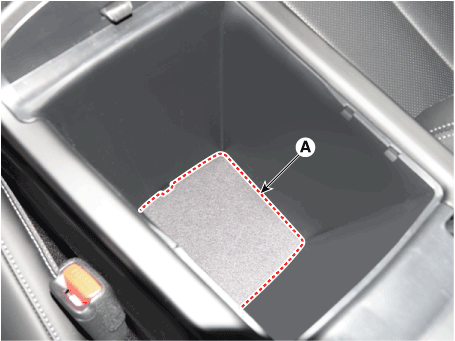
Remove the storage box mat (A).
|
|
6. |
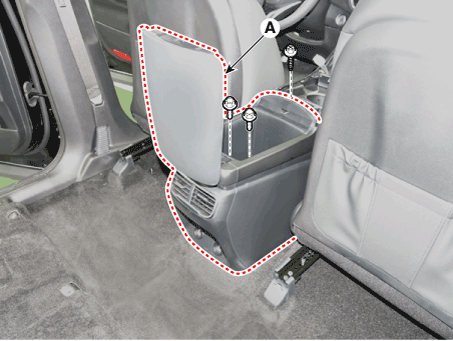
Loosen the mounting bolts and screw, remove the rear floor console assembly
(A).
|
|
7. |
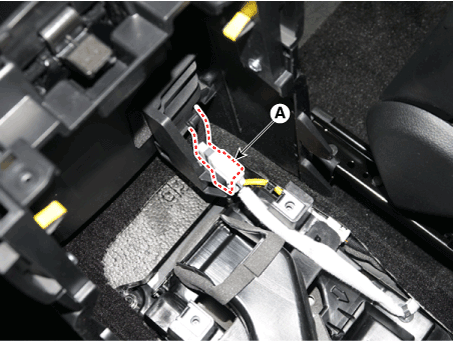
Press the lock pin, separate the connector (A).
|
|
8. |
To install, reverse removal procedure.
|
• |
Make sure the connector is connected properly.
|
|
• |
Replace any damaged clips (or pin-type retainers).
|
|
|
[Front Floor Console Assembly]
| •
|
When removing with a flat-tip screwdriver or remover, wrap protective
tape around the tools to prevent damage to components.
|
| •
|
Put on gloves to prevent hand injuries.
|
|
| •
|
Take care not to bend or scratch the trim and panels.
|
|
|
1. |
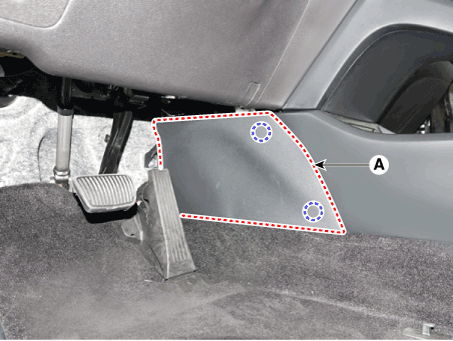
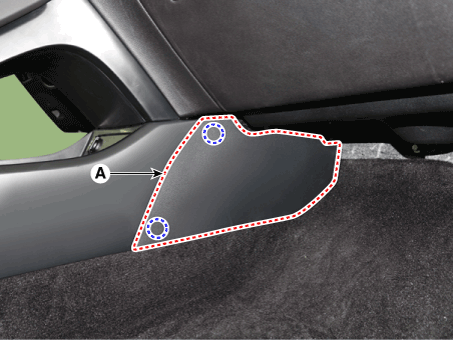
Remove the console side cover (A).
[LH]
[RH]
|
|
2. |
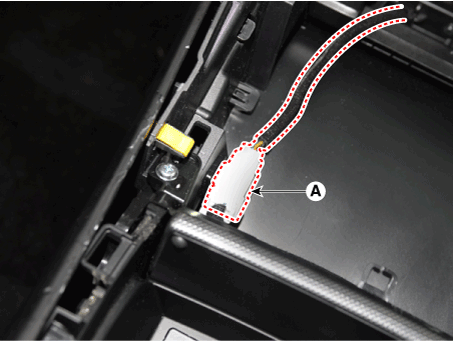
Press the lock pin, separate the connector (A).
|
|
3. |
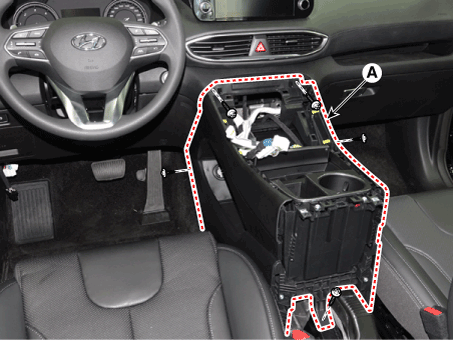
Loosen the mounting screws, remove the front floor console assembly
(A).
|
|
4. |
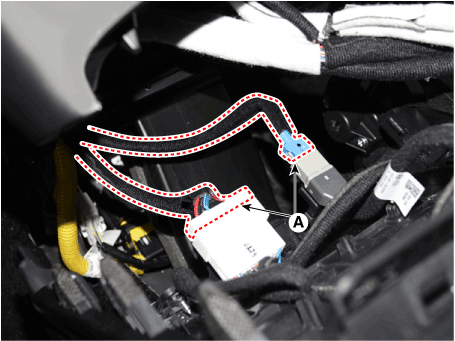
Press the lock pin, separate the connectors (A).
|
|
5. |
To install, reverse removal procedure.
|
• |
Make sure the connector is connected properly.
|
|
• |
Replace any damaged clips (or pin-type retainers).
|
|
|
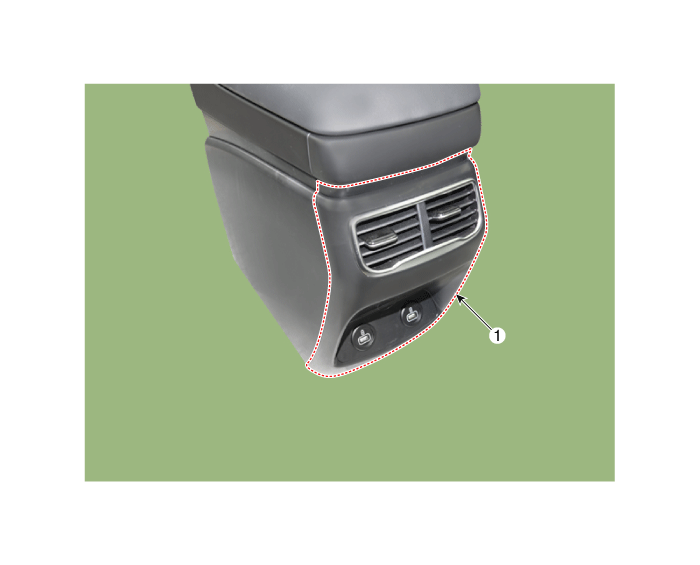
Rear Console Cover. Components and components location
Rear Console Cover. Repair procedures
| •
|
Put on gloves to prevent hand injuries.
|
|
| •
|
When removing with a flat-tip screwdriver or remover, wrap protective
tape around the tools to prevent damage to components.
|
| •
|
Use a plastic panel removal tool to remove interior trim pieces
without marring the surface.
|
| •
|
Take care not to bend or scratch the trim and panels.
|
|
|
1. |
Remove the rear console assembly.
(Refer to Floor Console - "Floor Console Assembly")
|
|
2. |
Remove the rear console upper cover (A).
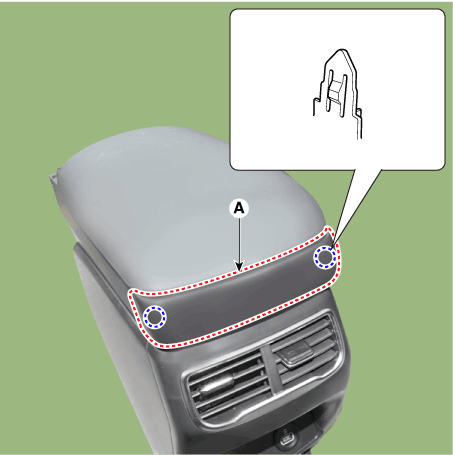
|
|
3. |
Press the lock pin, separate the connectors (A) and then loosen the
mounting screws (B).
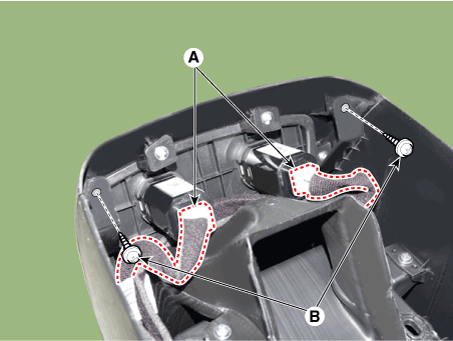
|
|
4. |
Loosen the mounting screws, remove the rear console cover (A).
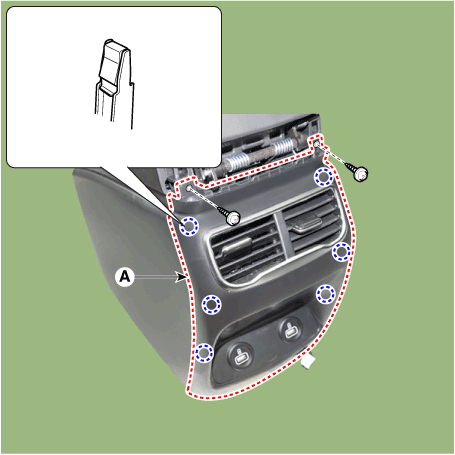
|
|
5. |
To install, reverse removal procedure.
|
• |
Make sure the connector is connected properly.
|
|
• |
Replace any damaged clips (or pin-type retainers).
|
|
|
Console Armrest. Components and components location
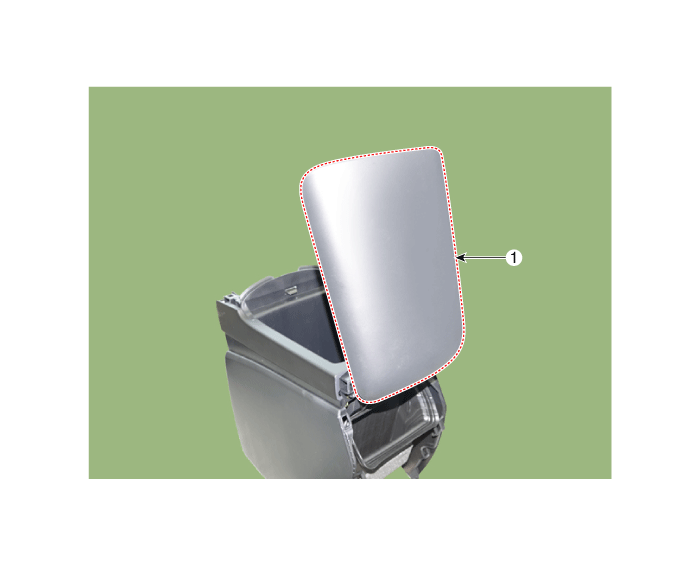
Console Armrest. Repair procedures
| •
|
Put on gloves to prevent hand injuries.
|
|
| •
|
When removing with a flat-tip screwdriver or remover, wrap protective
tape around the tools to prevent damage to components.
|
| •
|
Use a plastic panel removal tool to remove interior trim pieces
without marring the surface.
|
| •
|
Take care not to bend or scratch the trim and panels.
|
|
|
1. |
Remove the rear console assembly.
(Refer to Floor Console - "Floor Console Assembly")
|
|
2. |
Remove the rear console cover.
(Refer to Floor Console - "Rear Console Cover")
|
|
3. |
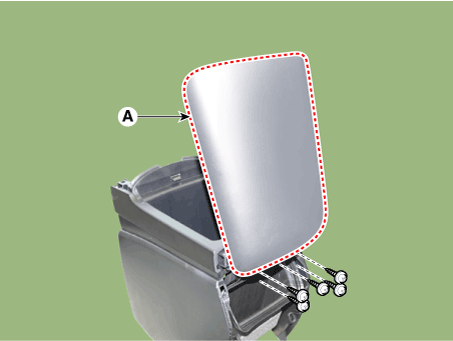
Loosen the mounting screws, remove the console armrest (A).
|
|
4. |
To install, reverse removal procedure.
|
• |
Replace any damaged clips (or pin-type retainers).
|
|
|
Components and components location Component Location 1. Cowl Top Cover Repair procedures Replacement 1. Remove the cap and the nuts, and then remove the wiper arm (A). Tightening torque : 22.6 - 26.5 ...
Components and components location Components (1) 1. Crash pad lower panel 2. Crash pad assembly 3. Crash pad side cover [LH] 4. Crash pad side cover [RH] Componets (2) 1. Crash pad under cover [RH] 2. ...
 Hyundai Santa Fe (TM): Floor Console


 Cowl Top Cover
 Crash Pad


