 Hyundai Santa Fe (TM): Power Door Mirrors
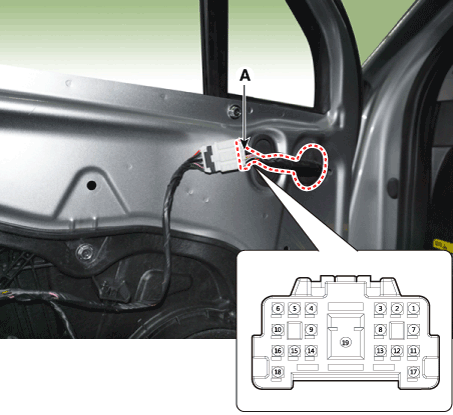
Components and components location
| Component Location |
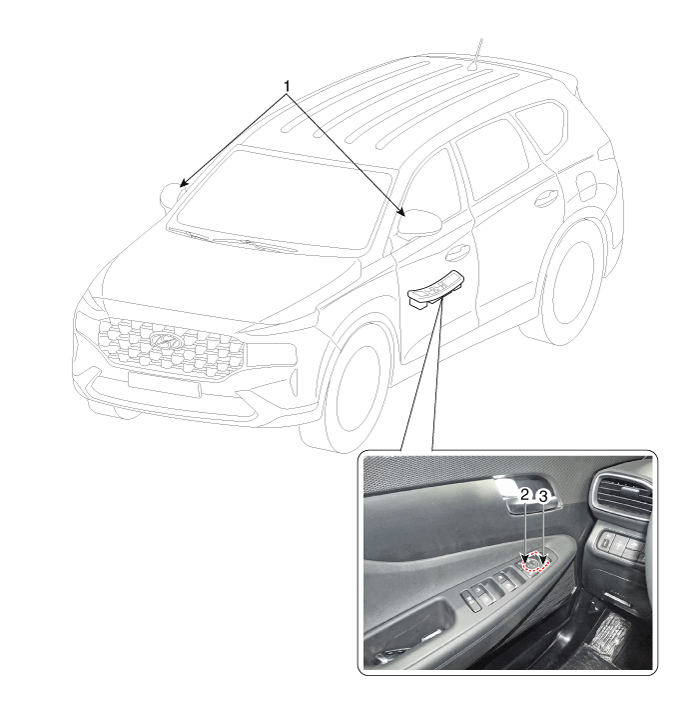
| 1. Power door
mirror 2. Power door mirror switch |
3. Power folding
mirror switch |
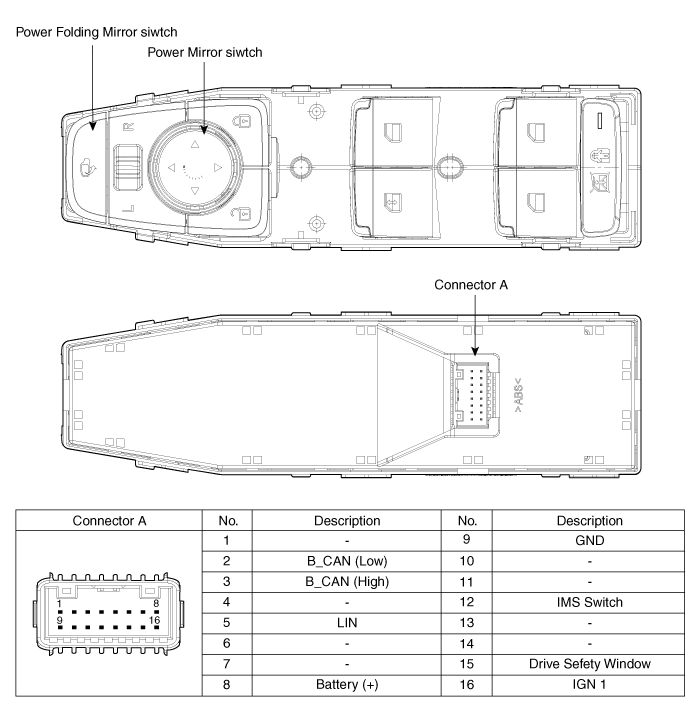
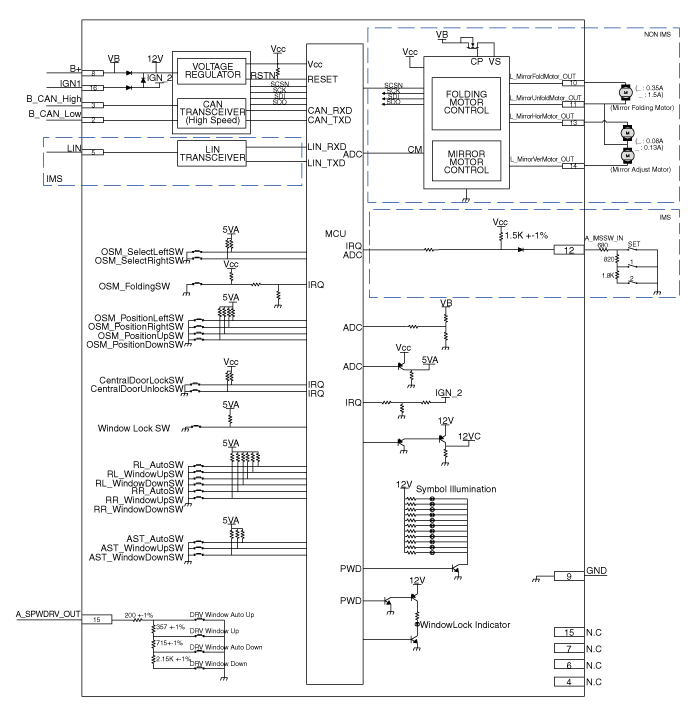
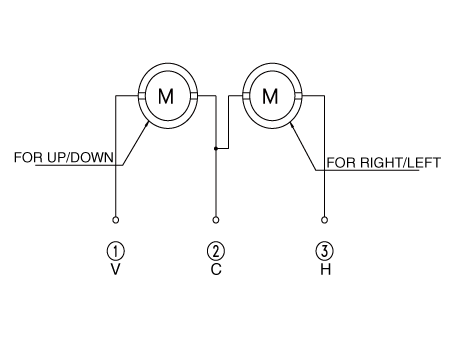
Power Door Mirror Switch. Schematic diagrams
| Circuit Diagram |
Power Door Mirror Switch. Repair procedures
| Removal |
| 1. |
Disconnect the negative (-) battery terminal.
|
| 2. |
Remove the front left door trim.
(Refer to Body - "Front Door Trim")
|
| 3. |
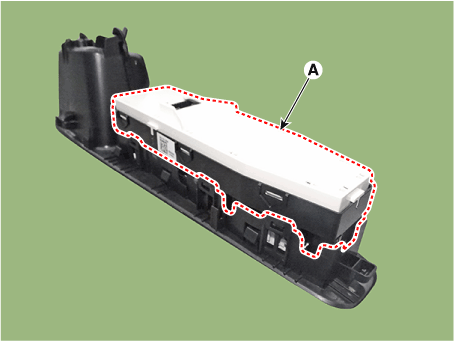
Remove the power window bezzel assembl (A) after loosening the mounting
screws.
|
| 4. |
Remove the power window switch assembly (A) after loosening the mounting
screws.
|
| Installation |
| 1. |
Install the power mirror switch.
|
| 2. |
Install the front door trim after connecting the connector.
|
| 3. |
Connect the negative (-) battery terminal.
|
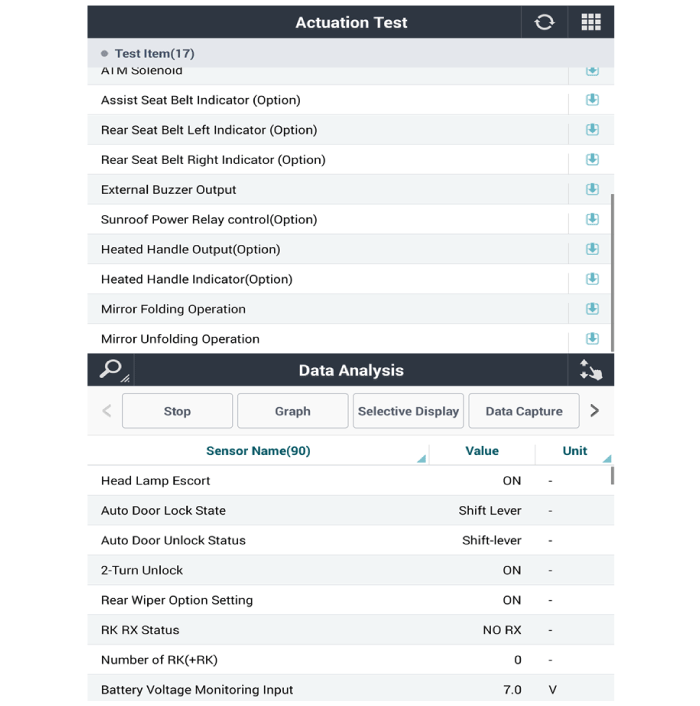
| Inspection |
| 1. |
In the body electrical system, failure can be quickly diagnosed by using
the vehicle diagnostic system (diagnostic tool).
The diagnostic system (diagnostic tool) provides the following information.
|
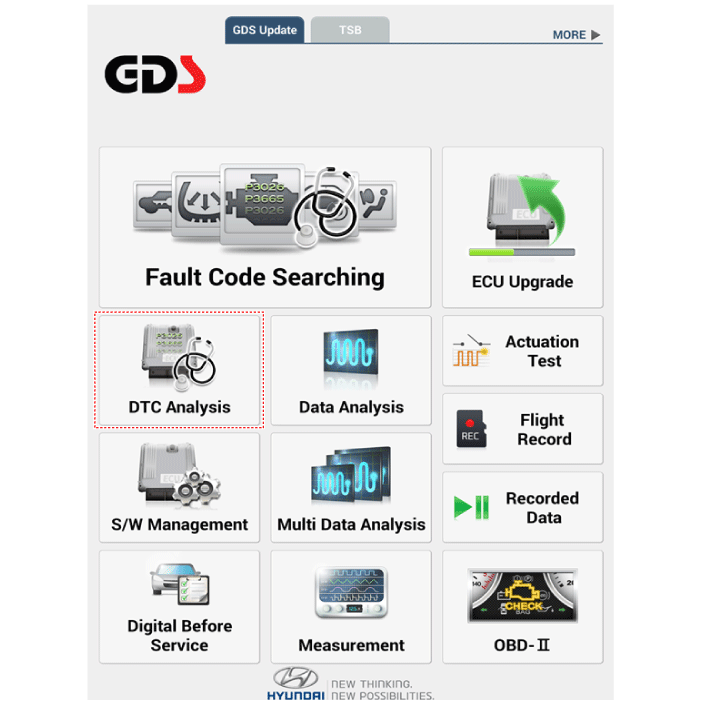
| 2. |
If diagnose the vehicle by diagnostic tool, select "DTC Analysis" and
"Vehicle".
|
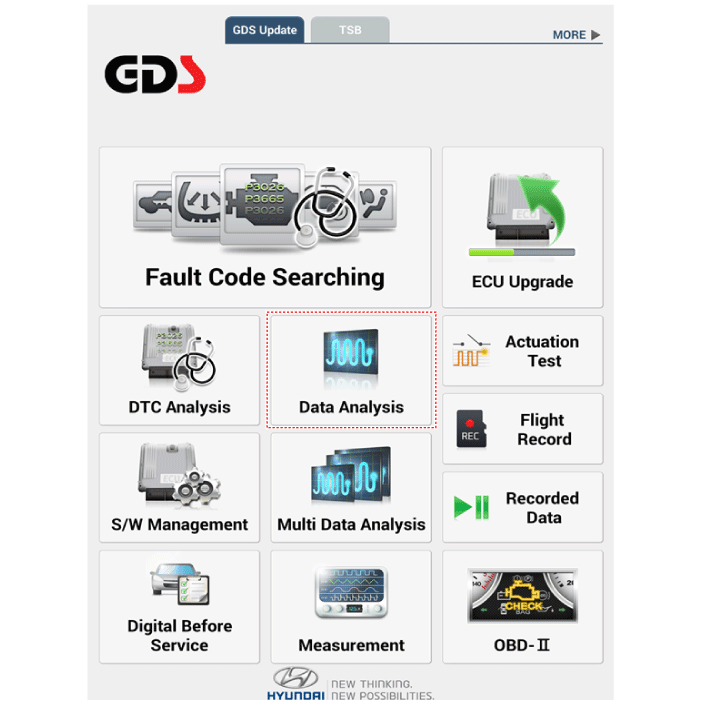
| 3. |
If check current status, select the "Data Analysis" and "Car model".
|
| 4. |
Select the 'IBU_BCM' to search the current state of the input/output
data.
|
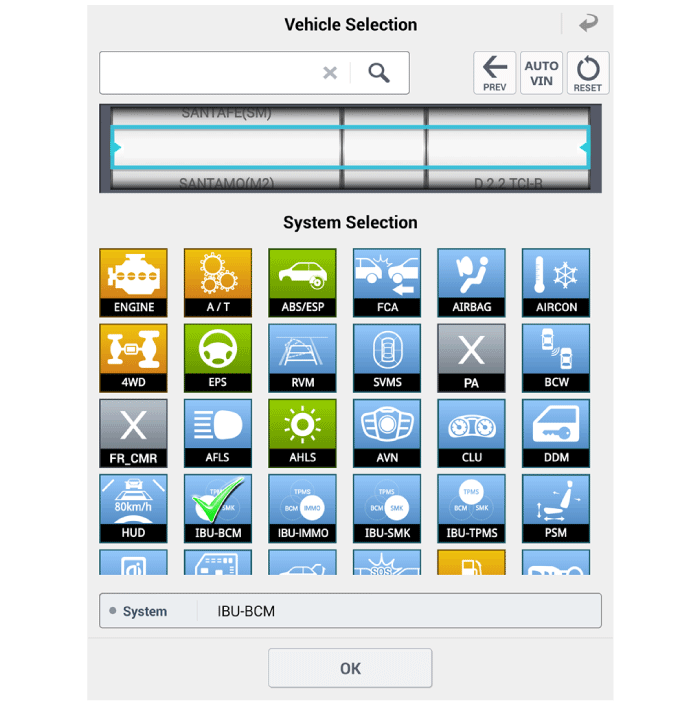
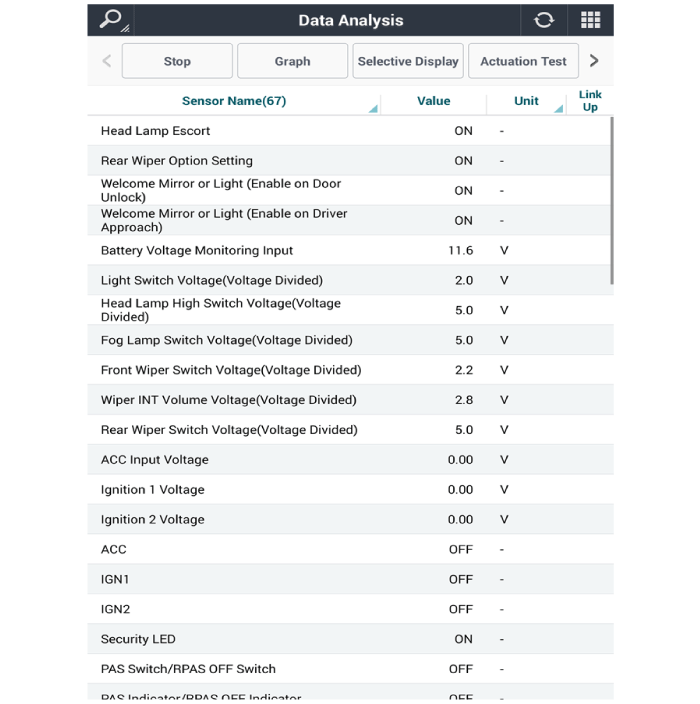
| 5. |
To forcibly actuate the input value of the module to be checked, select
option 'Actuation Test'.
|
Power Door Mirror Actuator. Repair procedures
| Removal |
| 1. |
Disconnect (-) battery terminal.
|
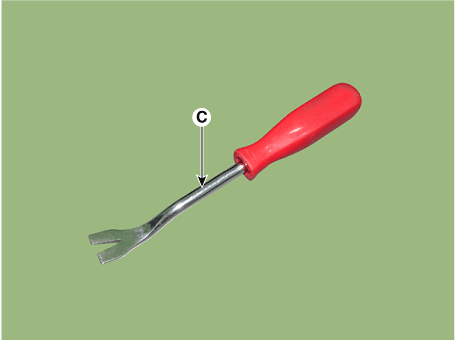
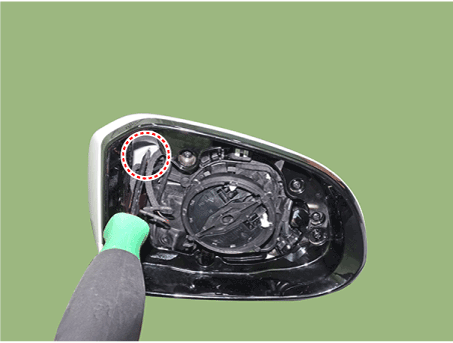
| 2. |
Using a fastener remover (C), remove the mirror (A) as illustration
below.
|
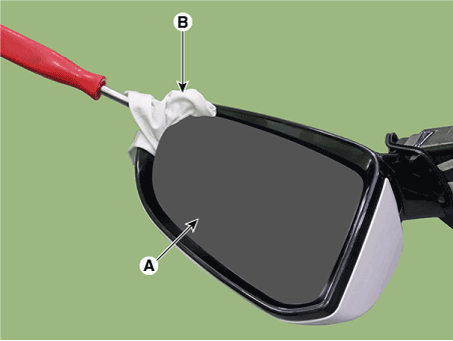

| 3. |
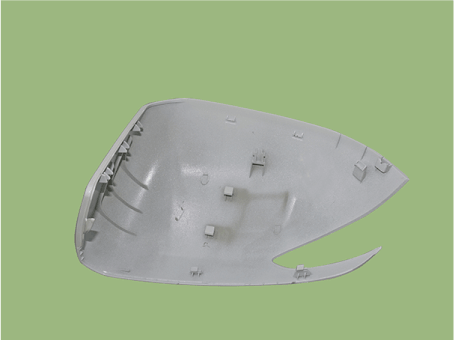
Disconnect heat wire connectors (A) and then remove the mirror.
|
| 4. |
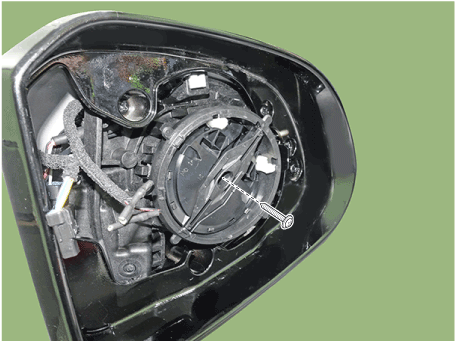
Remove the mirror actuator mounting screw.
|
| 5. |
Insert the fastener remover into the end of the mirror actuator (A)
and lift it up.
|
| 6. |
Disconnect the connector (A) and then remove the mirror actuator.
|
| Installation |
| 1. |
Connect the actuator connector and then install the mirror actuator.
|
| 2. |
Connect mirror heat wire connector and then install the mirror.
|
| 3. |
Connect (-) battery terminal then check if mirror works normally.
|
Power Door Mirror Assembly. Repair procedures
| Inspection |
| 1. |
Disconnect the negative (-) battery terminal.
|
| 2. |
Remove the door trim.
(Refer to Body - "Front Door Trim")
|
| 3. |
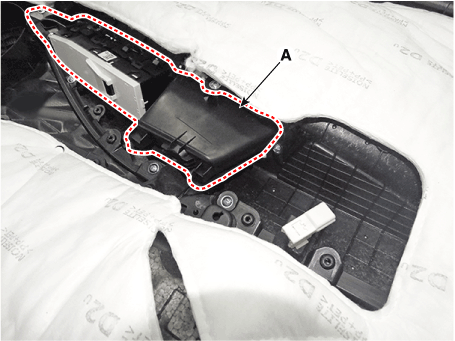
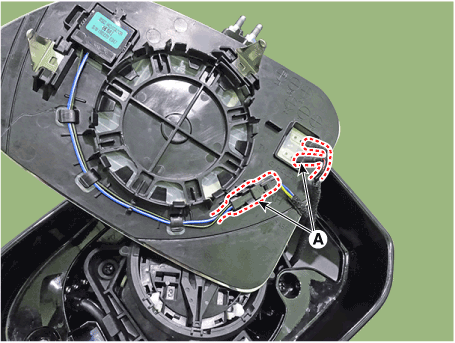
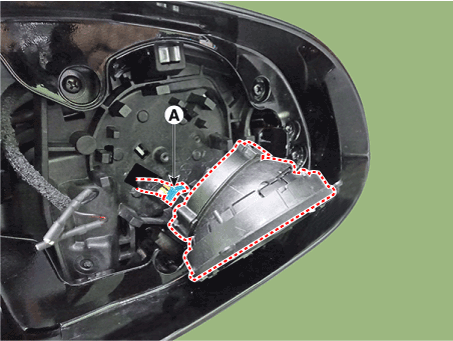
Disconnect the power door mirror connector (A) from the harness.
|
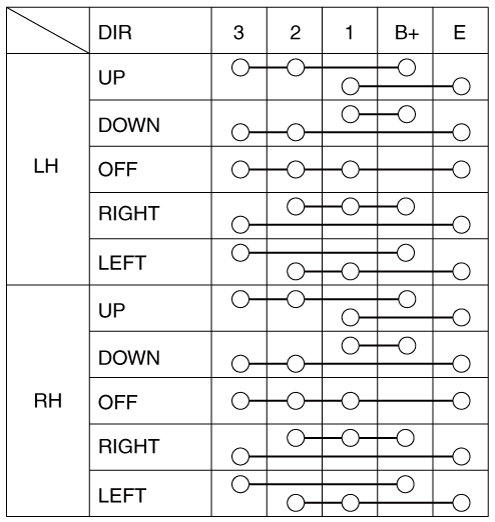
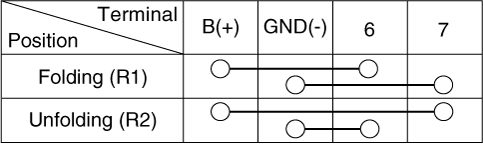
| 4. |
Apply battery voltage to each terminal as shown in the table and verify
that the mirror operates properly.
[Actuator]
BCW Indicator
Control Unit
Mirror Heater
Turn Signal Lamp
Puddle Lamp
Folding Mirror
|


| Removal |
| 1. |
Disconnect (-) battery terminal.
|
| 2. |
Remove front door trim.
(Refer to Body - "Front Door Trim")
|
| 3. |
Remove door mirror assembly.
(Refer to Body - "Outside View Mirror")
|
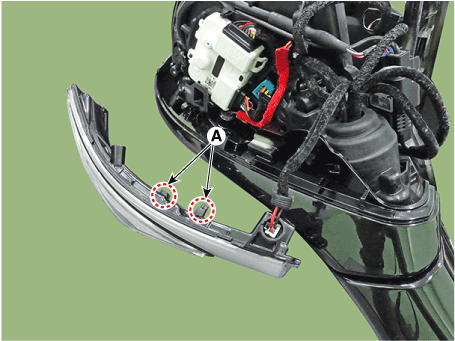
| 4. |
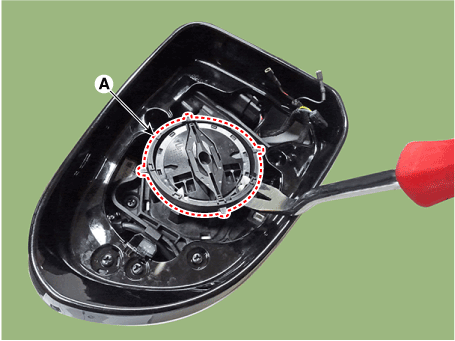
Using a fastener remover (C), remove the mirror (A) as illustration
below.
|
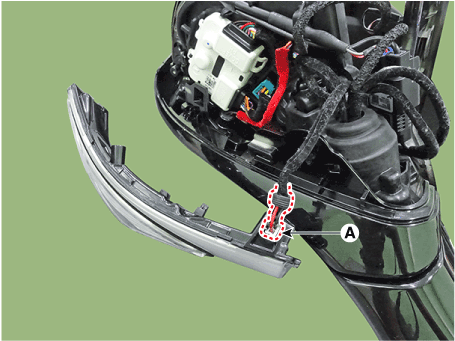
| 5. |
Disconnect heat wire connectors (A) and then remove the mirror.
|
| 6. |
Remove the scalp.
|

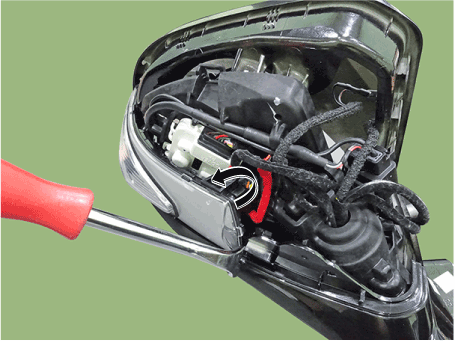
| 7. |
Remove front cover and LED side repeater lamp lock screw.
|
| 8. |
Using a fastener remover, remove the LED side repeater lamp as illustration
below.
|
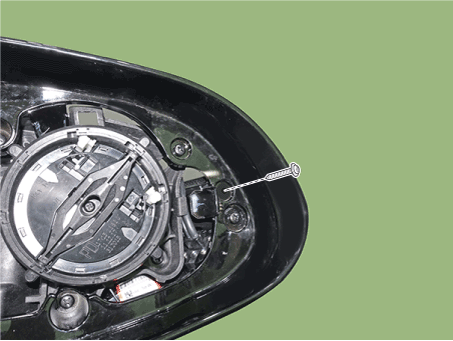
| 9. |
Disconnect the connector (A) and then remove the LED side repeater lamp.
|
| Installation |
| 1. |
Install the puddle lamp and LED side repeater lamp.
|
| 2. |
Install the scalp.
|
| 3. |
Connect mirror heat wire connector and BSD connector then mount mirror.
|
| 4. |
Install the door mirror assembly.
|
| 5. |
Connect (-) battery terminal then check if door mirror lamp works normally.
|
 Power Door Locks
Components and components location Component Location 1. Driver power window main switch 2. IBU (Integrated Body Control Unit) 3. Door lock switch 4. Tailgate lock actuator & switch 5. Front door lock ...
 Power Windows
Description and operation Function Of Safety Power Window When driver door power window auto-up switch is operated, safety function is activated. 1. Safety function condition When detect the force of 100N ...
See also:
Console Armrest. Repair procedures
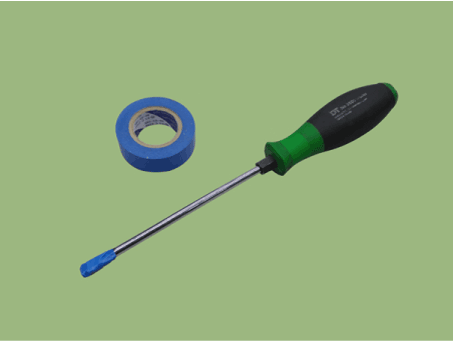
Replacement • Put on gloves to protect your hands. • When prying with a flat-tip screwdriver, wrap it with protective tape, and apply protective tape around the related parts, to prevent damage. • ...
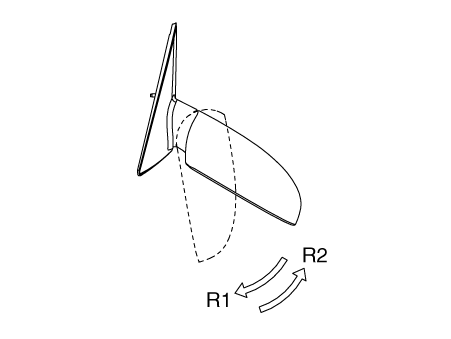
Mirror
Outside Rear View Mirror. Components and components location Component Location 1. Outside Rear View Mirror Outside Rear View Mirror. Repair procedures Replacement • Put on gloves to prevent ...
Good driving practices
Never move the shift lever from P (Park) or N (Neutral) to any other position with the accelerator pedal depressed. Never move the shift lever into "P" when the vehicle is in motion. Be sure ...