 Hyundai Santa Fe (TM): Propeller Shaft Assembly
Components and components location
| Components |

| 1. Front propeller
shaft 2. Center bearing bracket |
3. Rear propeller
shaft |
Repair procedures
| Removal |
|

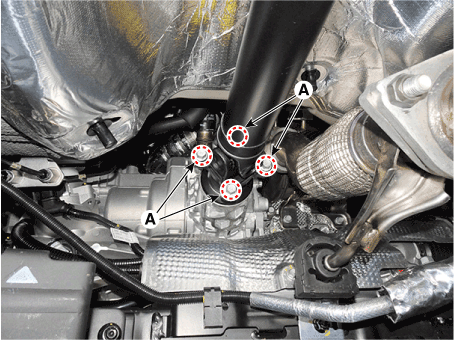
| 1. |
After making a match mark on the flange yoke and transaxle companion,
remove the propeller shaft mounting bolts (A).
|
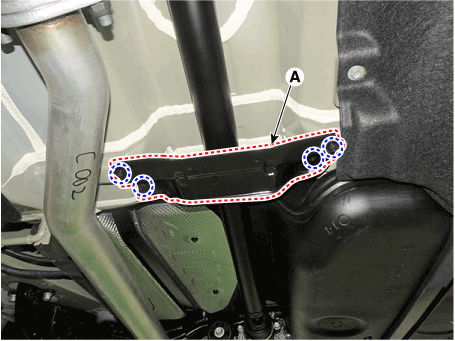
| 2. |
Remove the bracket (A) after loosening the mounting bolts.
|
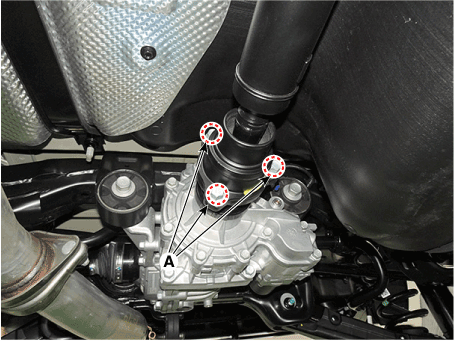
| 3. |
Loosen the center bearing bracket mounting bolts (A).
|
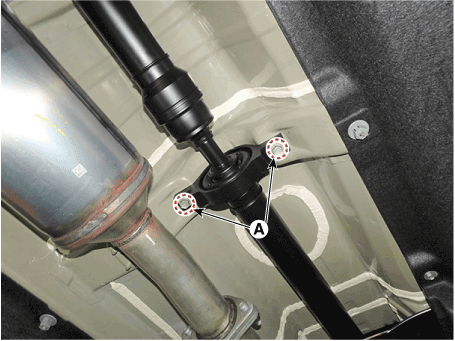
| 4. |
After making a match mark on the constant velocity joint and rear differential
companion, remove the propeller shaft mounting bolts (A).
|
| Installation |
| 1. |
To install, reverse the removal procedures.
|
 Rear Driveshaft Assembly
Components and components location Components 1. Rear drive shaft (left) 2. Rear drive shaft (right) Repair procedures Removal • Be careful not to damage the parts located under the vehicle ...
 Differential Carrier Assembly
Components and components location Components Location 1. Rear differential carrier assembly 2. Rear driveshaft assembly 3. Coupling Assembly 4. Propeller shaft assembly Components 1. Pinion lock nut 2. ...
See also:
Changing tires
1. Park on a level surface and apply the parking brake firmly. 2. Shift the shift lever into P (Park). 3. Activate the hazard warning flasher. 4. Remove the wheel lug nut wrench, jack, jack handle, and ...
Components and Components Location
Component Location 1. Fuel filler door open switch 2. Fuel filler door release actuator ...
ATF Warmer. Components and Components Location
Component Location 1. ATF Warmar 2. Bypass valve 3. ATF hose&pipe 4. Coolant hose&pipe Component 1. ATF Warmar 2. Bypass valve 3. ATF hose&pipe 4. Coolant hose&pipe ...
